If you no longer need the Assets within your Quick Group, you can clear it to ensure its empty prior to your next Customer meeting.
To add assets to a Quick Group, follow these steps:
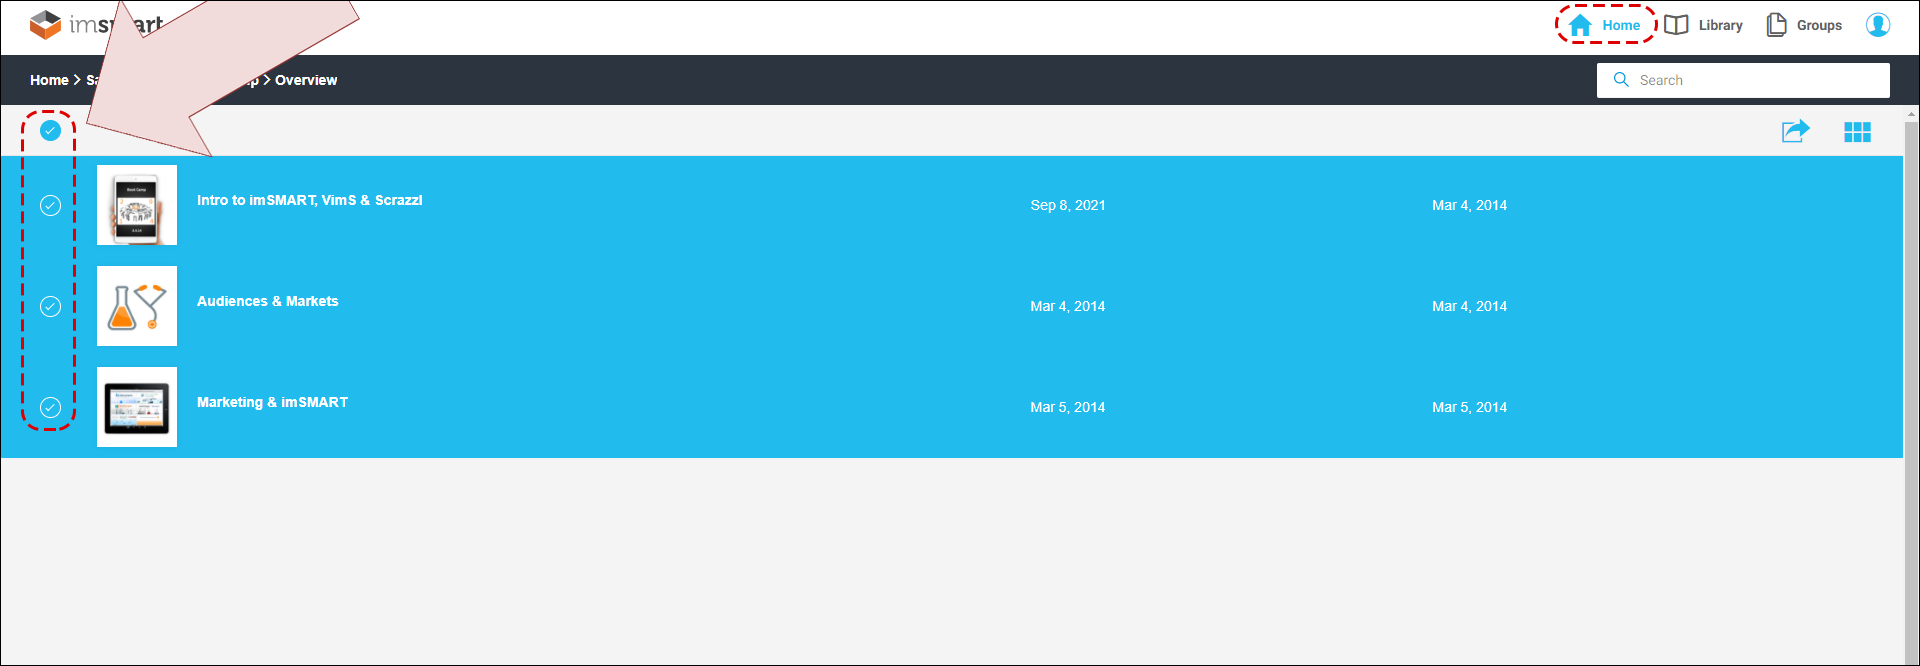
- Go to Home or Library.
- Use the checkbox on the left-side of the screen to select the Assets that you want to add to the Quick Group. (Or, you can click the Checkbox at top-left, to select all of the files at once, as shown below.)

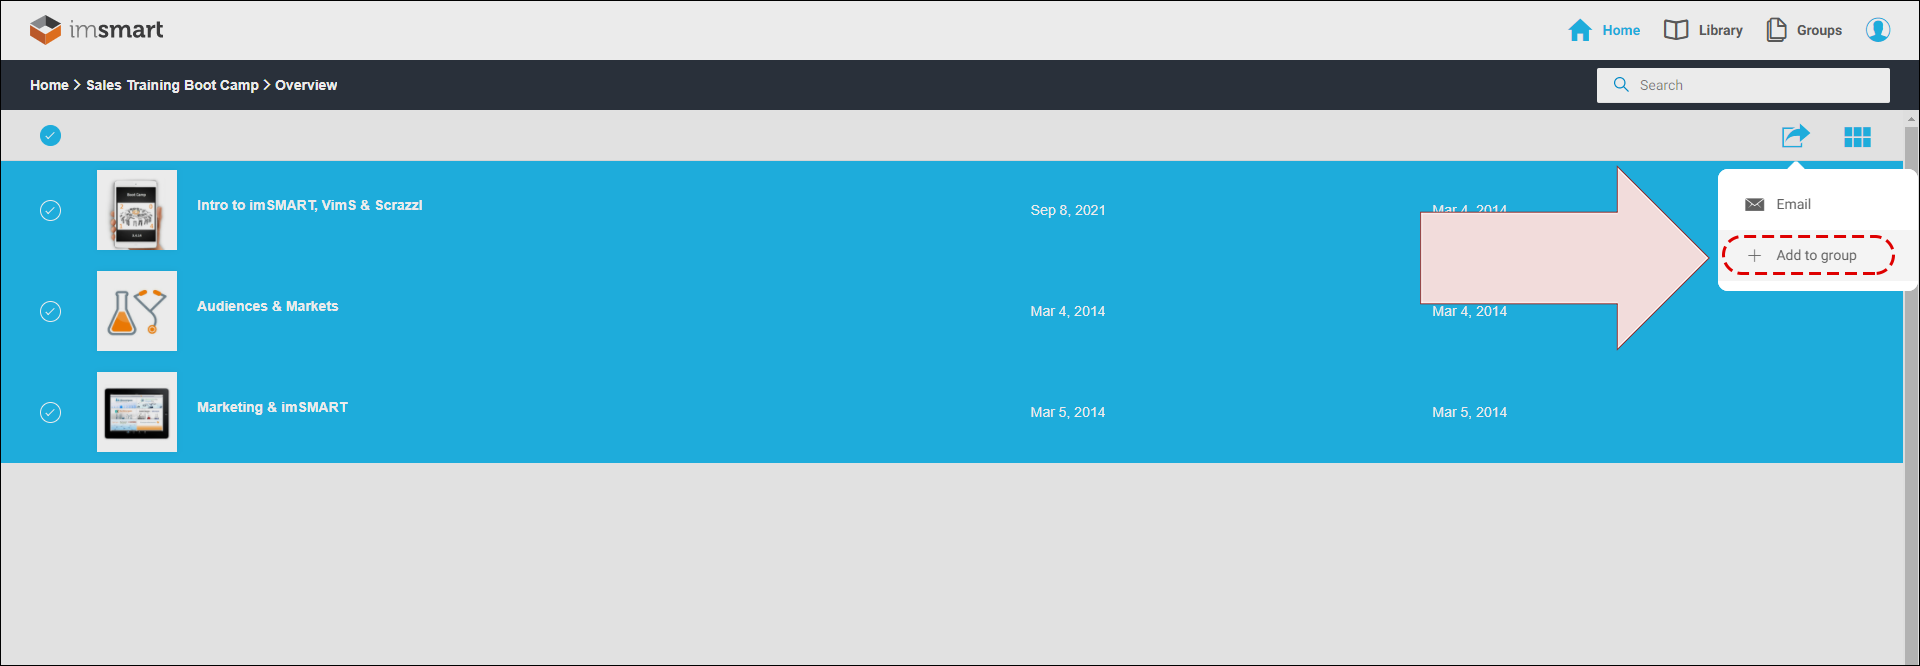
- Click the Share icon, at top-right.
- Click the + Add to Group button.

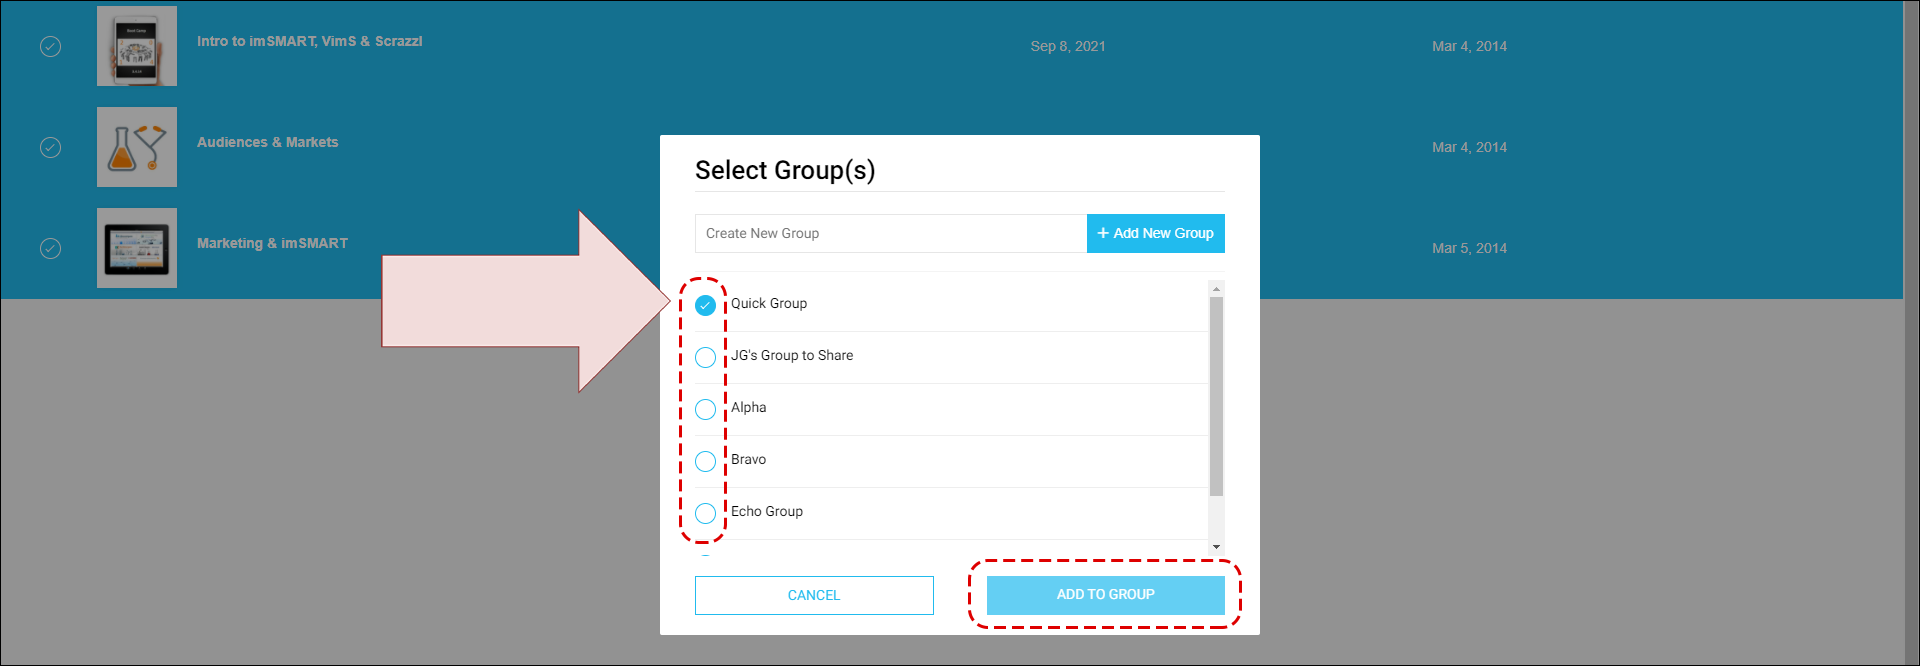
- A pop-up will appear, which enables you to select which groups you would like to add the Assets to.
-
- Use the checkboxes on the left to select Quick Group (as shown below).
- You can also create a new, custom Group, if desired.
-
- Click the Add to Group button, at the lower-right side of the pop-up (also shown below).

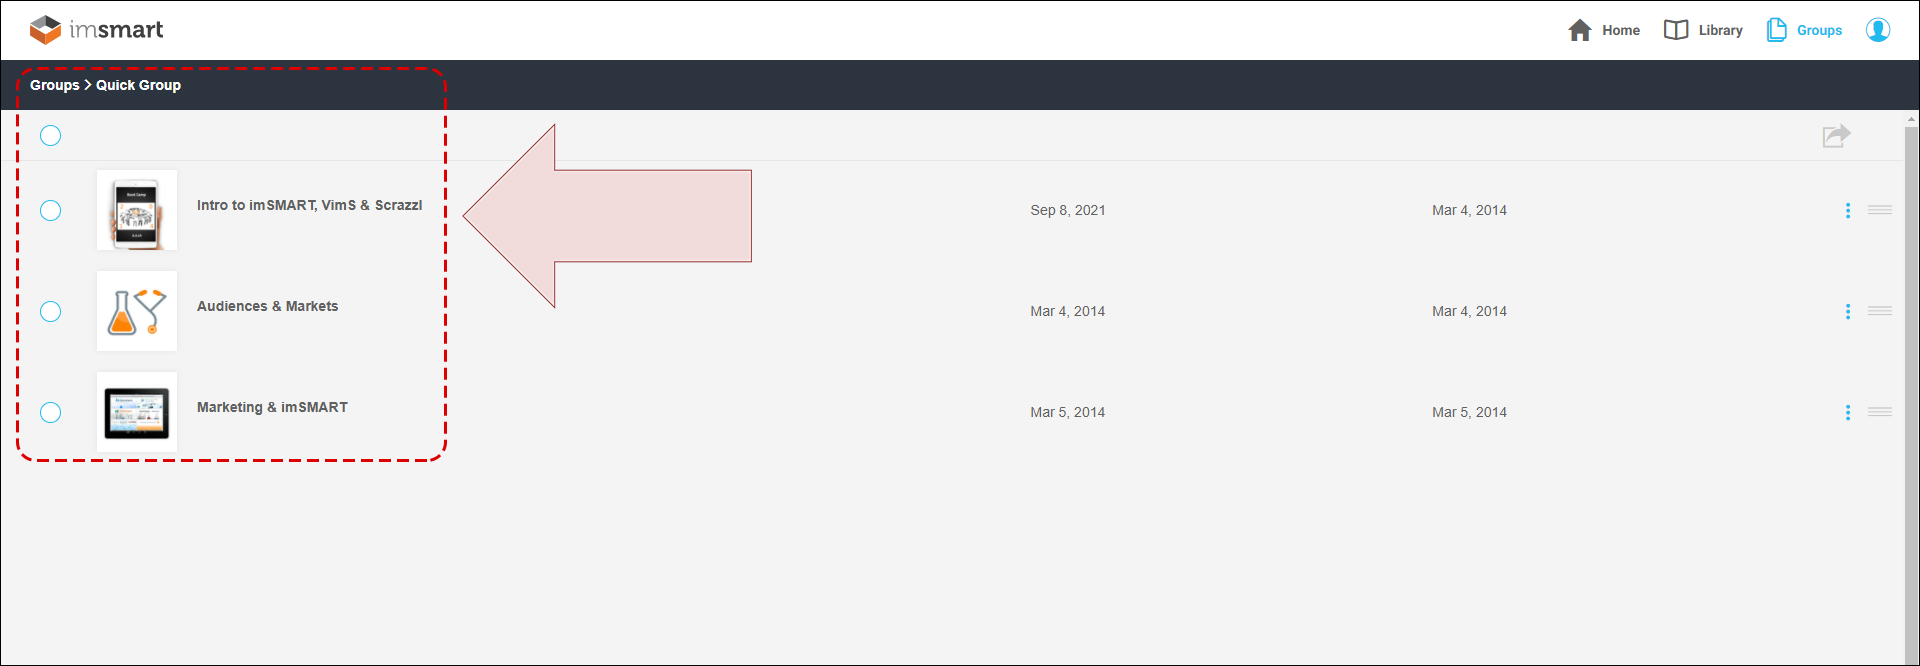
When you go to Groups > Quick Group, you will see the Assets appear in the Quick Group.


Comments
0 comments