The Shared Group feature enables you to share the contents within your Group internally (with people inside your company) or externally (with Prospects, Leads, Opportunities, or Customers).
You can create a new Shared Group in two ways:
- Share an existing Group that you previously created, that already has Assets in it
- Create a new Group, add Assets to it, then share it
 |
Note The Shared Group tool is a premium feature the imSMART platform that may not be visible in your application. To learn more, talk with your Application Administrator. By default, when you "share" a group, it will be shared with all of the Users in the same Region as you are. Alternatively, the imSMART system enables you to select specific people that you can share groups with, but some customers prefer to disable this option. |

Share an Existing Group
If you want to share an existing Group (that you previously created), follow these steps:
- Go to Groups. (By default, you will see the My Groups tab.)
- Click on the Group Name that you want to share.
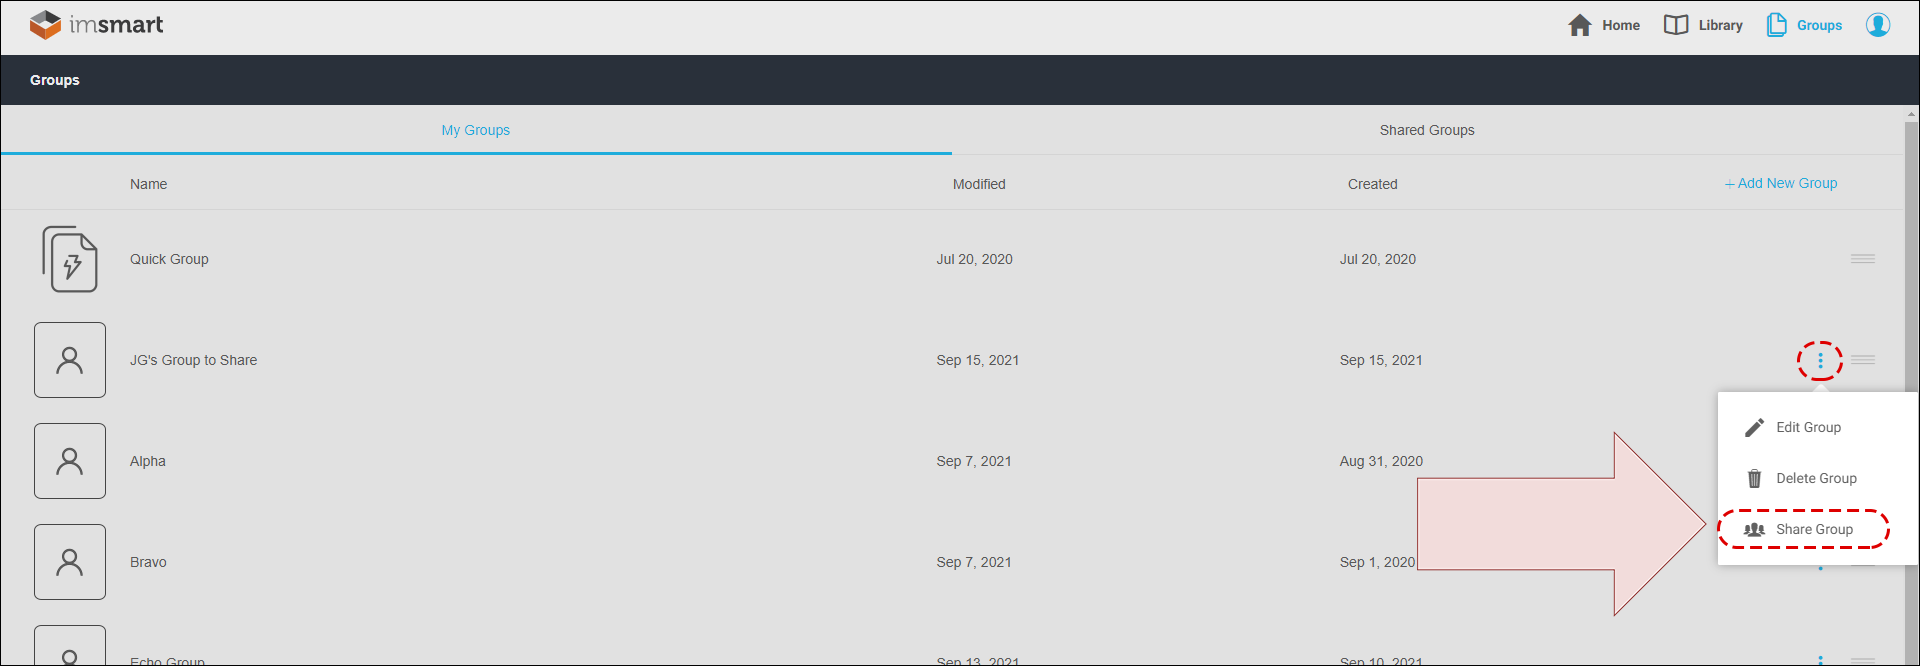
- Click on the Ellipsis icon (the three dots at the far-right of the screen).
- Click on the Share Group option.

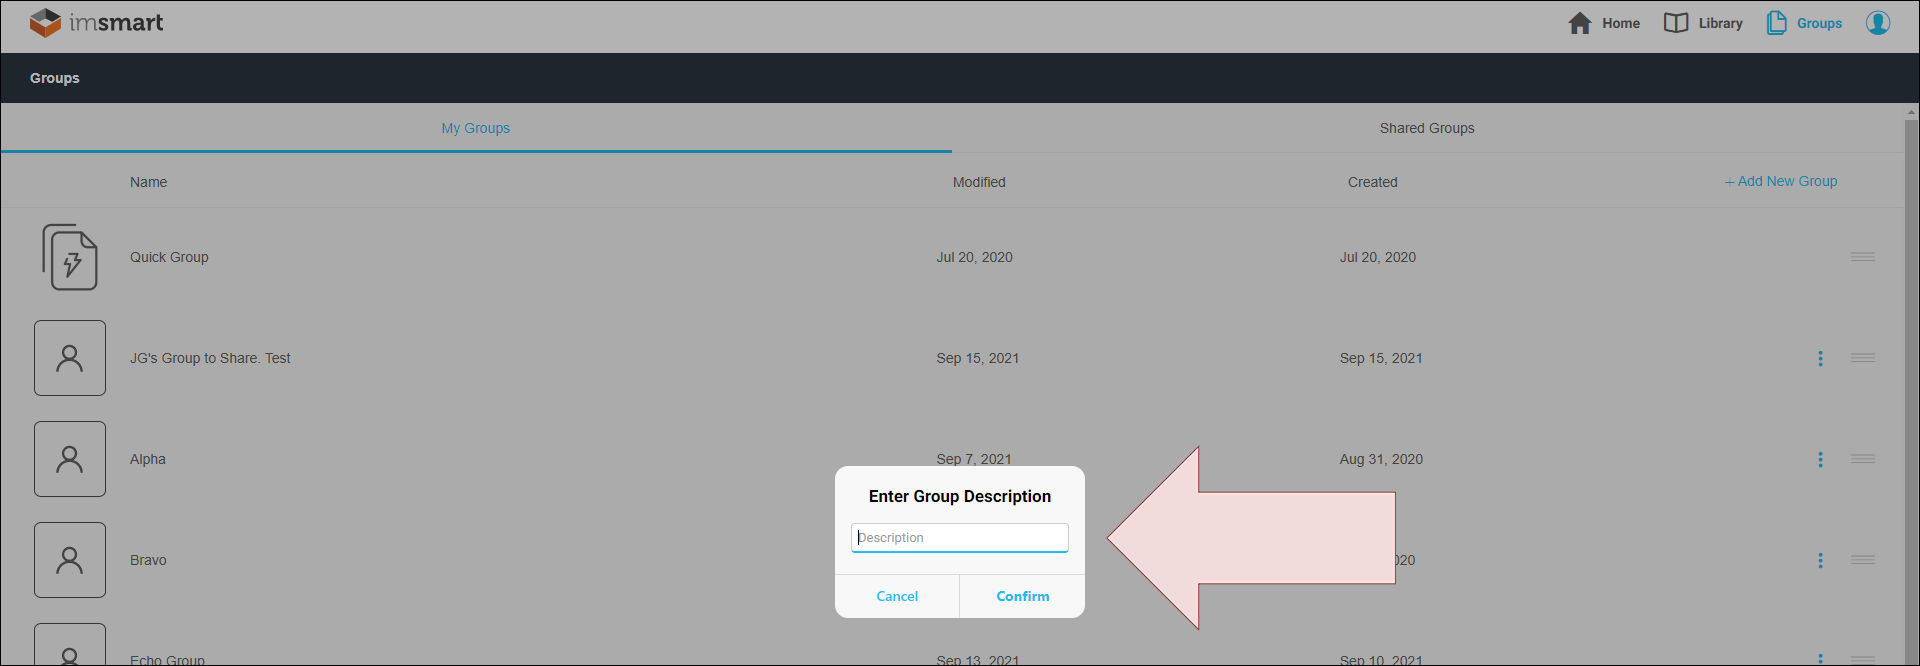
- A pop-up will appear. Enter a description for your Group. (as shown below)
- Click the Confirm button.

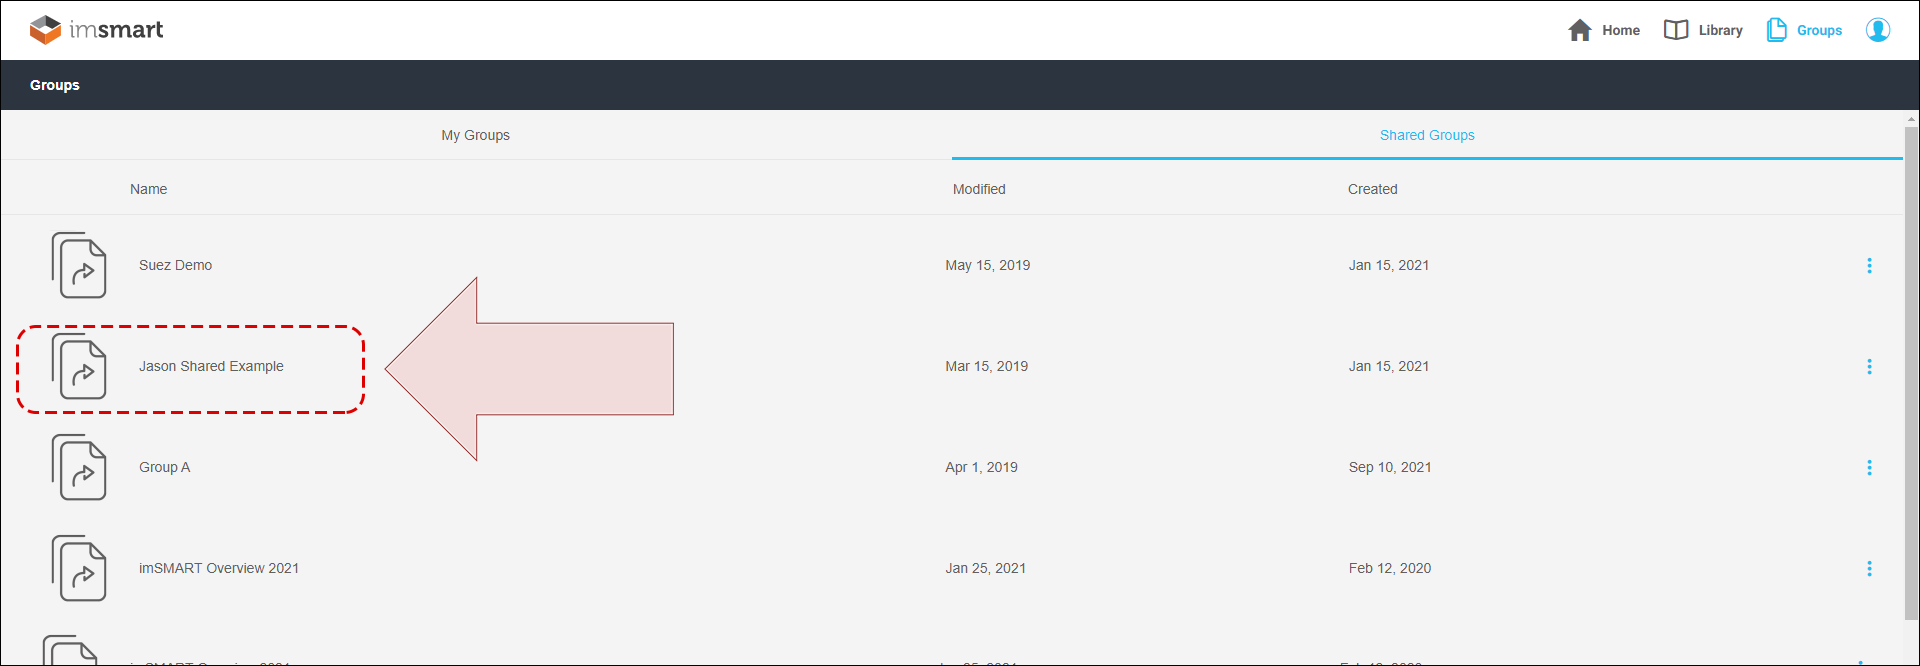
You will now see the group name appear in the list on the Shared Groups tab.
- The Shared Group will also be visible in the Groups tab, but will have a "shared group" icon rather than the original icon.


Create a New Shared Group
To add a completely new Shared Group, follow these steps:
- Go to Groups. (By default, you will see the My Groups tab.)
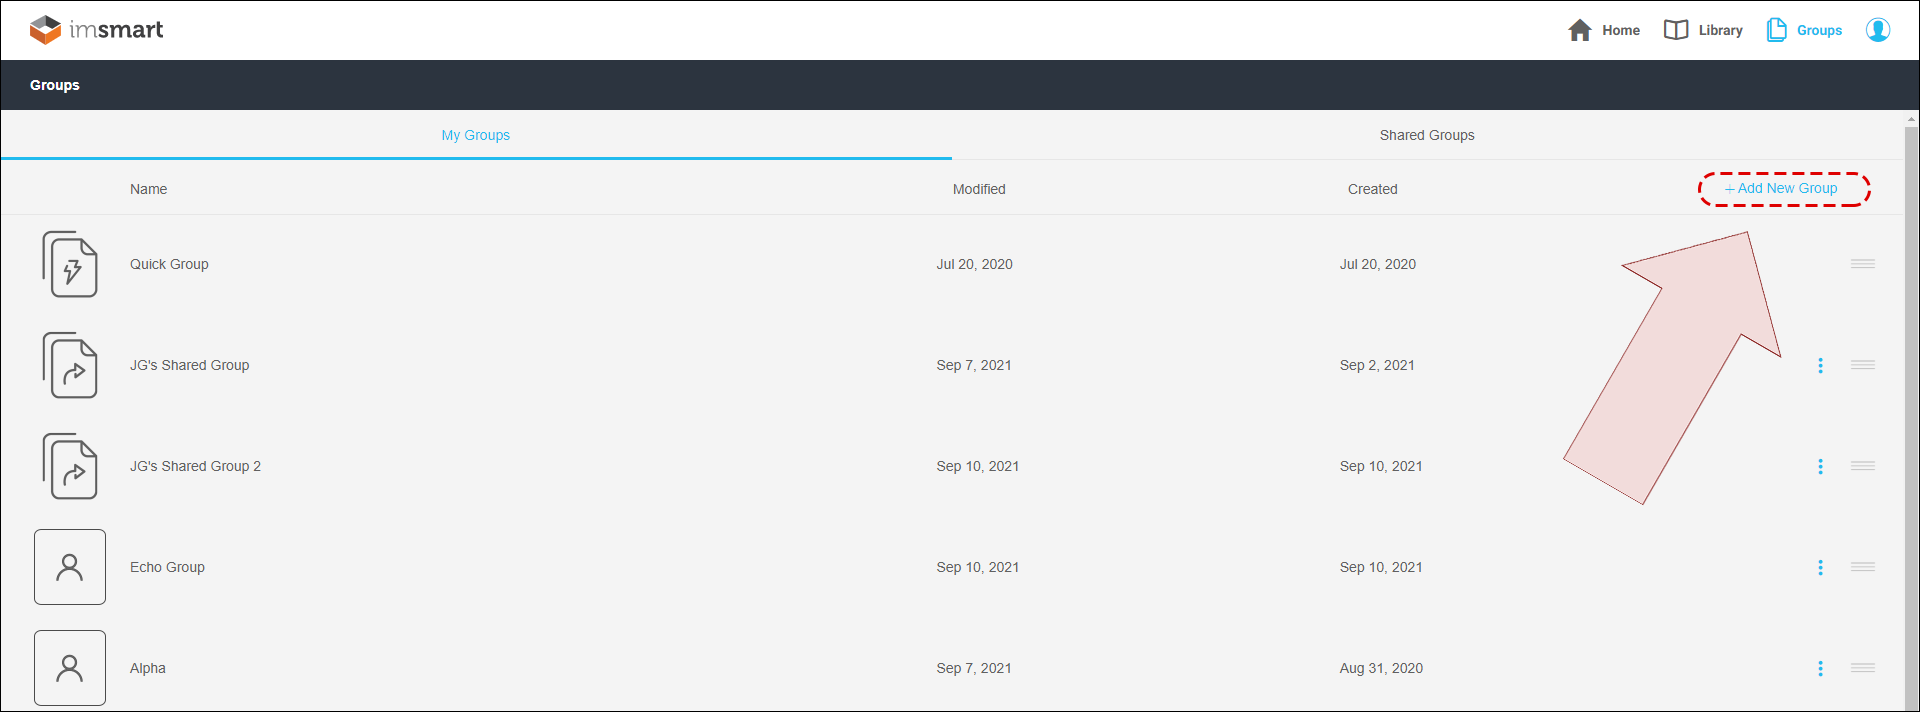
- Click on the + Add New Group button.

- A pop-up will appear; Enter your group name.
- Click Create.
Now that your new group is created, go to the Home or Library screens and Assets to it. You can now return to your Group and share it by following the steps outlined above.

Related Topics
Comments
0 comments