Step 1: Select File to convert

Step 2: Select iSpring Suite

Step 3: Click on Publish

Step 4: Make note of the following:
- Presentation Title: Desired File Name Output
- Local Folder: Where the file will be stored
- Mobile (HTML5)
- Zip Output

Step 5: Click on Customize to make changes to the player layout
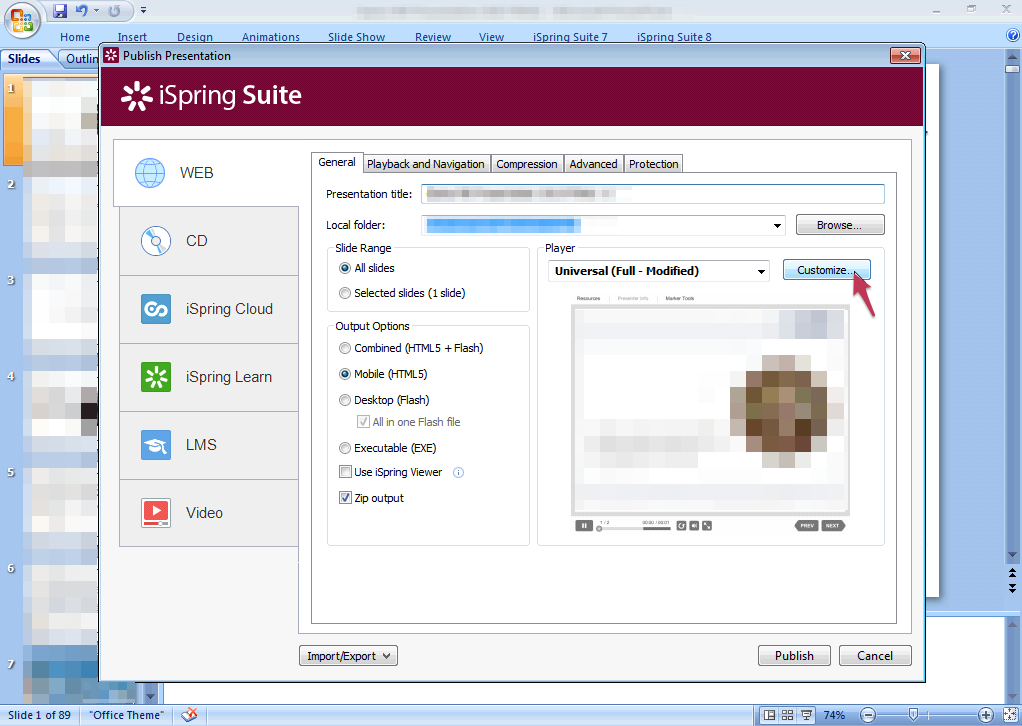
Step 6: Section in the Player Panels under Layout Tab allows for users to edit what's shown during the presentation.

Step 7: Make note of the following boxes checked off under Playback and Navigation:
- Start presentation automatically
- Enable Zooming with gestures
- Advance with gestures or mouse click
- Enable keyboard navigation

Step 8: Make note of the following under Compression Tab:
- Under Preset: Publish for Web
- Under Image Compression: Smart (PNG + JPEG) is selected
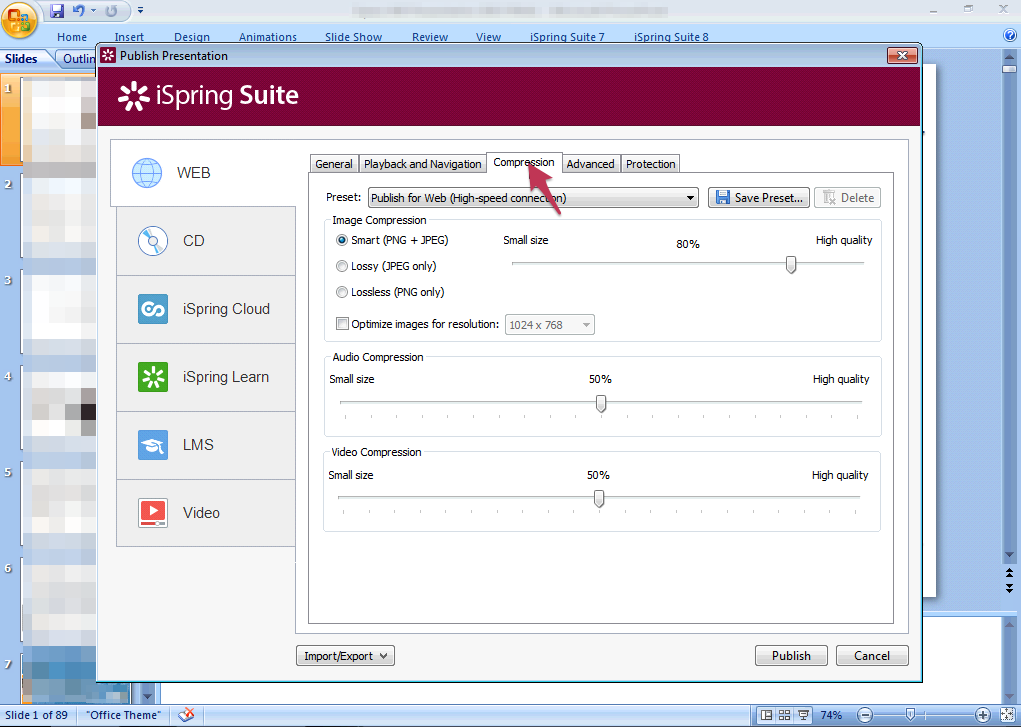
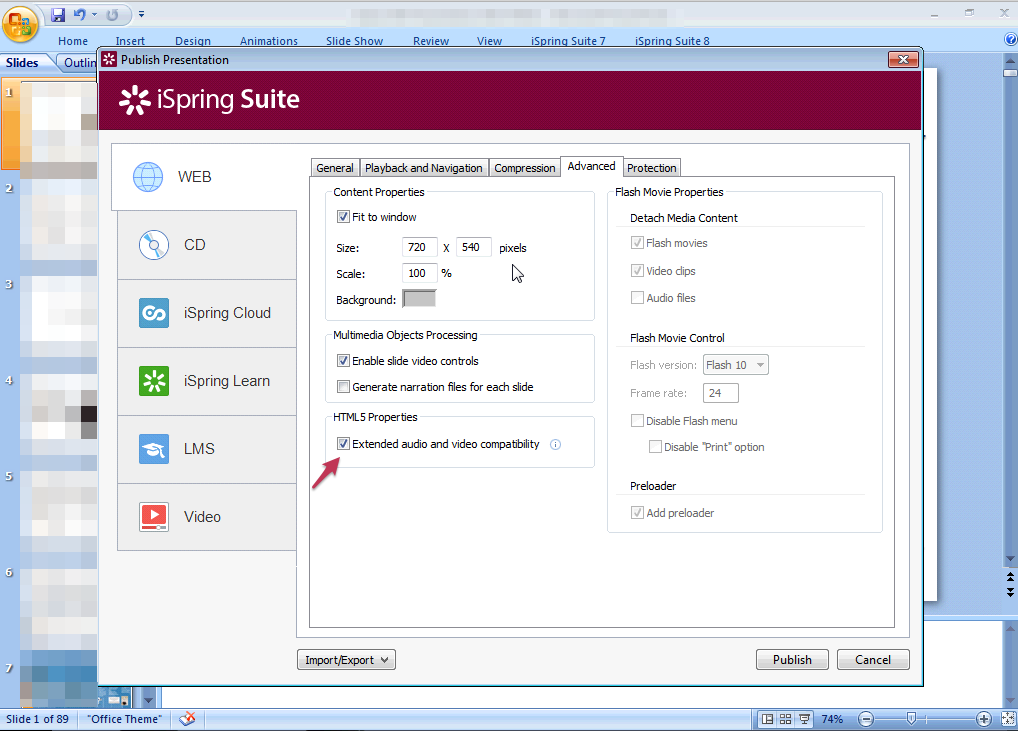
Step 9: Under Advanced Tab:
- Ensure Extended audio and video compatibility is selected
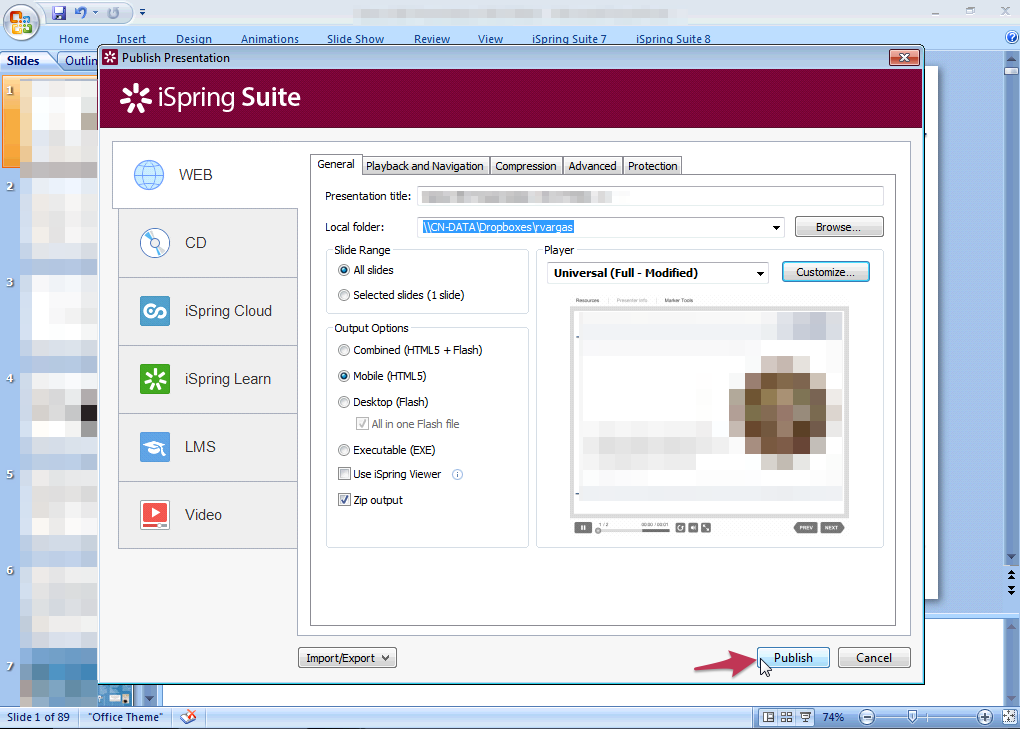
Step 10: Click on Publish
Step 11: Progress Pop-up

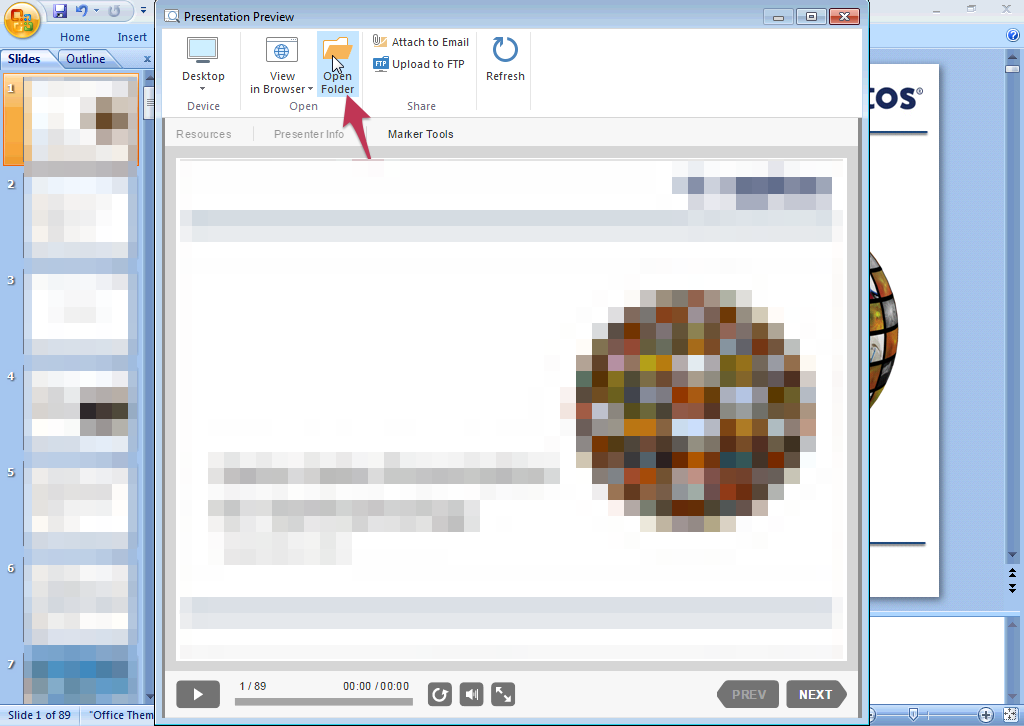
Step 12: Once converted, Presentation Preview will open, make note of the Open Folder icon. This allows easy access to the location of converted file.
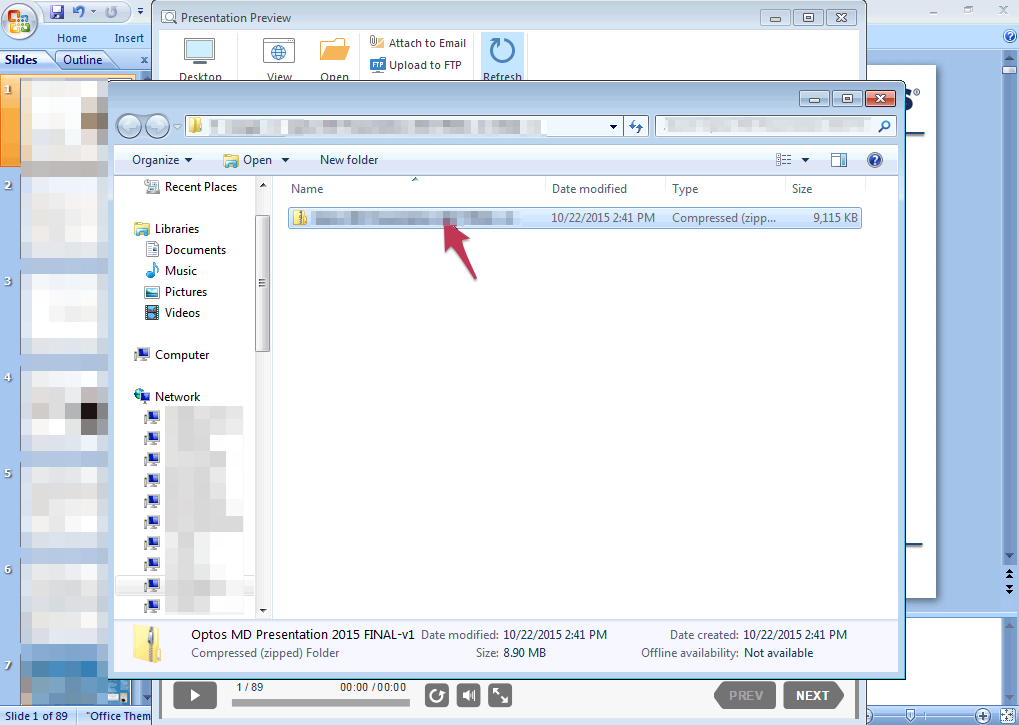
Step 13: Locate the Zip File and upload to CMS
Comments
0 comments