This process allows you to add new text and image fields that can be modified by your reps, without giving them full edit access on the document. Use this process to prepare new documents you add to ClearSlide. Reps can then create customized versions of this document via the process shown here.
Why allow customization in ClearSlide?
- Empower sales reps to personalize assets and keep your messaging intact.
- Create content with editable components so sellers can customize and add personal touches to specific sections to help them build deeper relationships with their customers.
- By eliminating the creation of rogue decks and documents, marketing messaging and content performance insights are protected.
Upload Content
To get started, upload the asset you wish to add editable elements to. For complete instructions on how to upload content in ClearSlide, click here.
Tip: Before you upload the content, ensure all the places where you wish to add editable elements are free of text and/or image boxes.
Enter the asset editing flow
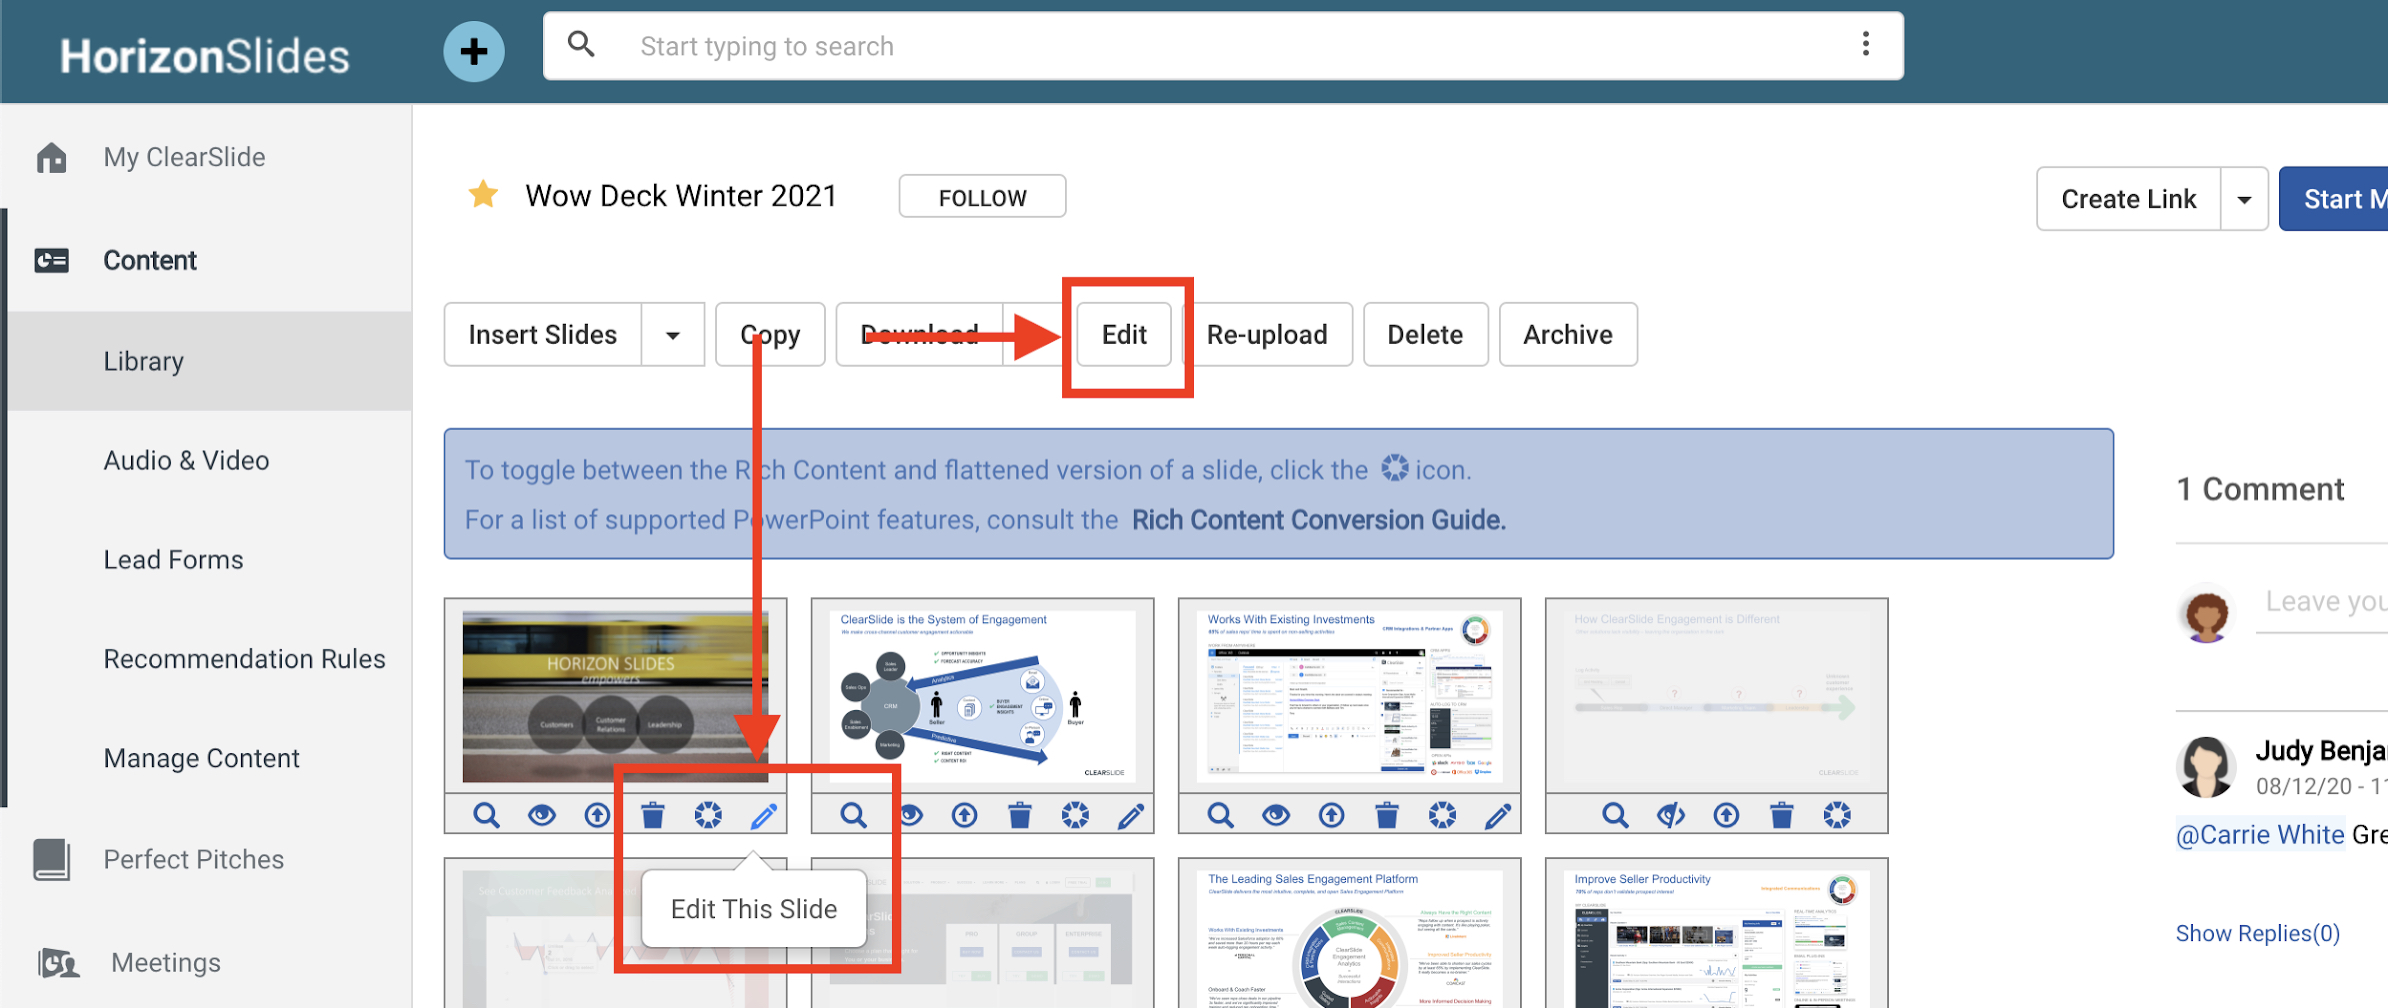
Click the edit icon in the top navigation or in the slide or page you wish to add elements to.

Adding editable text or image fields
For text:
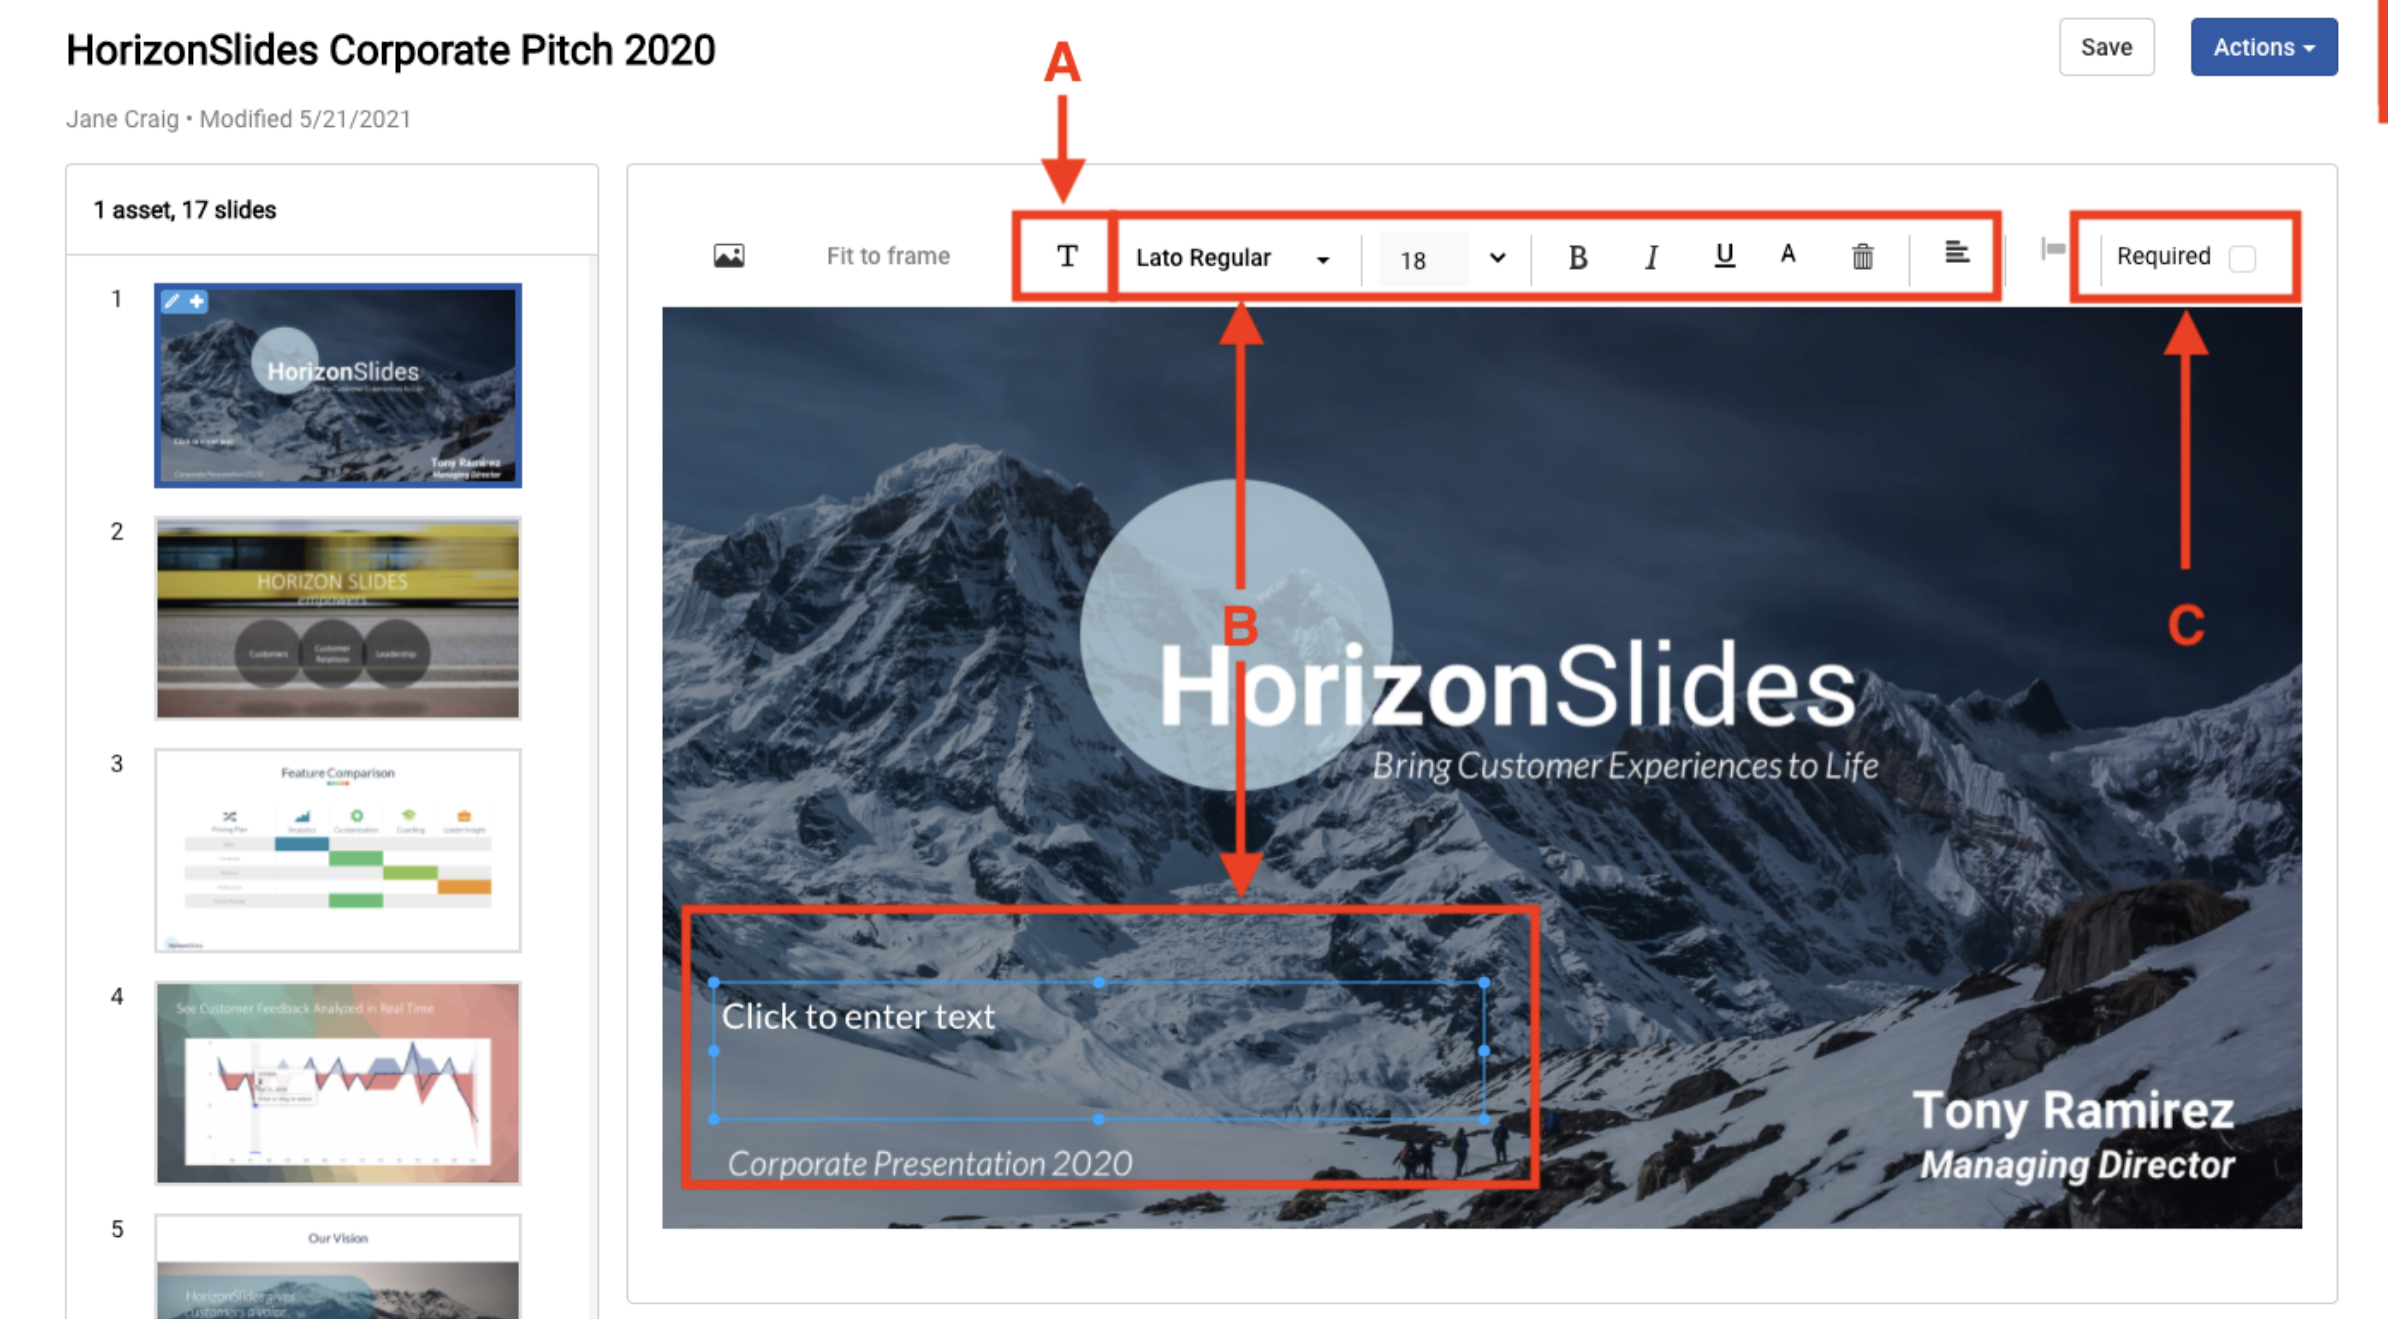
A. Click the text icon in the top navigation and draw a text element on the page.
B. Click on the text element and set the text font, size, style, color, and alignment. Sellers will not be able to change your selection giving you additional control over the asset’s appearance.
C. Optionally, set the element as "Required” to enforce customization by the seller.

For images:
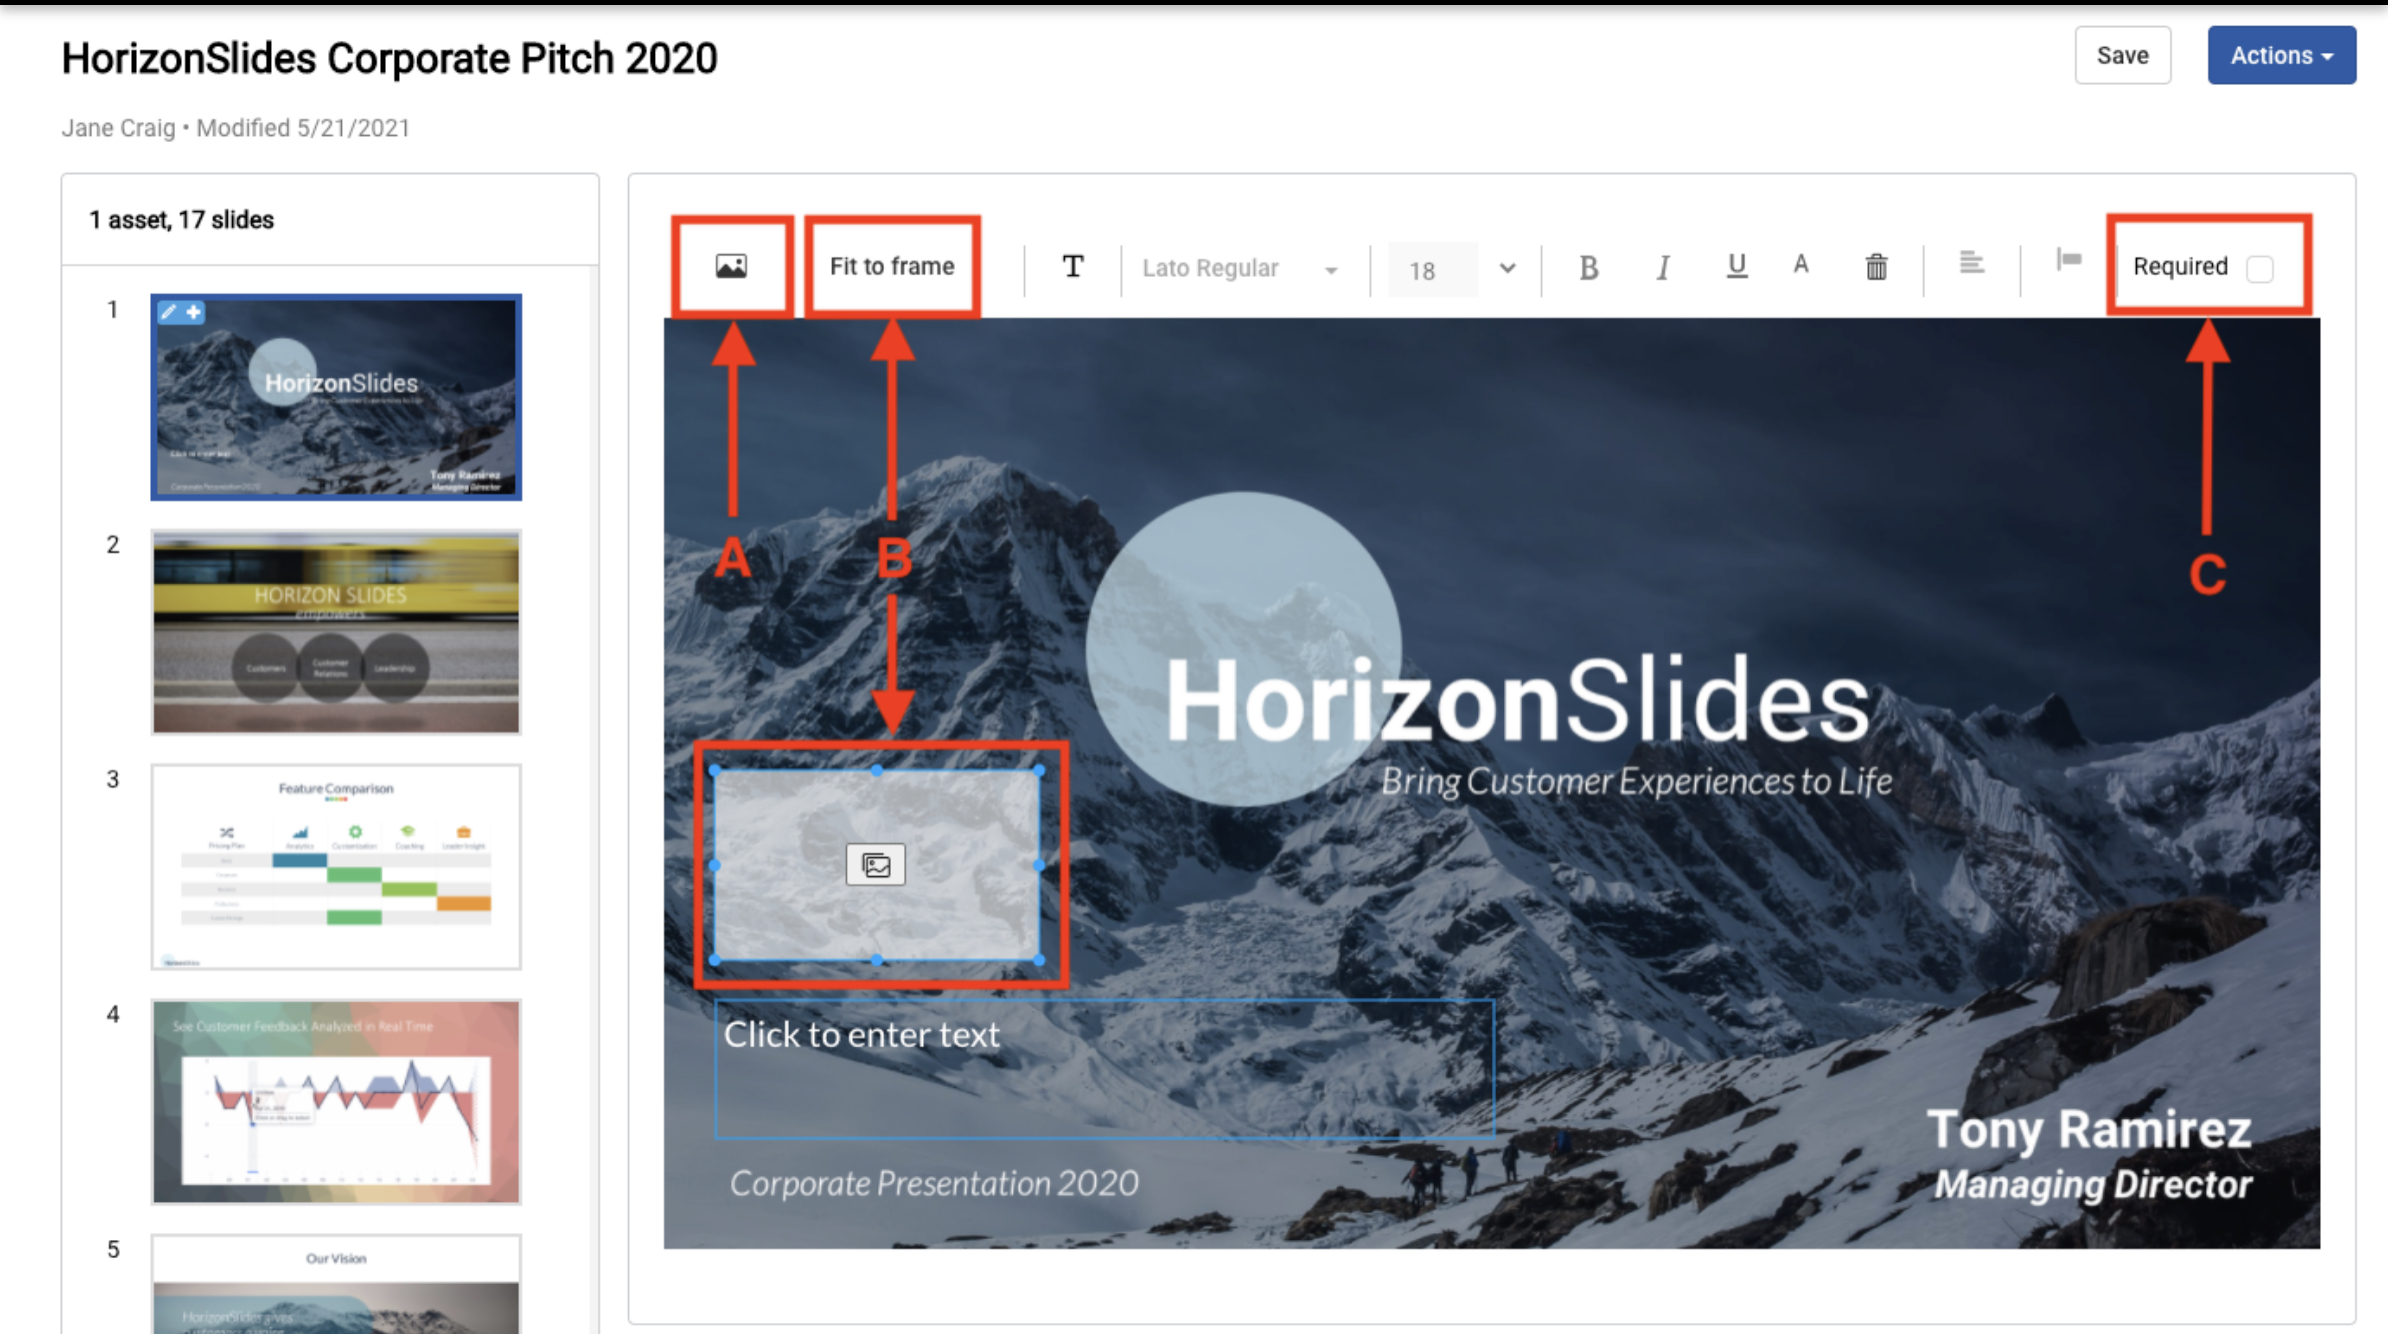
A. Click the image icon in the top navigation and an image element will appear at the center of the page.
B. Click on the element to move it around, adjust its size, and set it so that the image fits the frame or preserves its native resolution. Reps will also have an option to fit to frame/display images in native resolution so they can best display their selected image.
C. Optionally, set the image element as "Required” to enforce customization by the seller.

You can align an element with others by selecting and dragging the element into alignment with another element. You’ll see guiding lines to help align edges or by central line.
To align multiple elements at once:
- Hold the “shift” key while you click on the elements you wish to align.
- Select your desired alignment.

Always remember to save!
Comments
0 comments