Within the ClearSlide platform, you can choose any piece of content and create a unique, trackable link for sharing that content externally and internally. What does this mean for you? You'll never have to attach a document to an email ever again! Whether you're adding content to an email thread or want to post a case study on your LinkedIn and capture the name and email of everyone who clicks it, Create Link is about to change your life.
In addition to the workflow outlined in this article, you can also create a link from the Recent Content section within the My ClearSlide homepage, Any Asset located within the Content tab, and by using the Quick Actions button within the Navigation bar.
Create Link
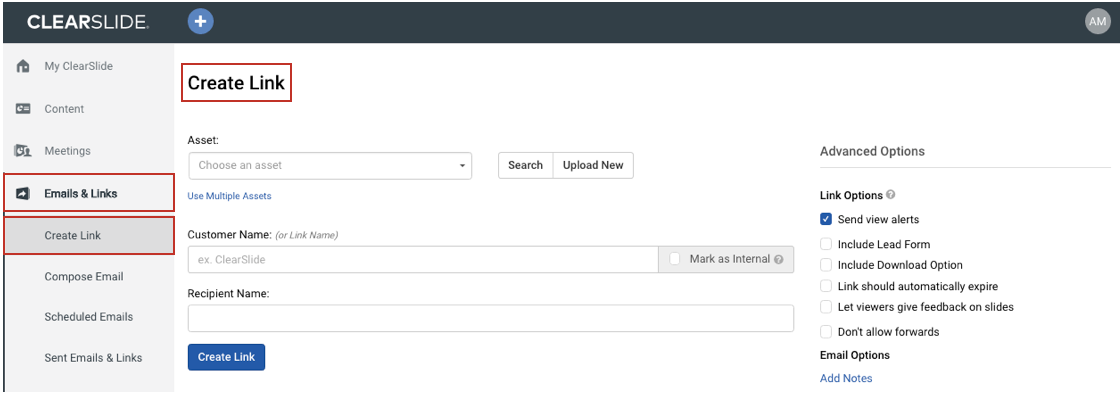
- Navigate to the Create Link page by expanding the 'Emails & Links' tab and selecting 'Create Link

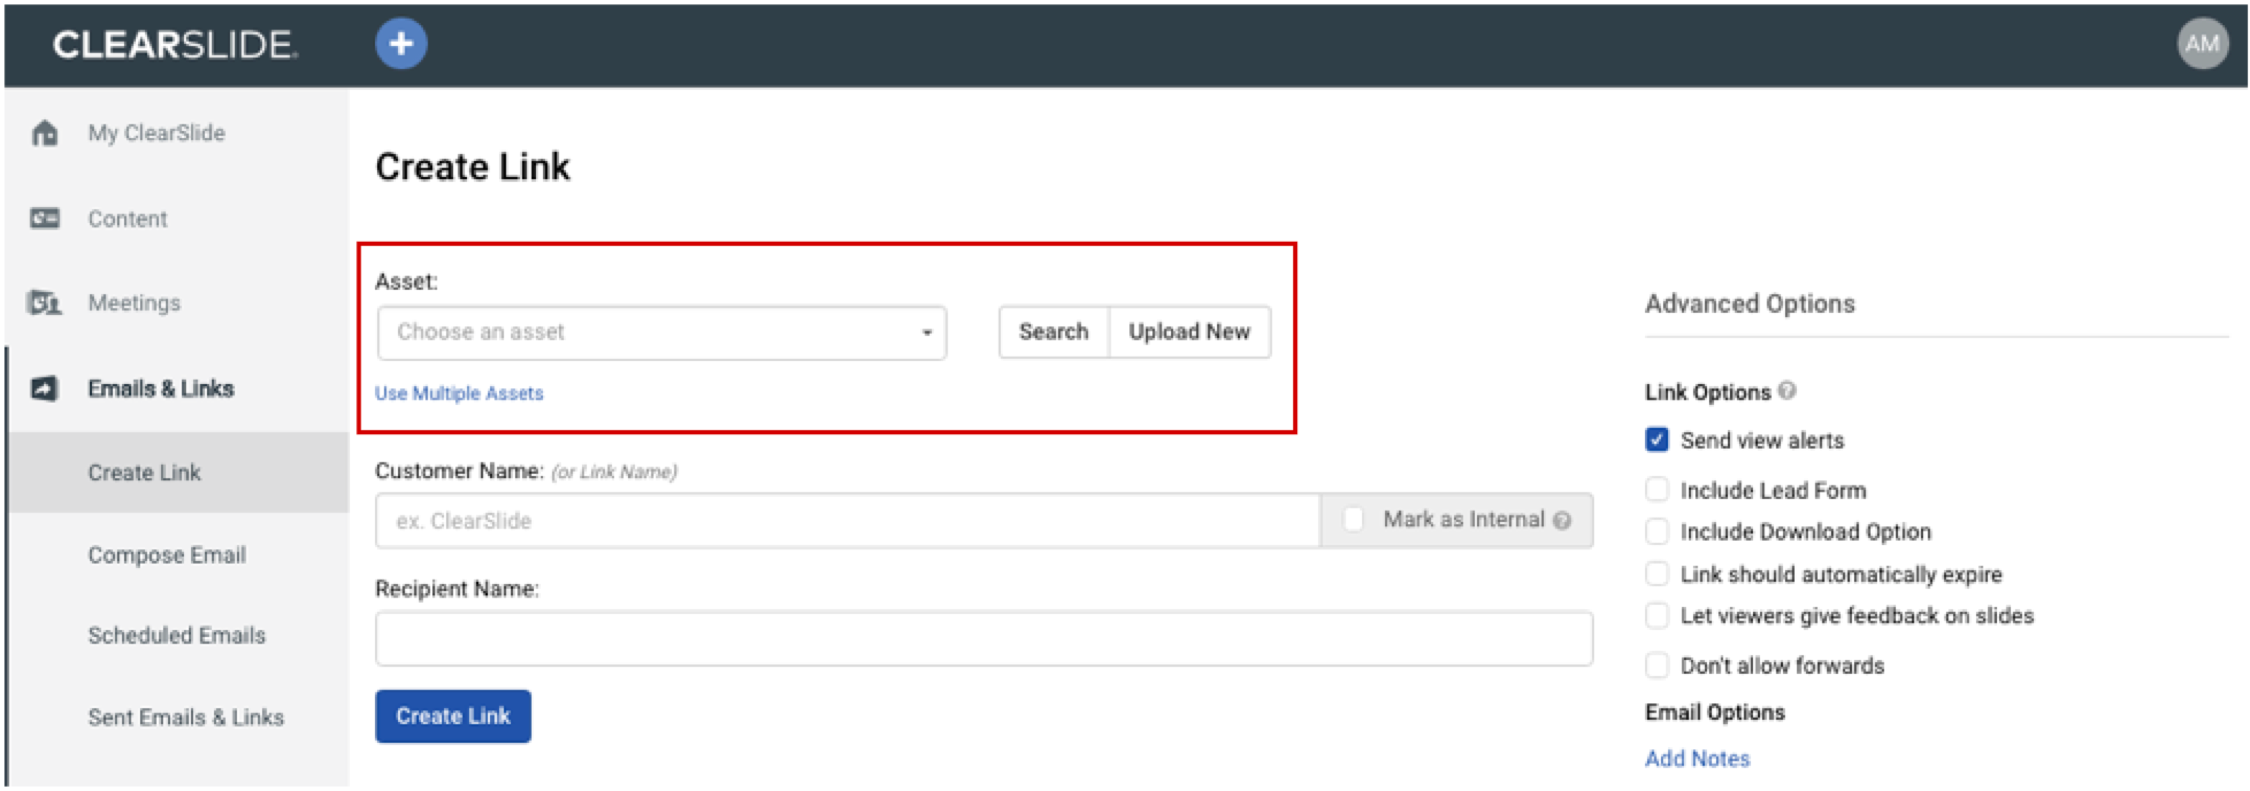
- From within the Create Link page, select the content you’d like to share from the 'Asset' dropdown or by clicking 'Search' for a more detailed view of all content
*Note: If you’d like to select more than one piece of content, click 'Use Multiple Assets' and make selections from the additional 'Asset' dropdowns. When using multiple assets, all assets selected will live within one single link. If you’d like to upload a new piece of content that doesn’t currently exist within the ClearSlide platform, click 'Upload New' and choose the relevant file to upload
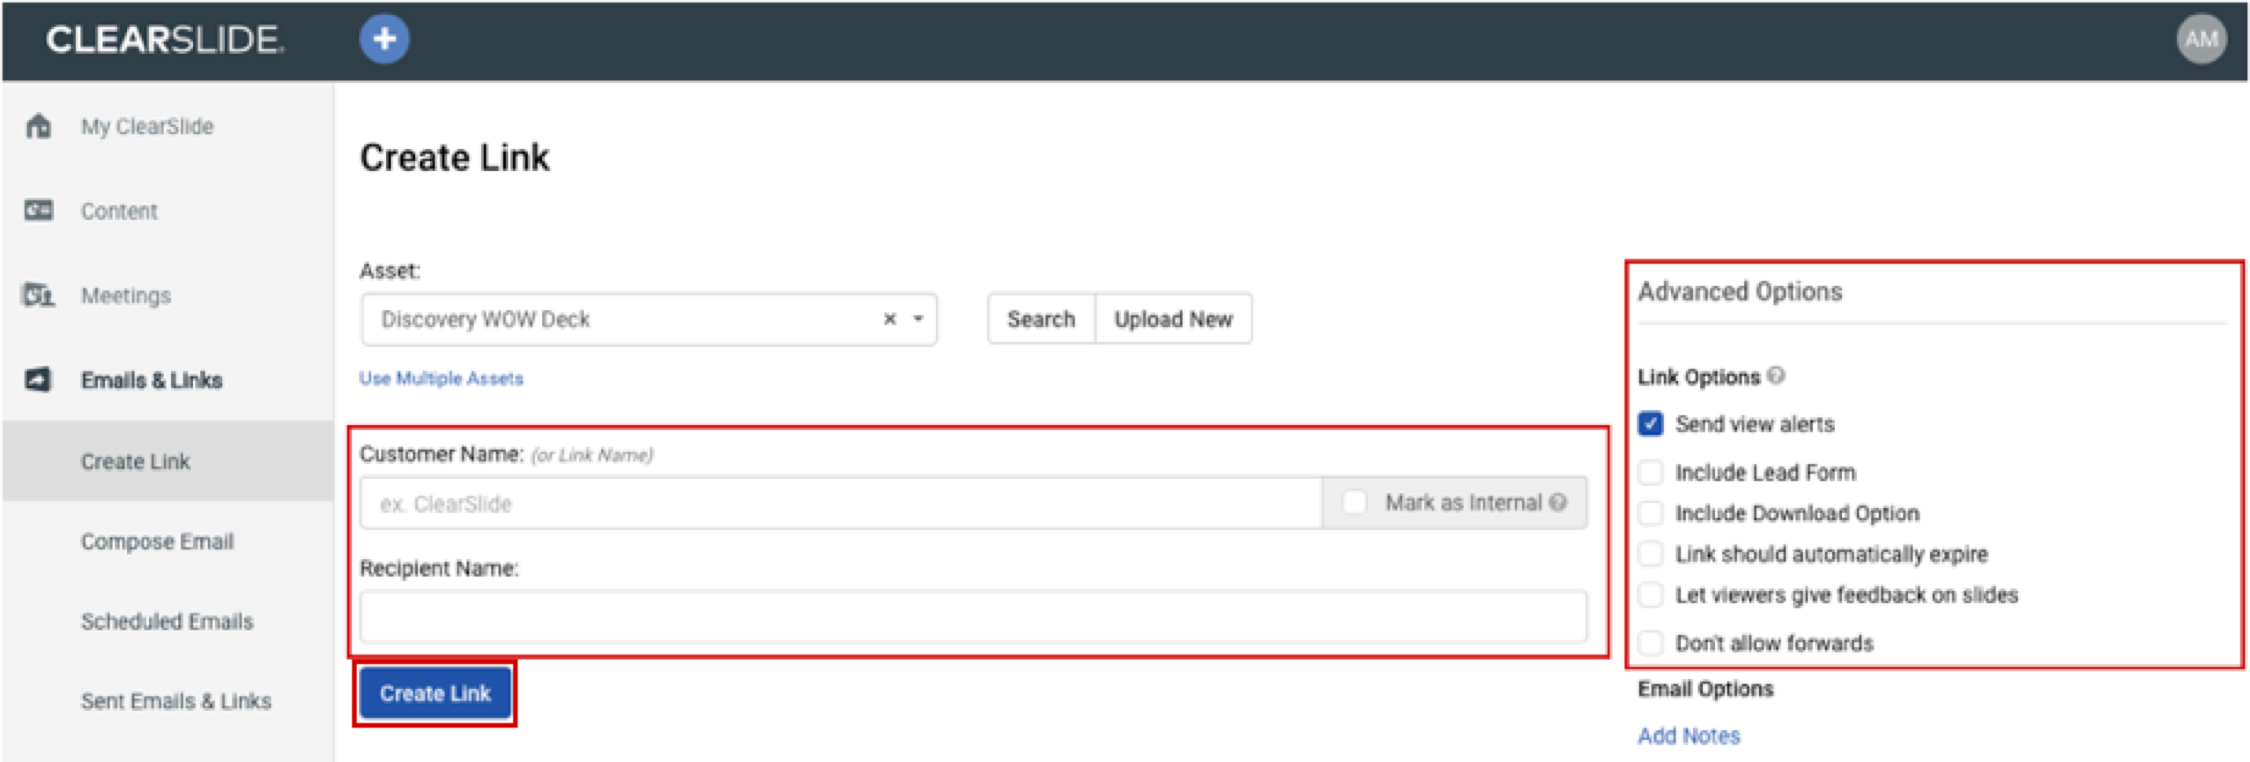
- Once you’ve selected the asset(s), fill out the 'Customer Name' and 'Recipient Name' required fields, configure the Advanced Options and then click 'Create Link'

- 'Customer Name' & 'Recipient Name'
- These fields will be used for Insights within ClearSlide
*Note: Using consistent naming conventions for these fields will ensure more accurate, duplicate-free data for reporting.- Example: “ClearSlide” “ClearSlide, Inc.” and “ClearSlide.com” will track as 3 unique customer records within Insights.
- These fields will also be used for CRM tracking if you have purchased & installed the Salesforce integration and if the Account/Contact record exists within your Salesforce instance
*Note: If you are using the created link for mass distribution, and therefore do not want to associate it with a specific customer & recipient, simply fill out both fields with any alternative information.- Example: 'Customer Name' could be used for the campaign name, the email blast name, the distribution list category, etc. 'Recipient Name' could be used for the date of creation.
*Note: Only use the 'Mark as Internal' checkbox when the created link will not be client-facing. All 'internal' activity data is easily removable from the 'Recent Activity' section within the My ClearSlide homepage.
- Example: 'Customer Name' could be used for the campaign name, the email blast name, the distribution list category, etc. 'Recipient Name' could be used for the date of creation.
- 'Advanced Options
*Note: All 'Advanced Options' can be retroactively adjusted, even after you’ve sent out your content. All updates made are automatically applied to the created link without needing to send another email letting recipients know you've updated the content or their permissions!
- These fields will be used for Insights within ClearSlide
- Your unique, trackable link has been created and is ready to be shared! Copy your link and share via email, social media, or across any other channel
*Note: Click ‘Preview this Link’ to view your link as your recipients will see it. Click ‘View Link Details’ to review and edit your advanced options, content included, and customer & recipient information.

Comments
0 comments