ClearSlide’s personalized content pages allow you to share multiple assets with buyers in a digital space that puts them in control of what they consume and when. To further customize your shared content, review our process to add editable text and image fields directly to the content here.
Creating your content-sharing microsite
Select the content you wish to share
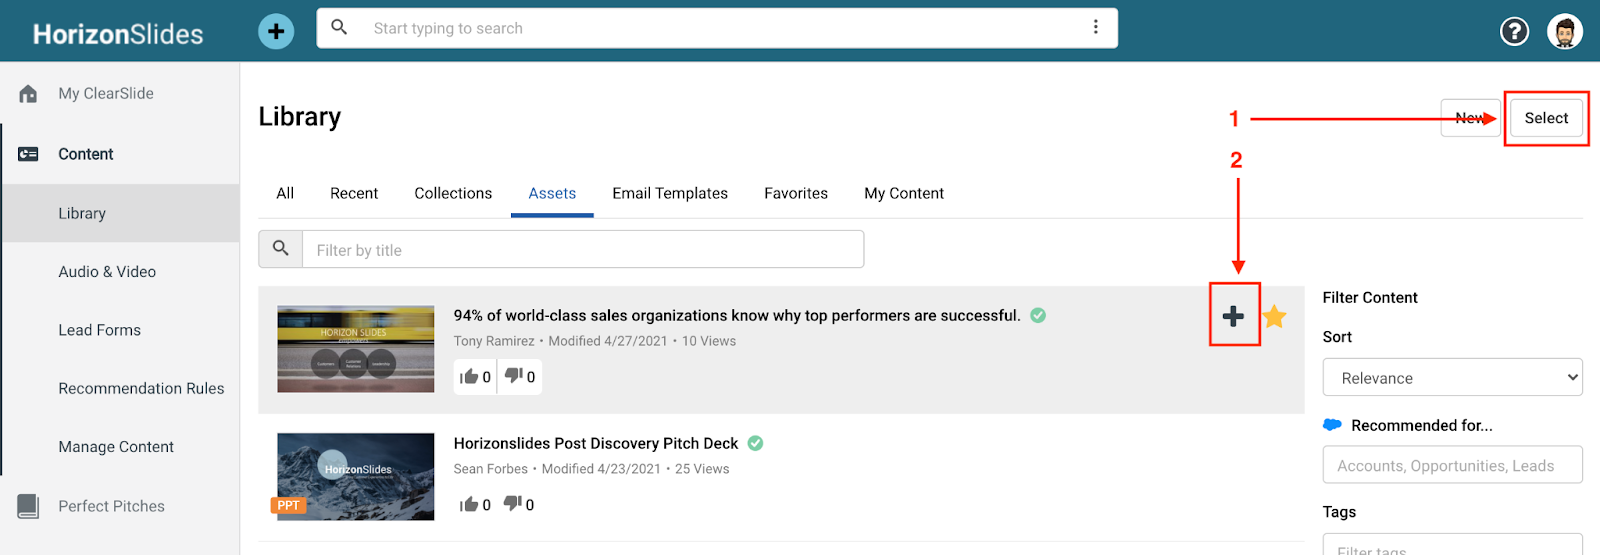
To get started, navigate to the content library and click the asset tab. You have two ways to select content:
- Hit the “Select” button. Plus signs appear to the right of the asset’s thumbnail.
- Hover over the asset you want to add and the same plus sign will appear.
In both cases, click the plus sign to add it to your microsite.

You can use search, filters and tags to continuously find all the assets you wish to include from the Assets tab. However, if you click into a different tab, the assets you’ve previously selected will be cleared.
Personalize your microsite
Once you’ve found all the assets you wish to include, you have two options:
- If you’d like to customize your content or microsite, click “Personalize” to enter the personalization flow. This could include editing personalized text/image fields (for instructions on text/image personalization, visit this help article), hiding and reordering slides, or renaming your microsite chapters (for instructions on building custom presentations, visit this help article)You'll be able to create your link after completing Personalization steps.
- If you don’t need to make any changes select “Create Link”. If Create Link is disabled, your selected assets likely include a field that requires Personalization using the process in option 1.

Enter customer details
- Enter the customer name so you can track interactions with the shared assets. If you have an integration with Salesforce, enter the account or opportunity name and this activity will be automatically logged into the CRM.
- Enter the recipient’s name. Again, if you have an integration with Salesforce, enter the name of the contact you wish the activity to be logged to in the CRM. Recipients are limited to one for link sharing. You have the option to add a lead form to collect information if the link is shared or, if you’d like to share the assets with multiple recipients you can share it via email. The assets will still be presented in microsite form and you’ll get engagement insights at the aggregate and individual recipient level. For instructions on how to compose an email, see this help article.
- If the link is being shared internally check the “Mark as Internal” box.

Configure link sharing settings
Click the “Settings” tab to:
- Add a lead form to collect contact information. For instructions on how to create a custom lead form visit this help article. By default the lead form will appear on page 1 of the first asset and the lead form will be hidden from the first viewer. You can select a different slide for the lead to appear on and choose for the lead form to appear to the first viewer.
- Opt to receive view alerts via email when the recipient interacts with assets in the microsite.
- Set an expiry date (optional) where the content will no longer be viewable from the microsite.
- Allow recipients to download assets as PDFs or source files.
- Restrict recipients from forwarding the assets if they are of a sensitive nature.

Create and share your link
Click the “Create Link” button.

Copy and paste your link to social media, web pages, or any preferred digital communication channel

Your microsite will look like this:

Managing your content-sharing microsite
Finding your microsite page
After you've shared content in ClearSlide (via link,email, orGmail/Outlook), find your microsite via any of the following paths:
- Enabling "View Alerts" when you create the link or email will send you a real-time notification email when your content is viewed. Click through the link in the email to view the activity and edit your microsite.
- Recently viewed emails and links are available directly from your My ClearSlide activity feed. Activity cards reshuffle dynamically to show the most recently viewed links at the top.
- Use the Emails and Links dashboard to review your own activity or filter by the owner to review recent activities by others on your team. Click on any record to view the details.

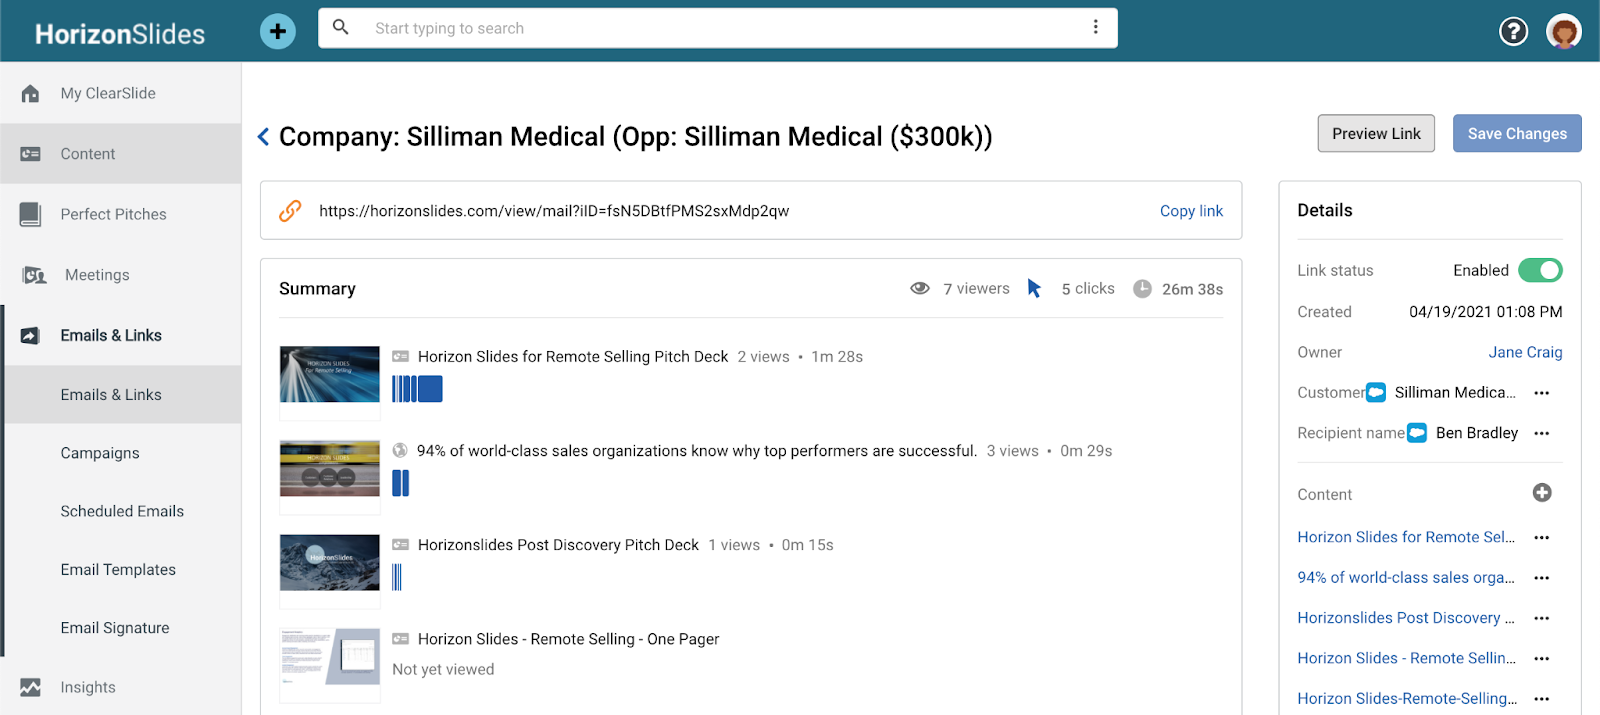
Click into the email or link you'd like to edit. The page will look like this:

The page displays engagement insights for all shared assets. For instructions on how to interpret this information, visit our article on Link Engagement Insights.
Make changes to your microsite
The right column of the page is where you can make changes to your microsite like:
- Disable / enable the link.
- Edit the customer and recipient name.
- Add new content.
- Change the order of, replace or remove content, and follow individual assets to receive. engagement notifications.
- Subscribe/unsubscribe from view alerts, block/allow forwarding, add/remove lead forms, add/remove link expiration dates, and/or block/allow downloading of assets.
If you make changes you must hit “Save Changes” (6 in the diagram) to make them live.

Setting up your avatar and contact information
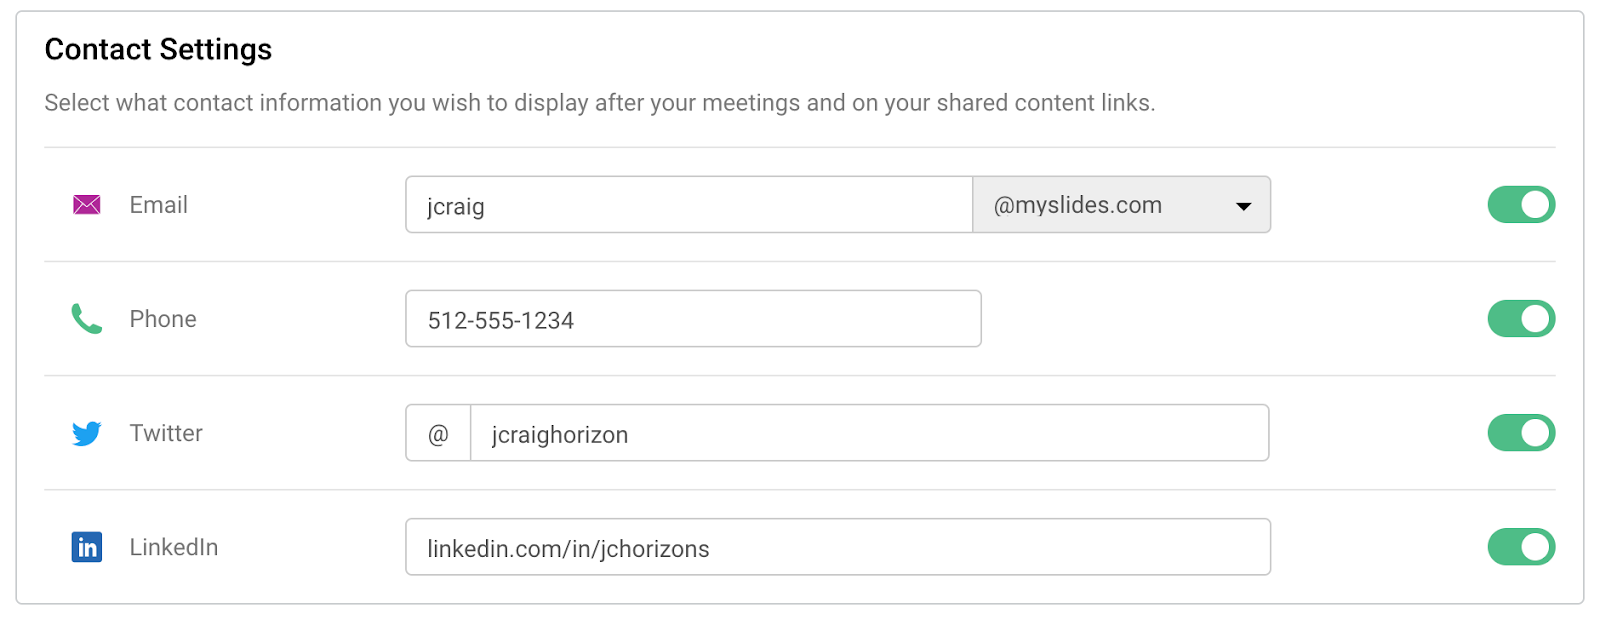
To make your microsite feel more personal, you’ll want to add your photo, email address, phone number, and social media links which will appear in the top left corner.

Click your avatar in the top right corner of the dashboard and select “My Account” from the drop down menu.

Scroll down to Contact Settings and enter your information.

Click the “Save Changes” button at the top right corner.
Comments
0 comments