ClearSlide allows sellers to personalize assets for their buyers by combining different files, reordering/hiding slides, and pages and adding text and images, all without leaving the platform. In order to customize text and images within an Asset, content creators need to add these fields via the process shown here.
The content in your customized Presentation is connected to the original Assets, so your content is always up to date. Whenever admins update the Assets (i.e. change content in a slide, add slides, etc) it will update the slides in the Presentation automatically. This may reset your custom slide order or custom fields, so if an Asset is updated, scan through your Presentation to make sure it still appears correctly.
Adding Assets to your Customized Presentation
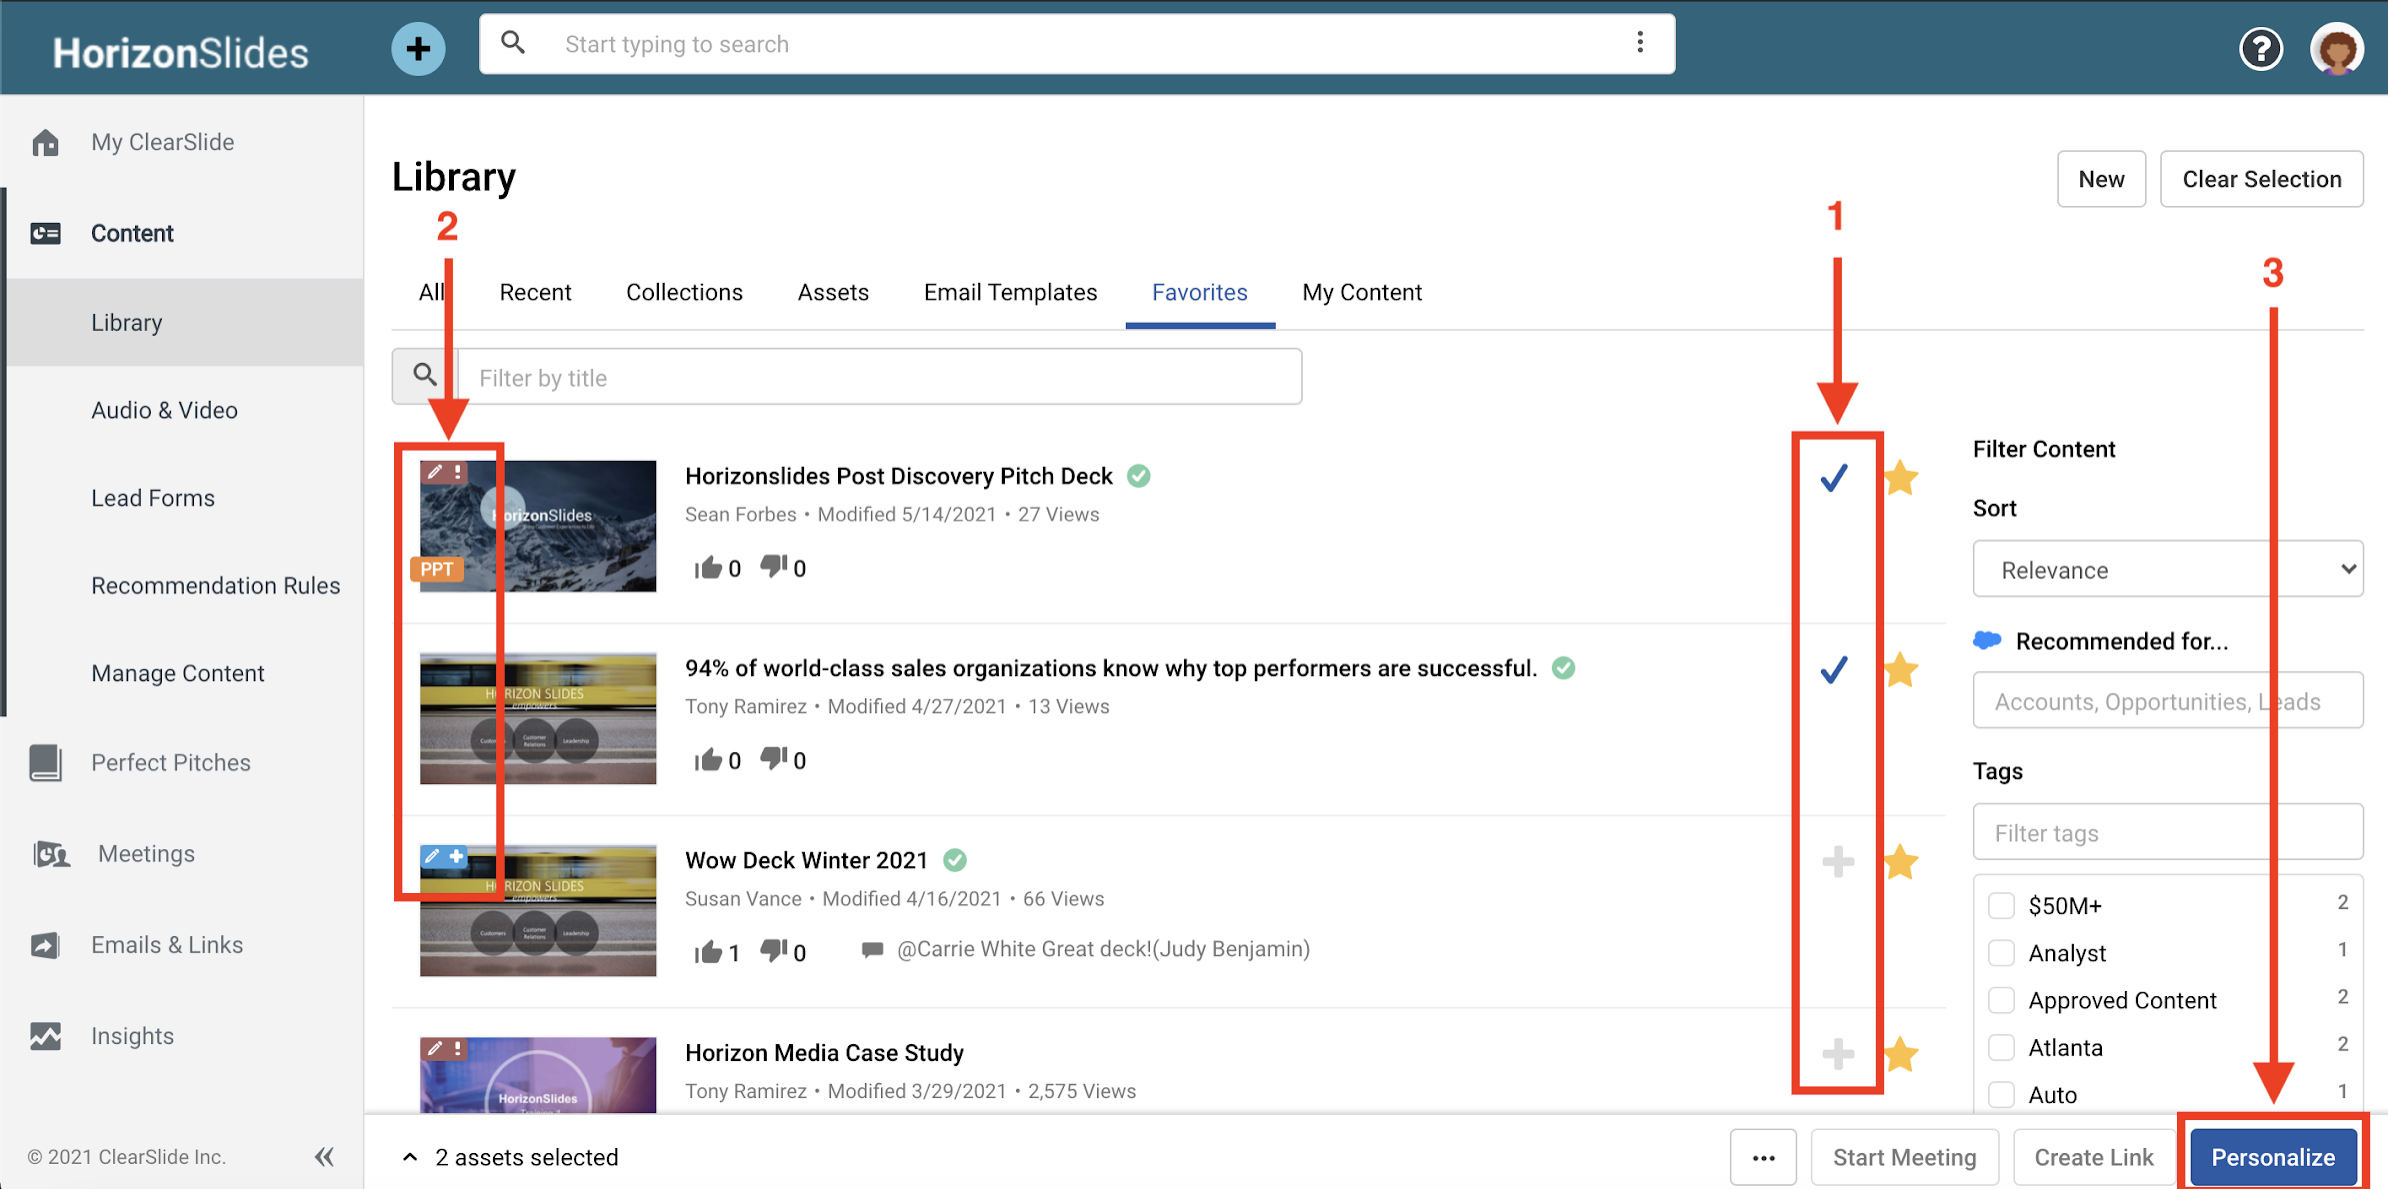
Start in the content library. Find the content you’d like to assemble using the tabs at the top or filters at the left.
- Select asset(s) by clicking the plus icon to the right of each asset.
- Assets with editable text or image fields are indicated by blue or red icons in their top left corner. Blue indicates it is optional to add text or images, red indicates that it is a requirement to add text or images in order to use the asset.
- Click the “Personalize” button to enter the customization workflow.
Note: Only assets can be assembled into a customized Presentation. If you select a Presentation, email template or other content object you will not be able to move on to the Personalization flow.
Reordering Slides
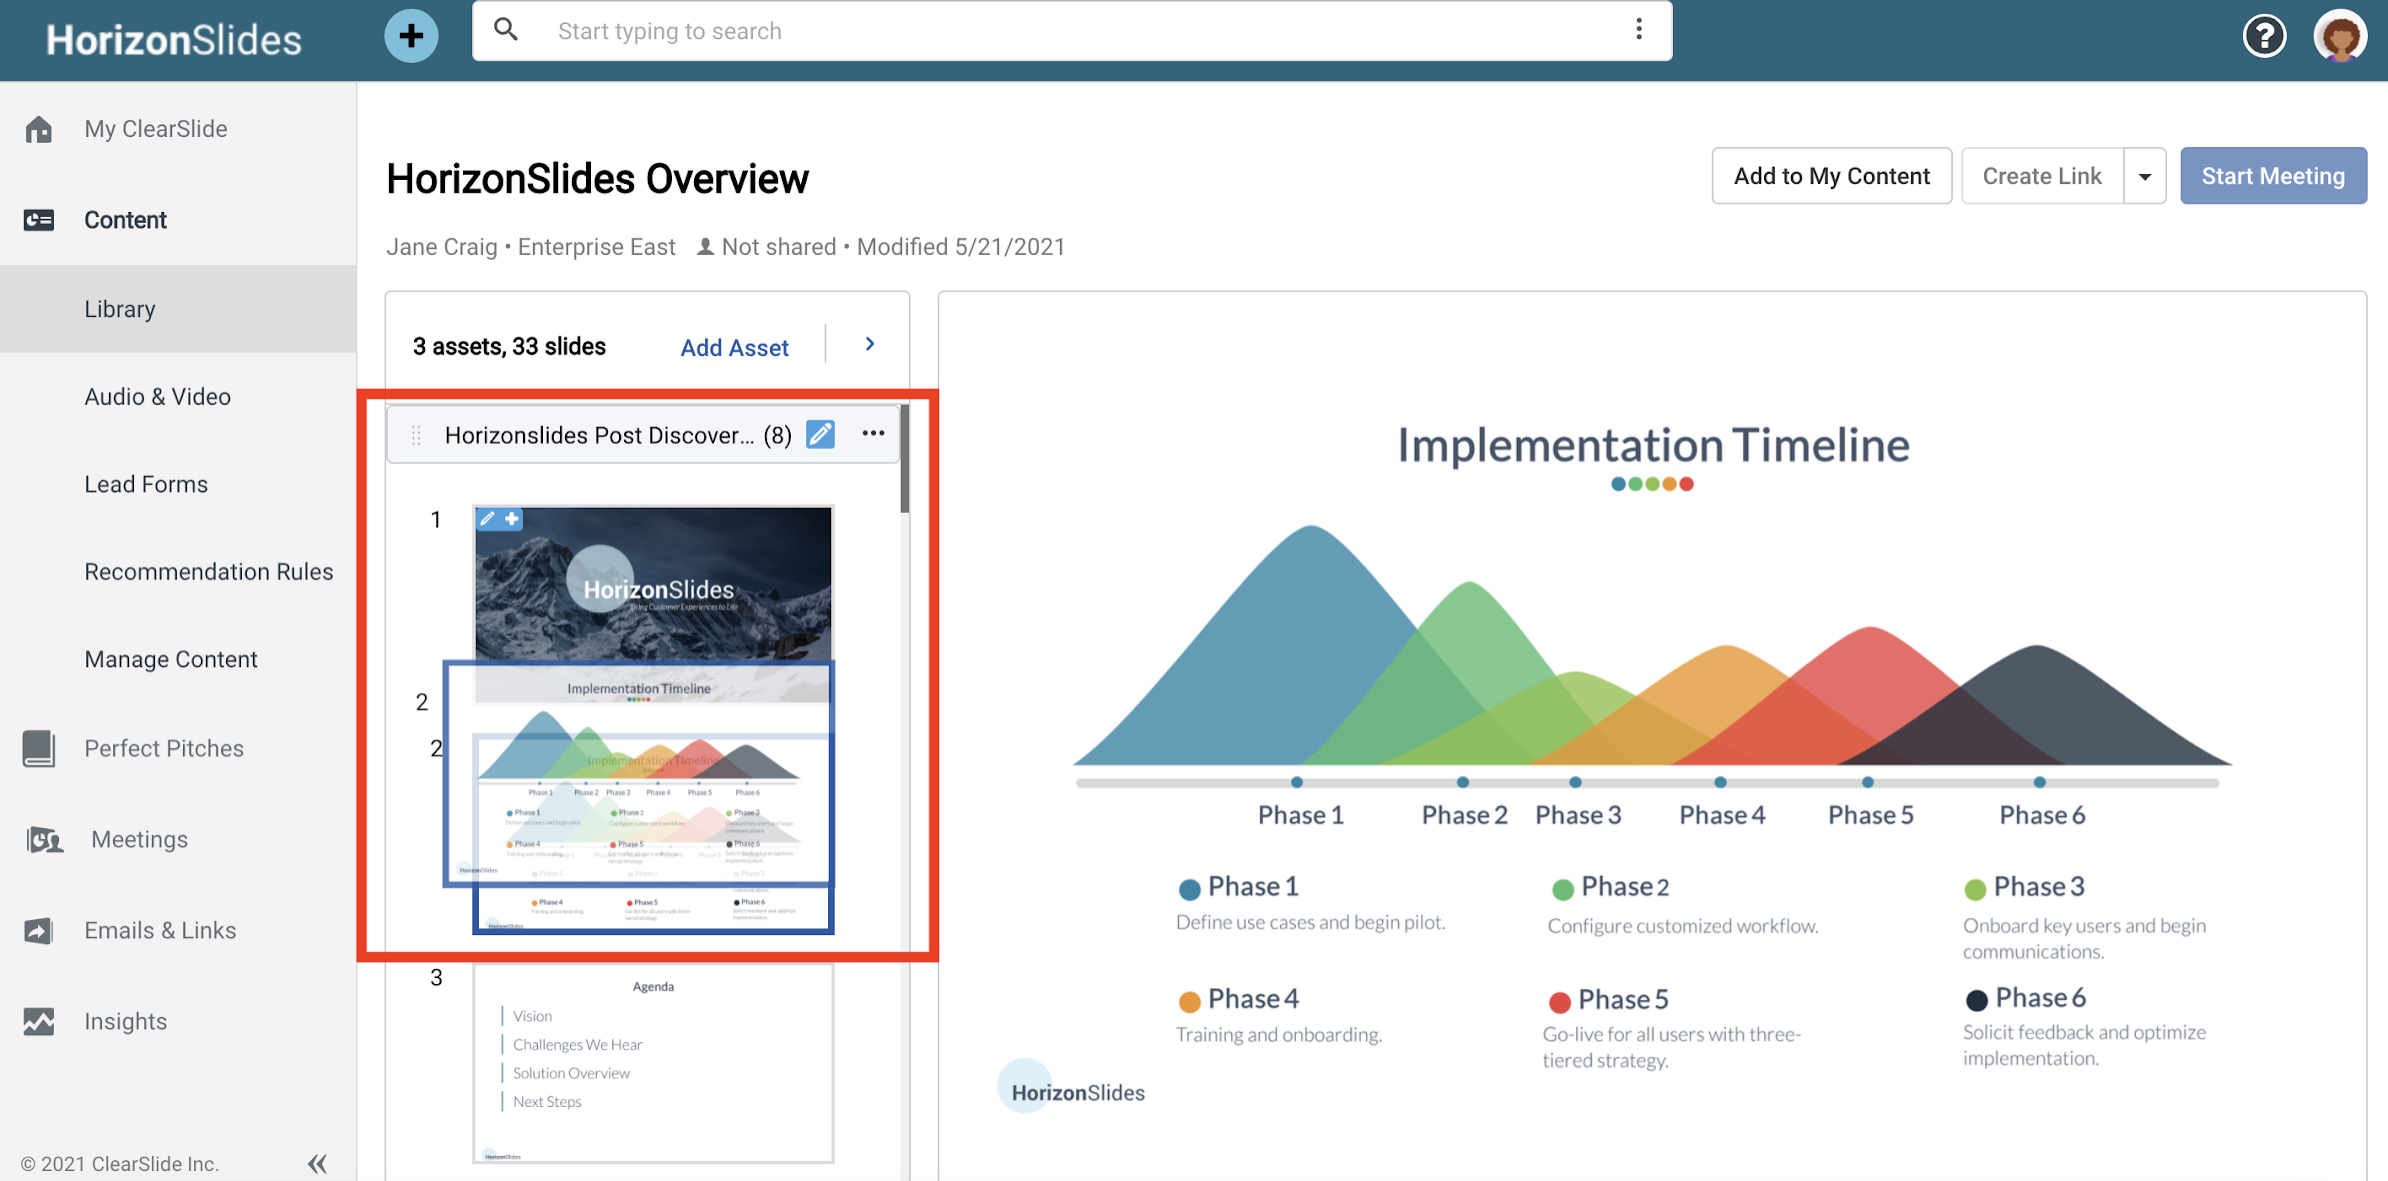
You can rearrange slides by clicking, holding, dragging and dropping them into the desired place in the side panel.
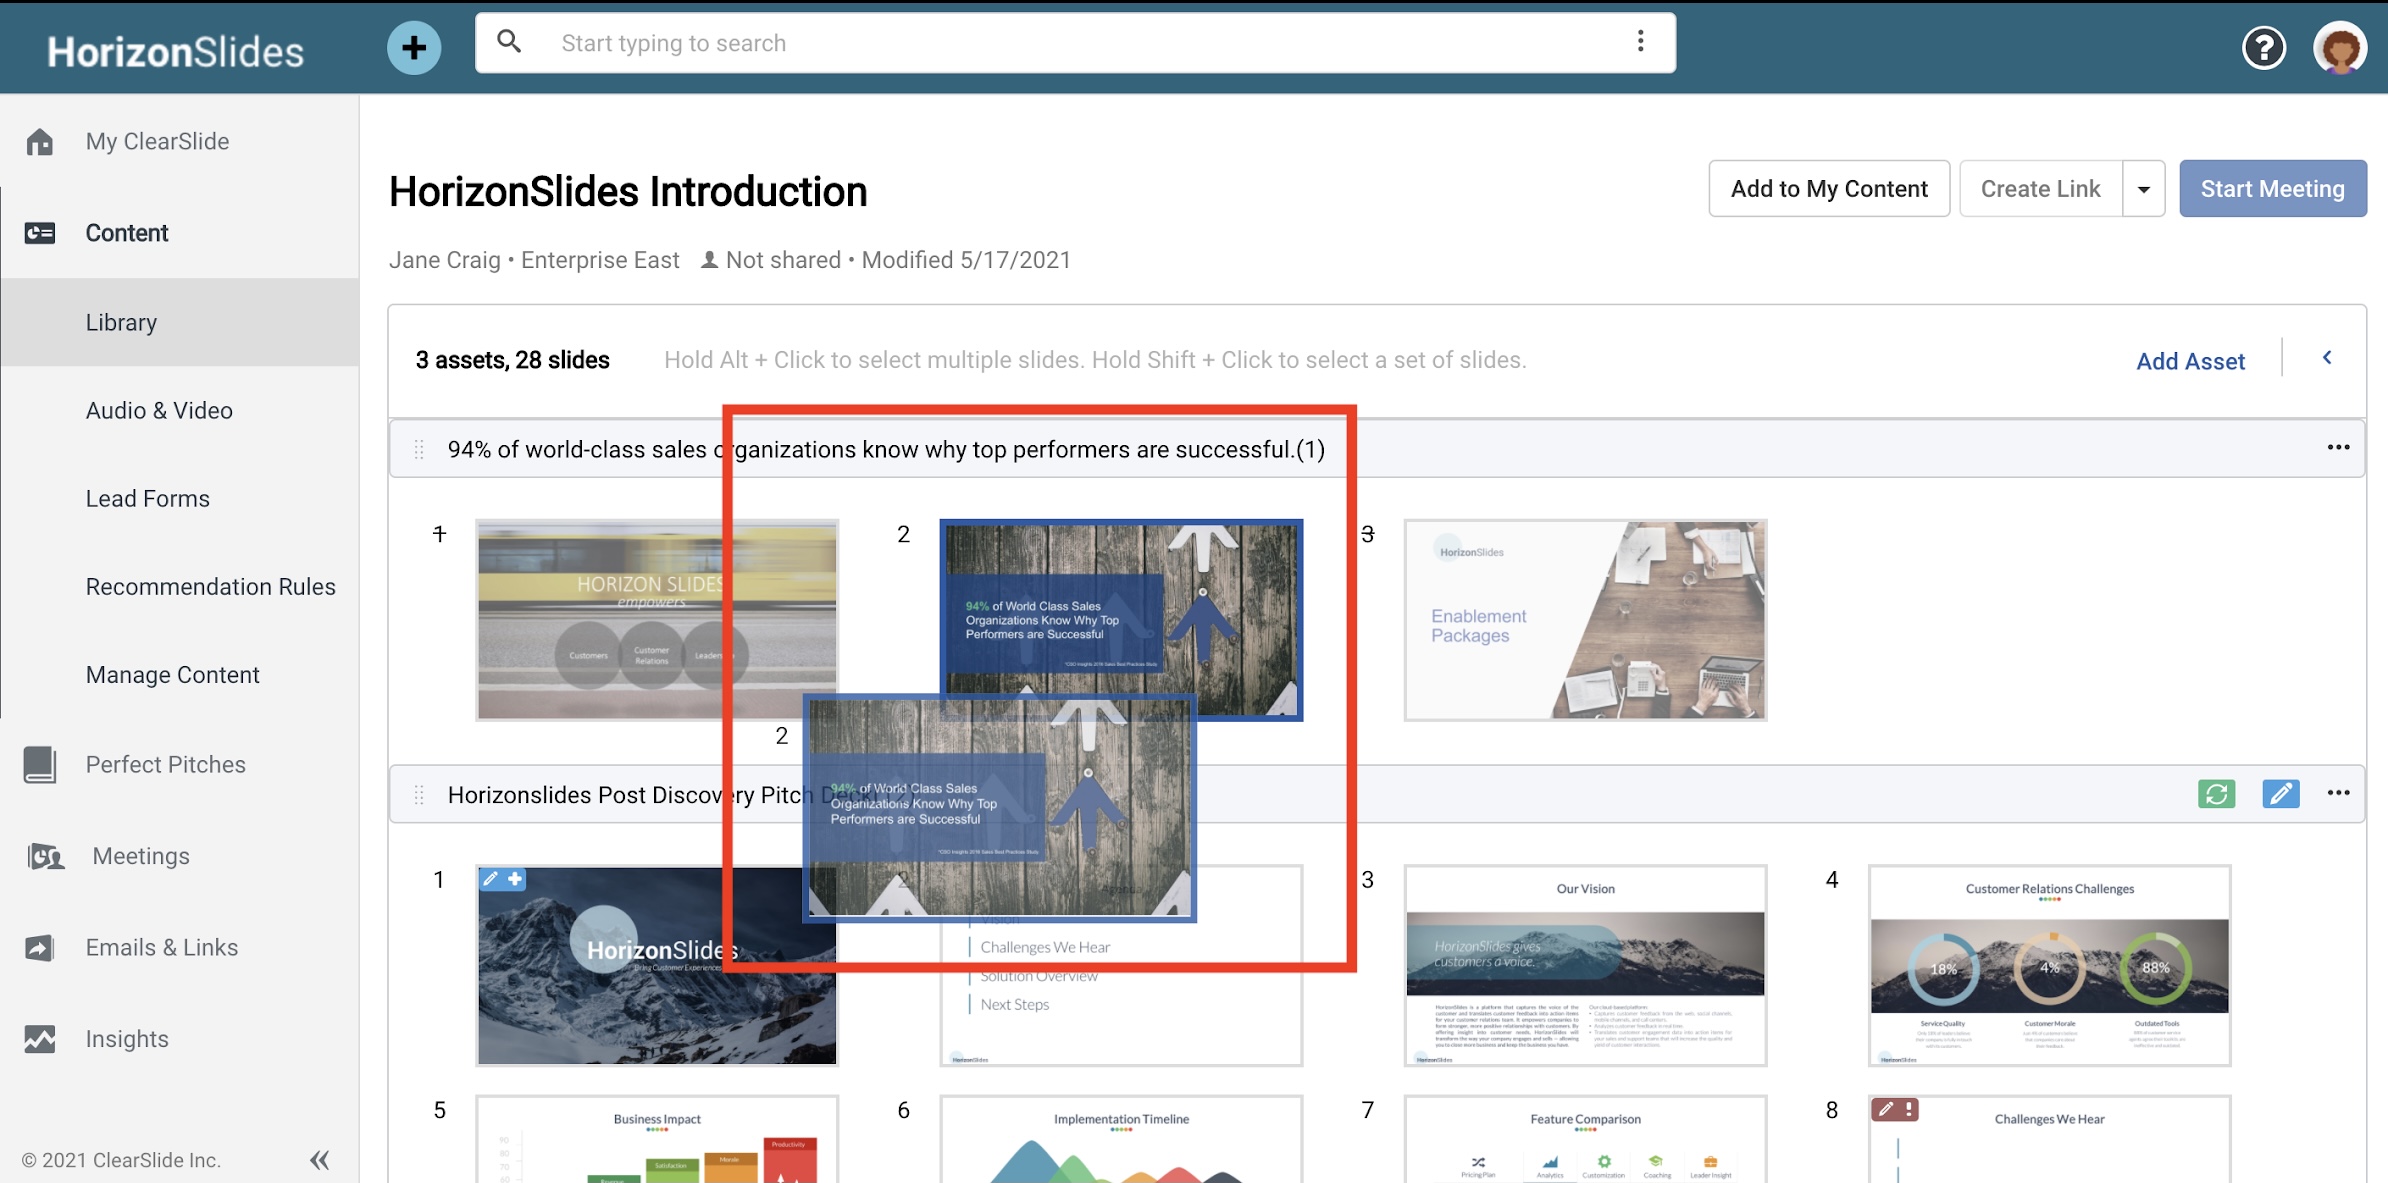
Alternatively, you can expand your view of all the slides in your selection by clicking the left pointer at the top of the stacked view of slides.

Rearrange slides by clicking, holding, dragging and dropping them into the desired place. To select a set of slides to move at once, hold ‘Shift’ on your keyboard, click on each one, then drag to their new place. If you’re having trouble dragging slides, click and hold until you see the slide “lifted”, then proceed to drag it to the new location.
Hiding Slides
Hide slides by clicking the closed-eye icon that appears at the top right of the thumbnail on hover. To make it visible again, click the open-eye icon that appears in the same place.


Renaming assets
In the customization flow, individual assets are referred to as “chapters”. If you are sharing your customized assets in a personalized microsite via email or link, chapter names will reflect that of the original asset on the page menu unless it is renamed.(Learn more about personalized microsites). To rename them as something customer-facing and/or more personalized to the buyer, click the ellipsis icon to the right and select “Rename”.
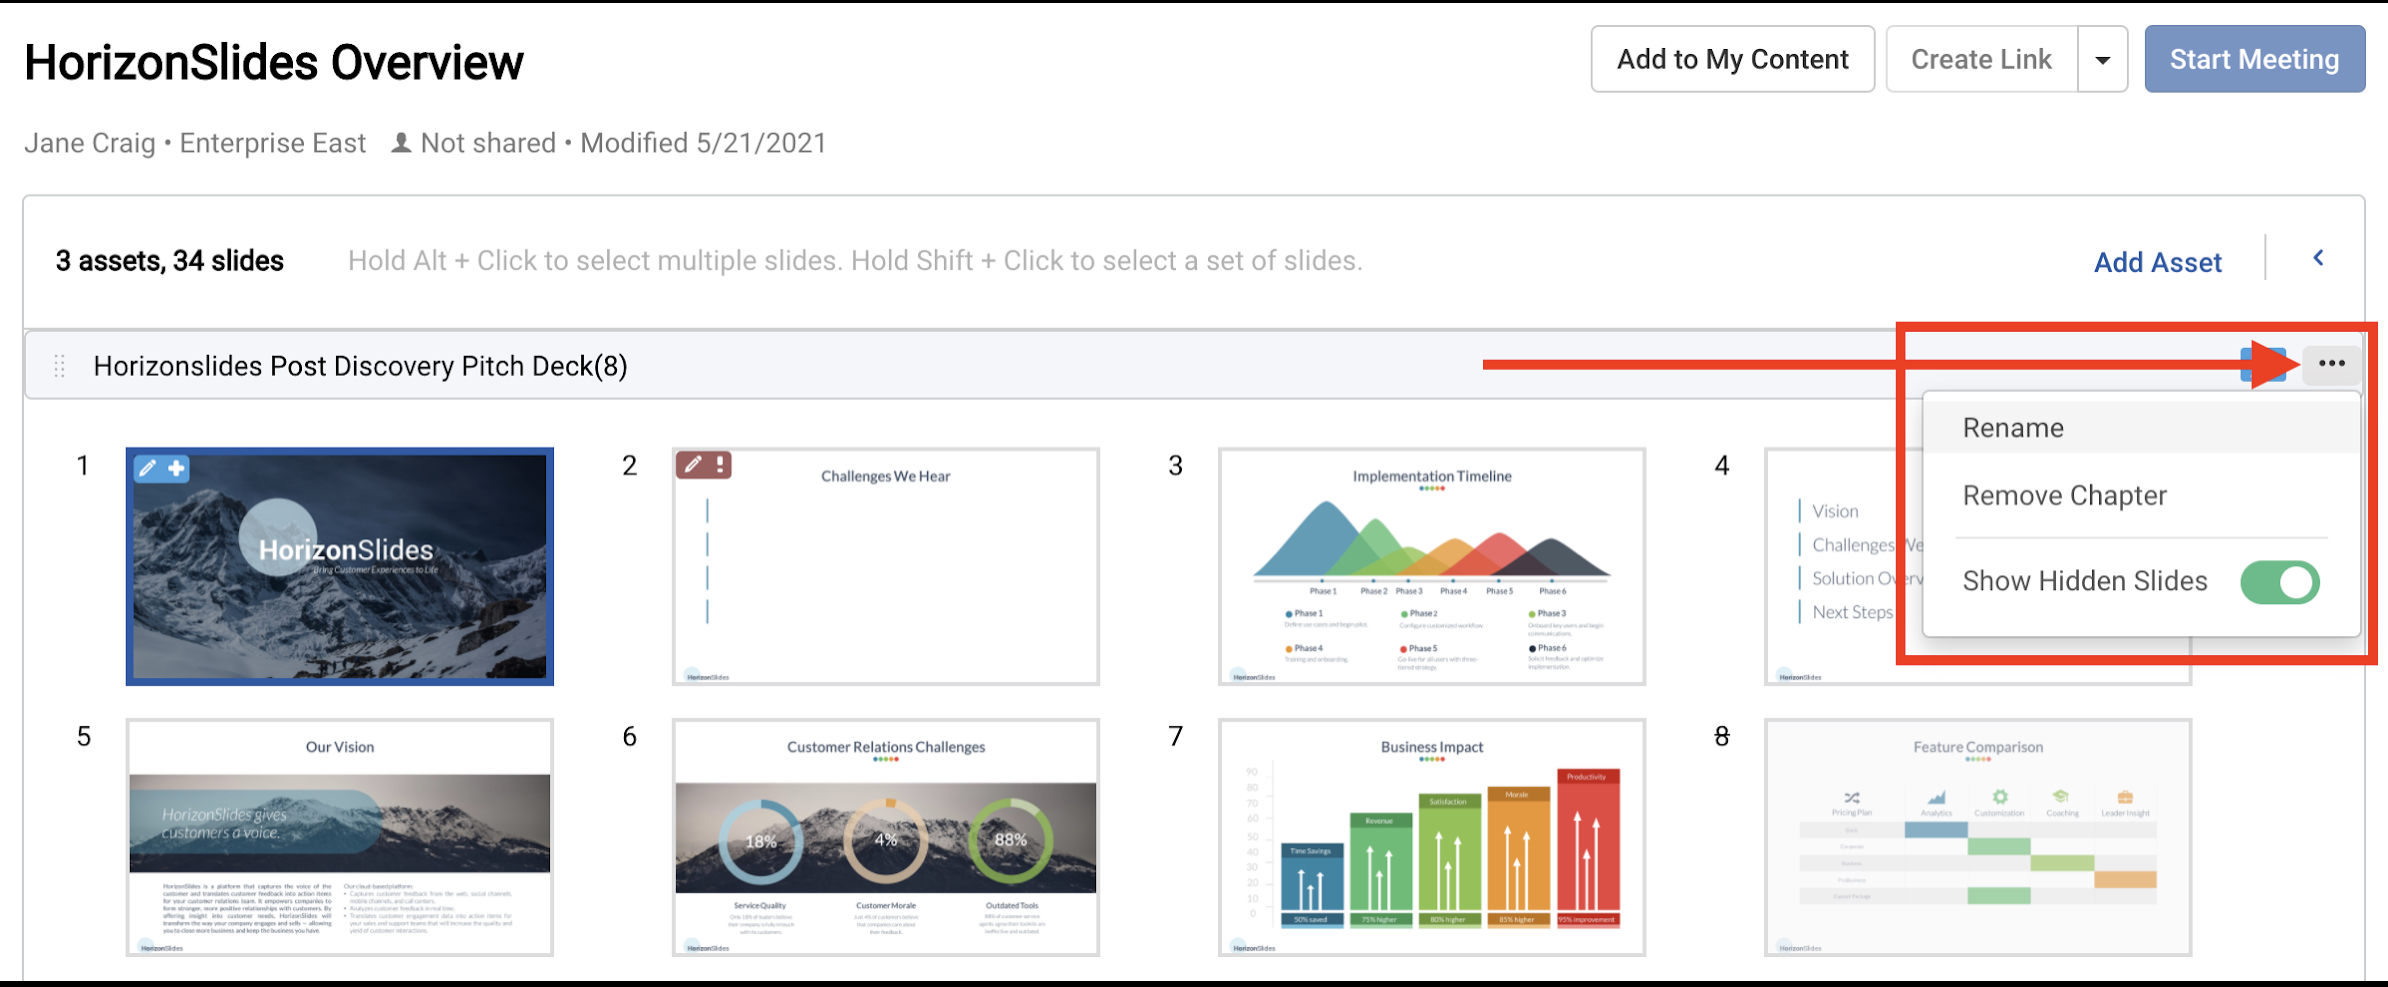
From this drop-down menu you can also remove chapters or toggle between showing and hiding hidden slides.
Reordering assets
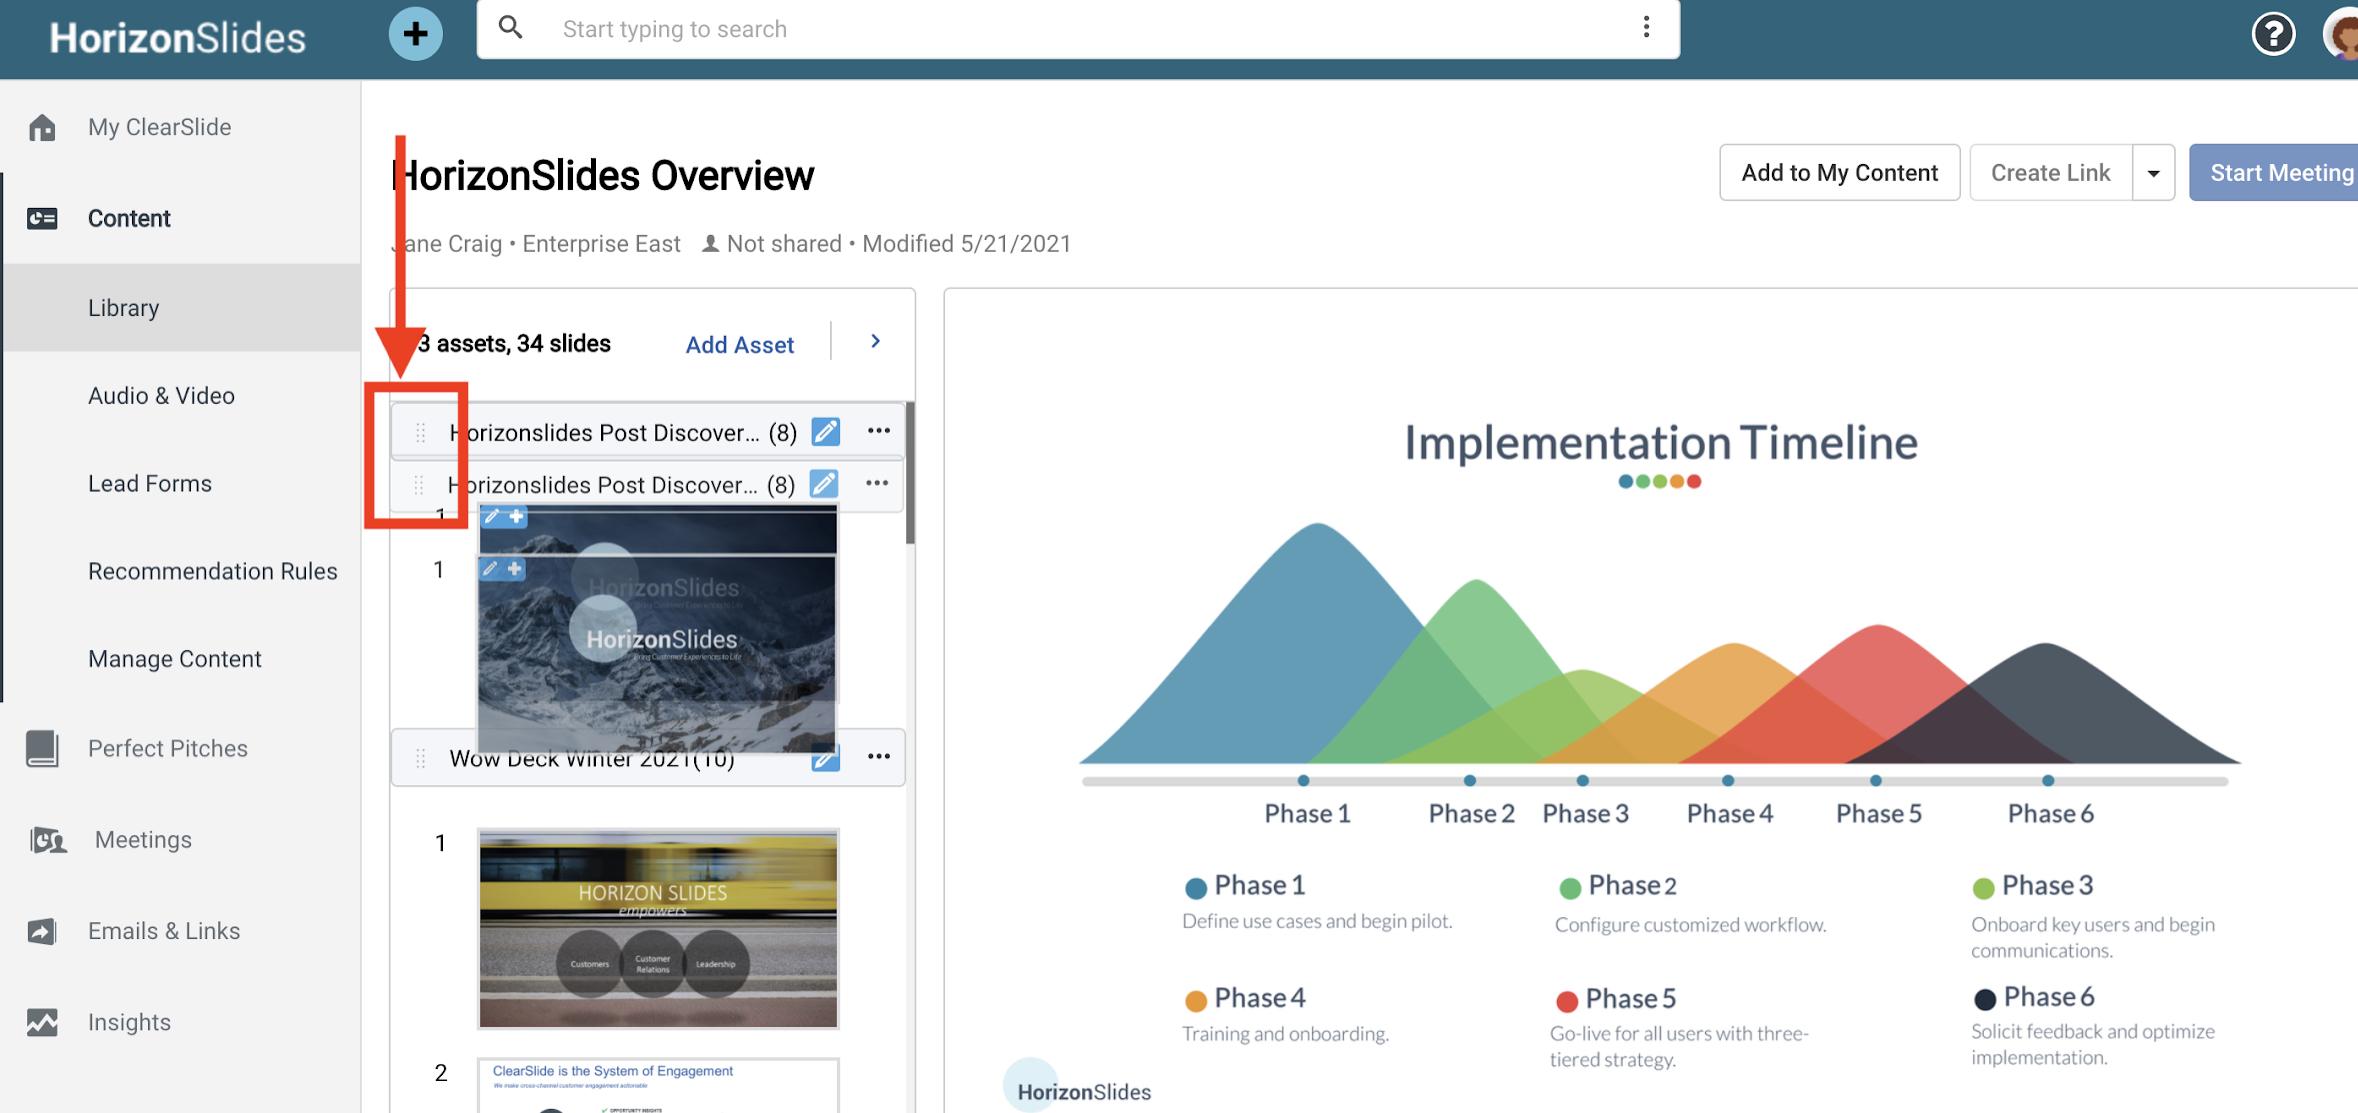
To change the order of assets, click the assets “handle” to the left of its name (see image below) then hold, drag and drop to the desired place. The panel or screen will scroll as you drag.
Personalizing editable text and image fields
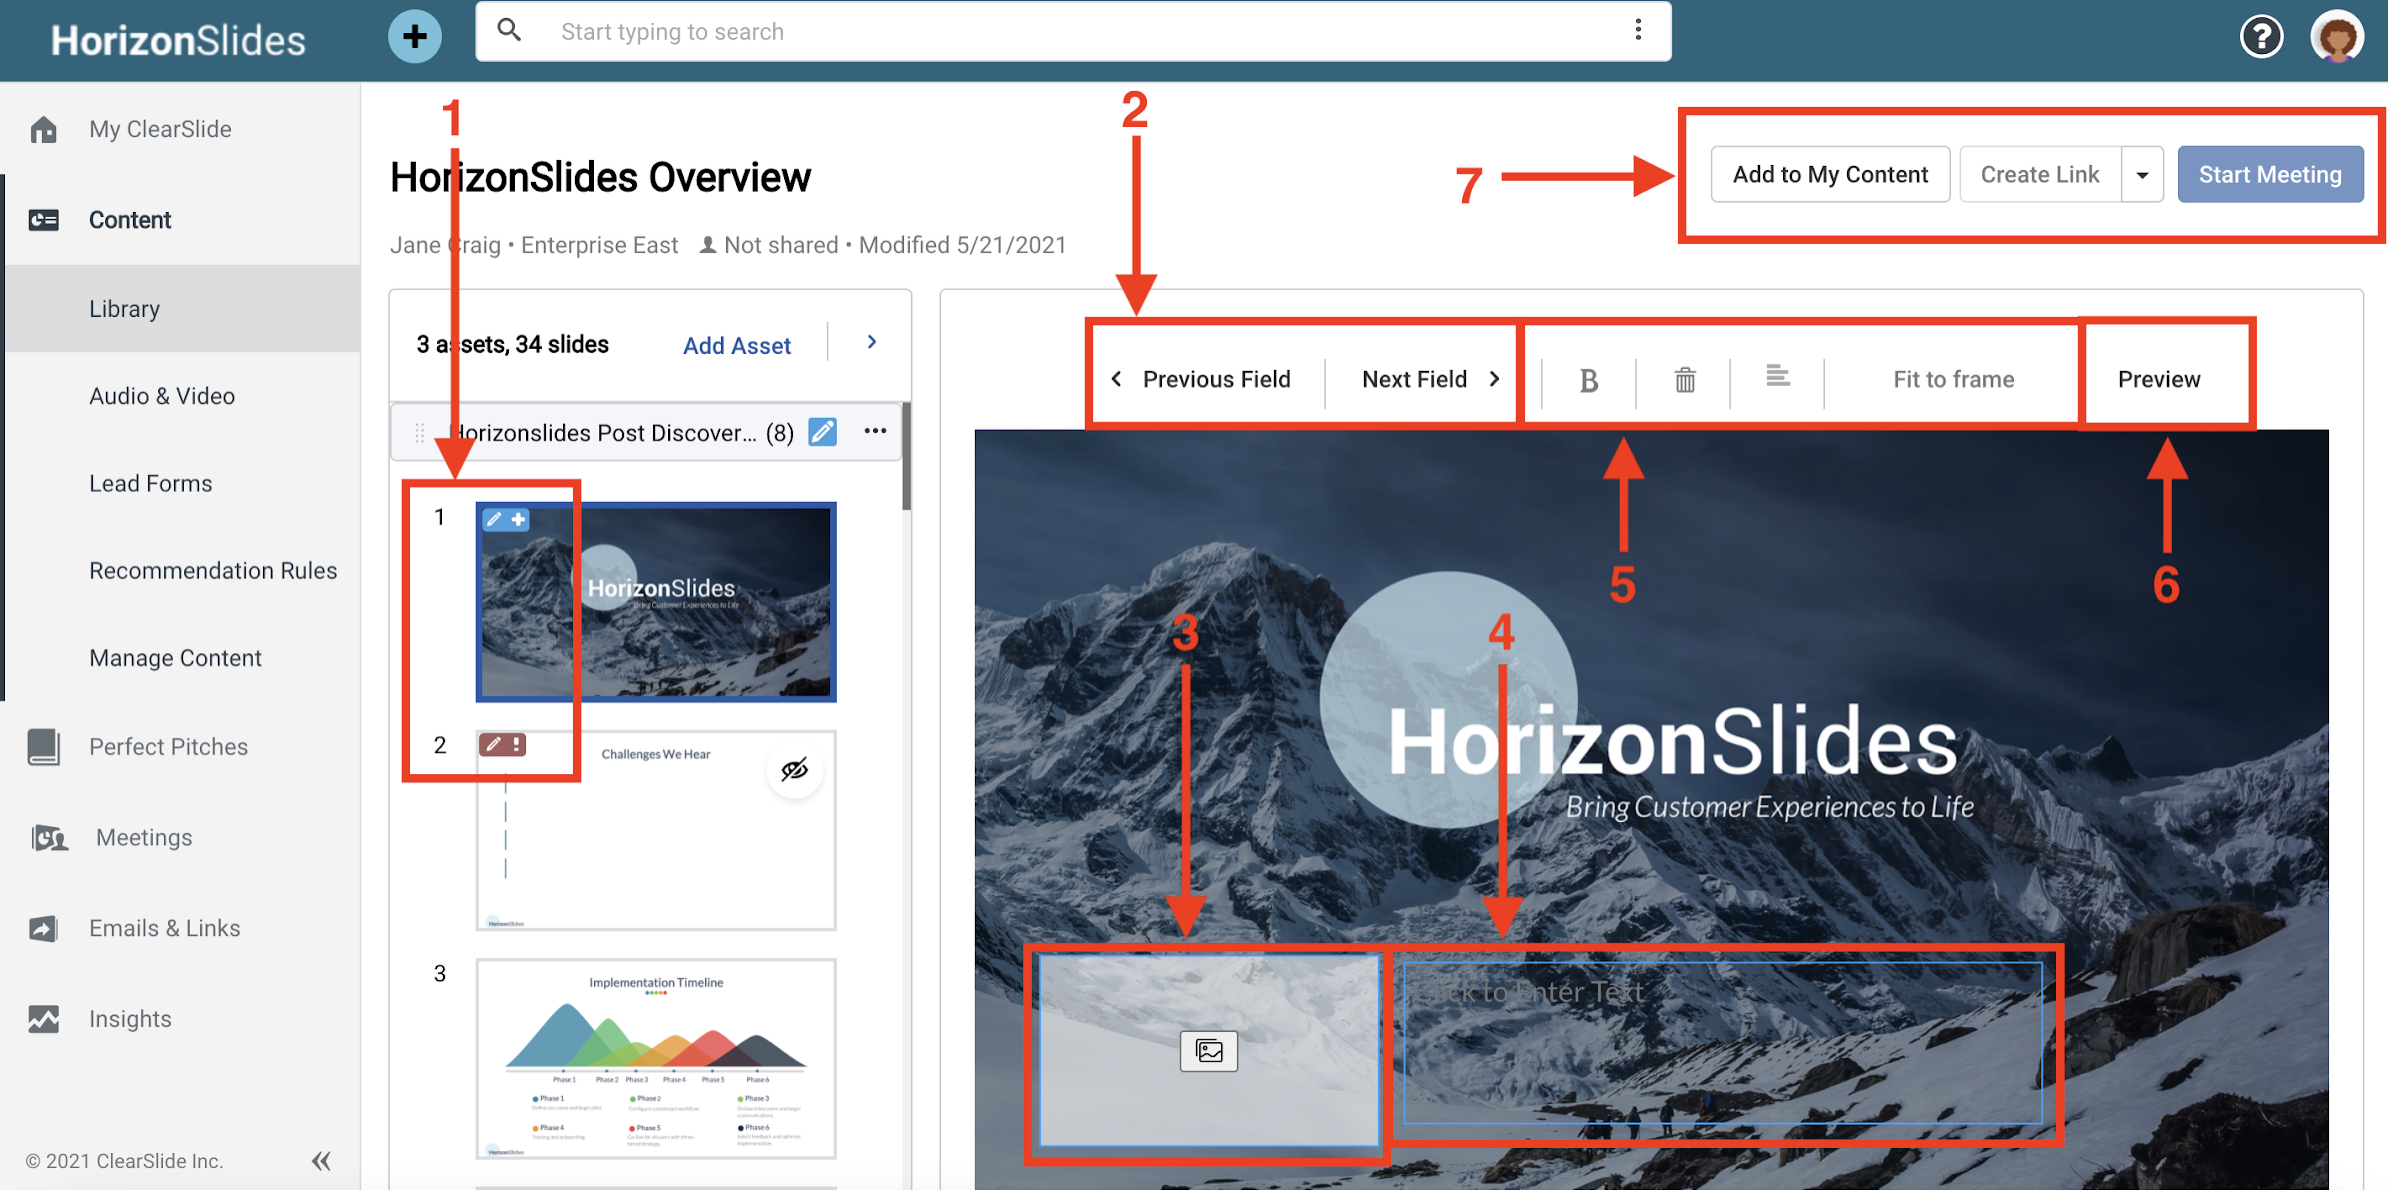
- Slides or pages that have editable elements are indicated in the top left corner of the preview thumbnail. Red indicates an element with required input, blue indicates an element is optional.
- Use the ‘Next’ and ‘Previous’ arrows to quickly navigate through the editable elements.
- To select an image from your desktop, click the image icon in the middle of the image element.
- For text fields, simply type the personalized information.
- There are options to bold and change the alignment of text as well as fit images to the frame.
- Click ‘Preview’ to see what your personalized asset will look like.
- Optionally, click ‘Add to My Content’ to save your personalized asset to your library if you plan to use it later or re-use the personalized version multiple times.
- Share it immediately through email or a live meeting by clicking ‘Create Link’, ‘Compose Email’ (in dropdown) or ‘Start Meeting’ respectively.
Note: if there are required fields in a slide or page, you will not be able to share the asset or start a meeting using it until you’ve customized them.
Comments
0 comments