Create a new Lead Form
Create your own Lead Form to request the information that is important to you so you can follow up with people who viewed your content.
Tip: For more information on how to use a Lead Form see this help article.
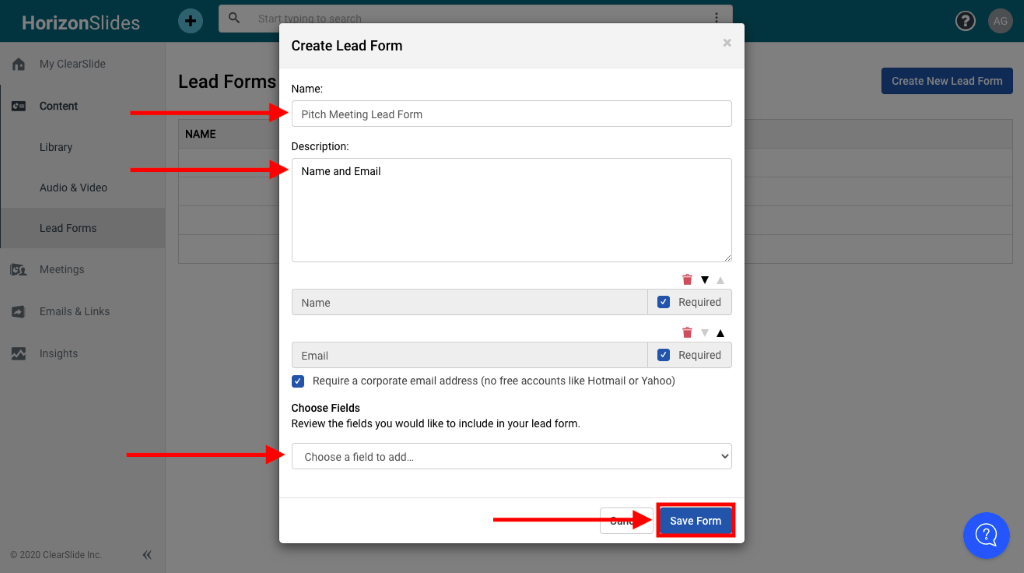
Navigate to the Lead Forms page from Content in the left menu. Click the Create New Lead Form button.
Give your Lead Form a name, provide a description, add the desired fields, mark them required or leave as optional, then click Save Form
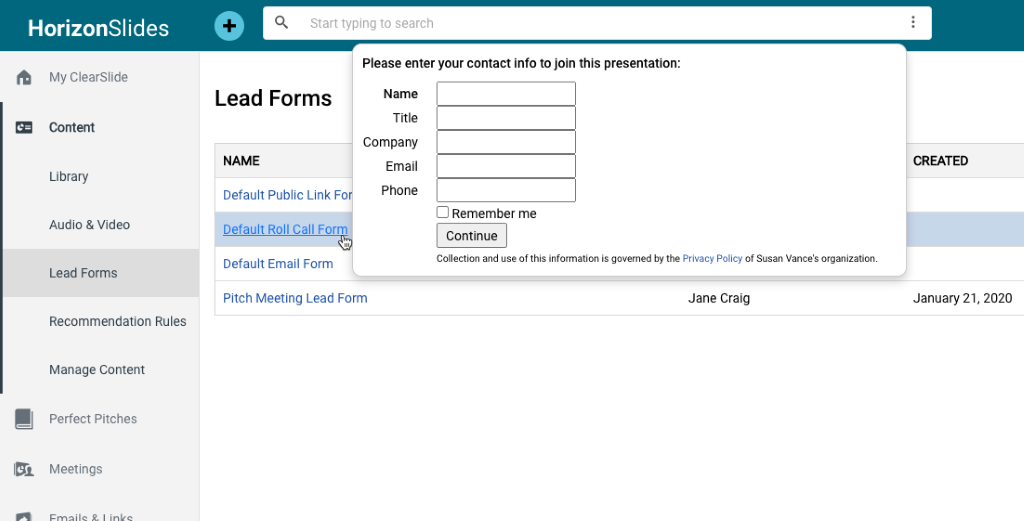
Preview fields in Lead Forms
Hover over the name of each lead form to preview the fields requested
Edit Lead Form
Click the name of the lead form you’d like to edit, make the desired edits then click Save Form

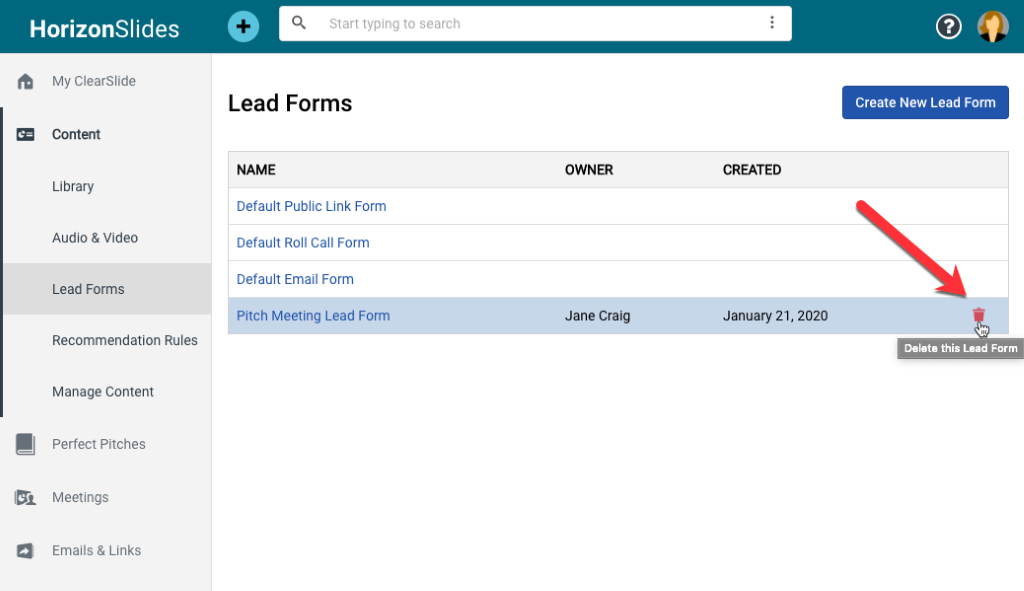
Delete Lead Form
Locate the lead form you’d like to delete, click the red trash bin icon on the right to delete the lead form
Set the default lead form (Admin access required)
For Meetings:
Under Group Based Permissions for both Organization and Group level settings, Admins can select a default roll call lead form for live meetings and set it to initiate at the start of meetings.
Note: ClearSlide collects name by default and meeting hosts can choose to collect additional info in the meeting, but this feature defaults ON a specific form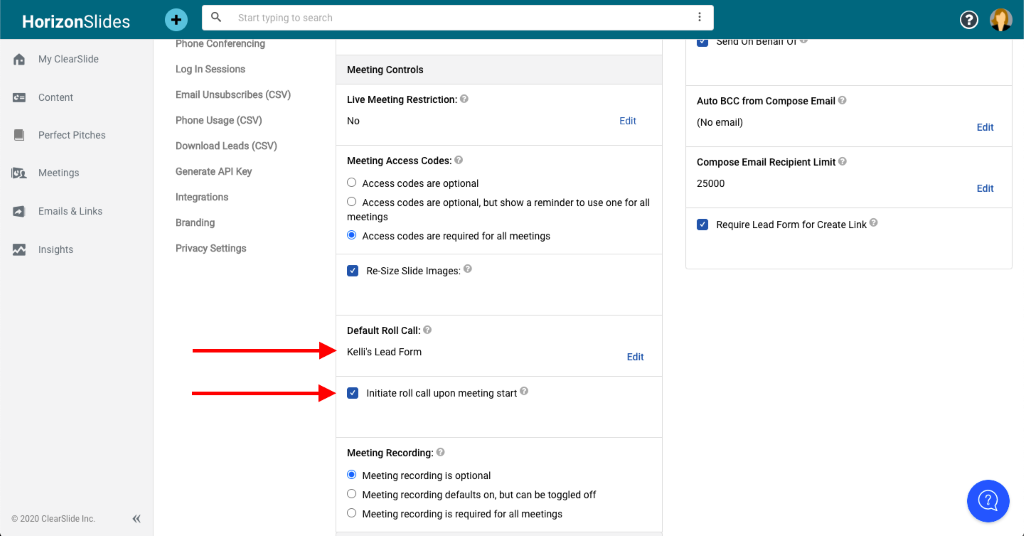
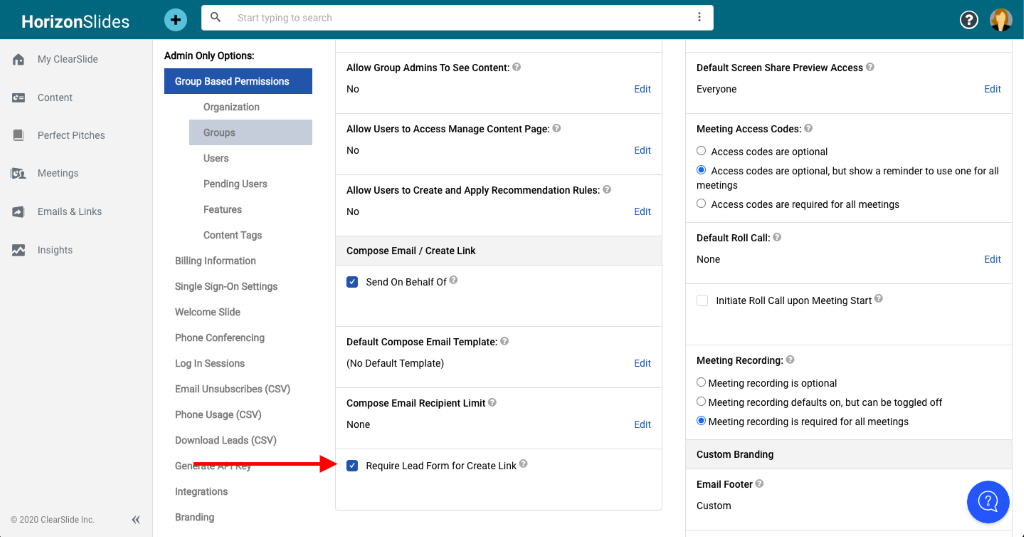
Require Lead Form for Links
For Links and Compose Email
Under Group Based Permissions for both Organization and Group level settings, Admins could require lead form for links for Compose Email and Create Link.
Download ALL of your lead info
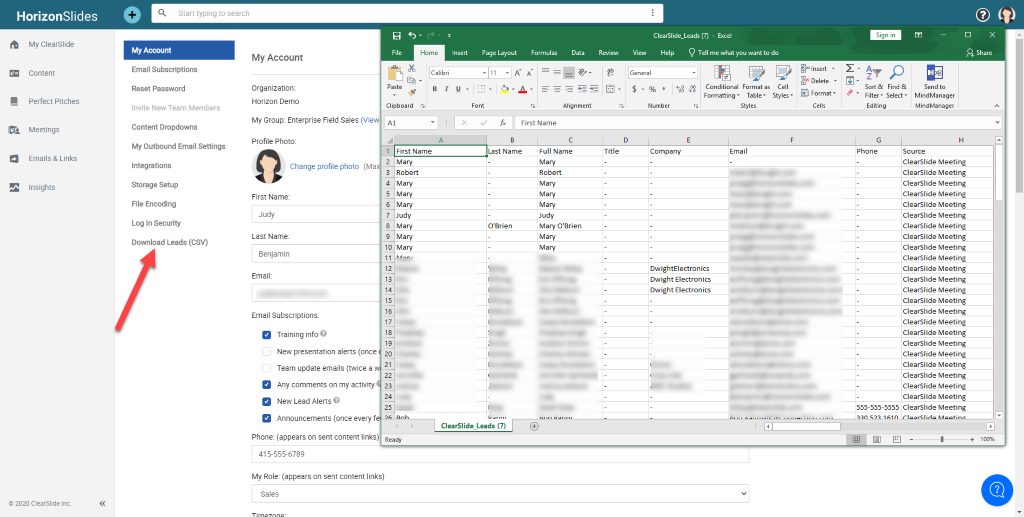
Go to My Account > Download Leads (CSV). The file will contain leads captured from your Live Meetings, Links and Email.
For an Admin user, the downloaded CSV file will include all leads for their team.
Comments
0 comments