Many organizations find that their users want to see Assets in a "folder" type system that's more similar to other content repositories they've used in the past. So, in addition to organizing Assets by "Tag", you have the option to create "Collections" with Assets as well. Creating Collections will help your users easily discover content in different areas defined by how your organization sells.
How you choose to organize your Collections is entirely up to you and your organization's particular needs/preferences. Some ways you could group content together would be by product type, sales stage, region or vertical. At ClearSlide, we like to organize our Collections based on sales stages (Ex: Prospecting/Discovery, Value/Solution, etc.) and also have Collections for Product, Internal, Training, etc.
In the Discovery phase with a prospect? Go to your Discovery collection and find all content purpose-built for those conversations. Select multiple assets and build a Presentation customized to the conversation you're going to have!
Create a new Collection:
- Go to your content library and click the "+" sign on the right of the assets you want to add to your Collection.

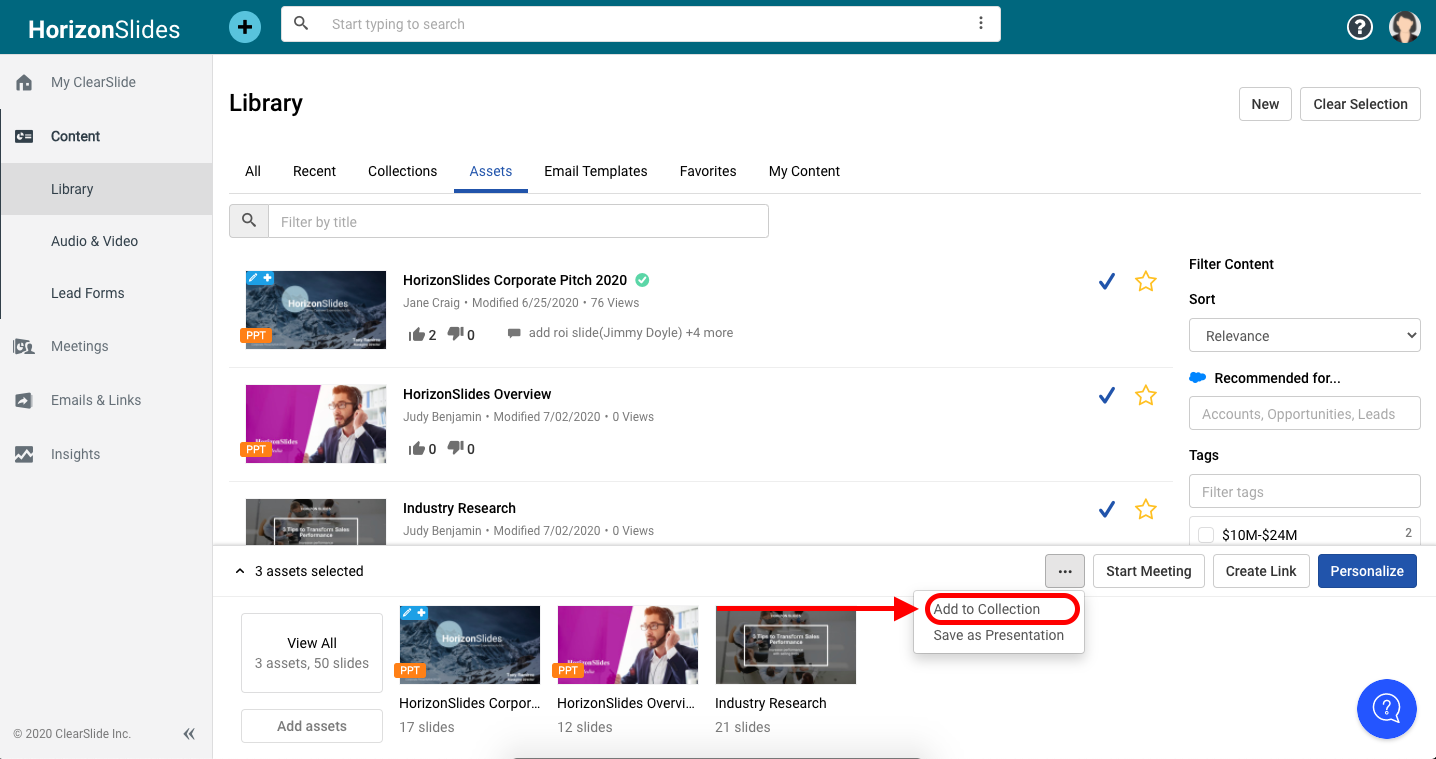
- The "+" will become "✔" and you will see your selected assets in a tray on the bottom of your window. From the tray, click the more options "..." button and select "Add to Collection".
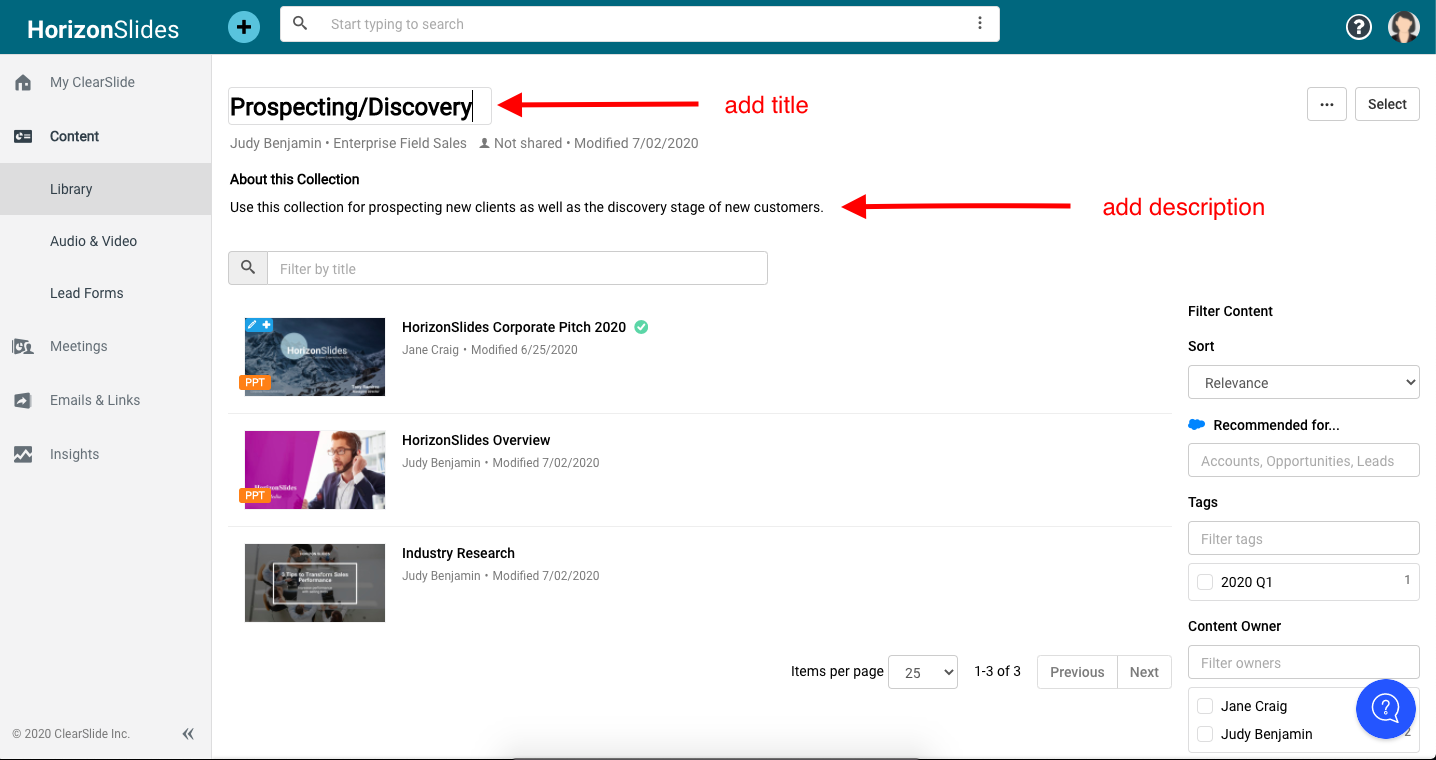
- Once your Collection has been created, it is recommended that you add a title and add a description. Adding atitlewill help you quickly and easily identify the purpose of your collection. Adding adescriptionwill provide context around how and why to use content in the collection.
- To locate your Collection, navigate to the Collections tab in your content library.
Add Assets to an Existing Collection:
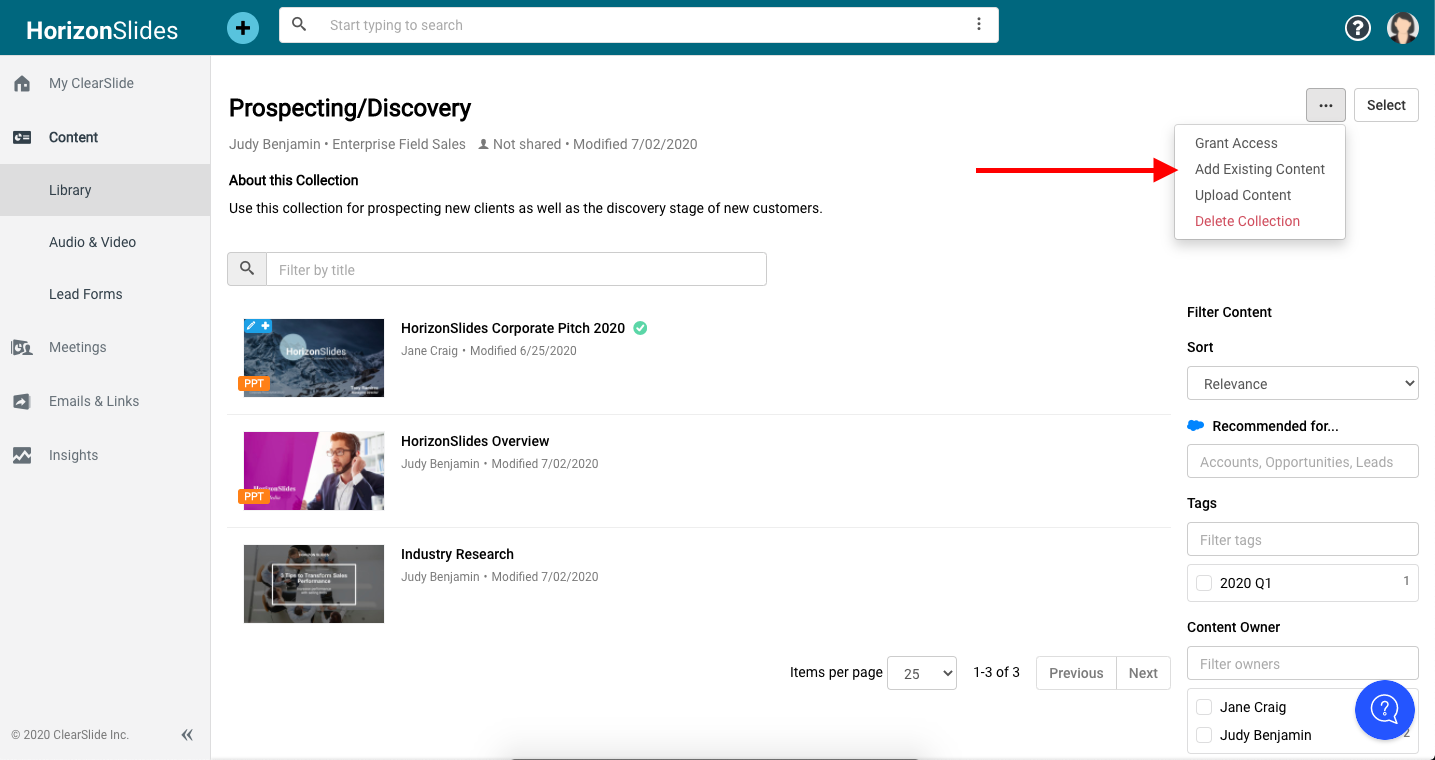
- In your collection's page, click the more options "..." button, and click "Add Existing Content".
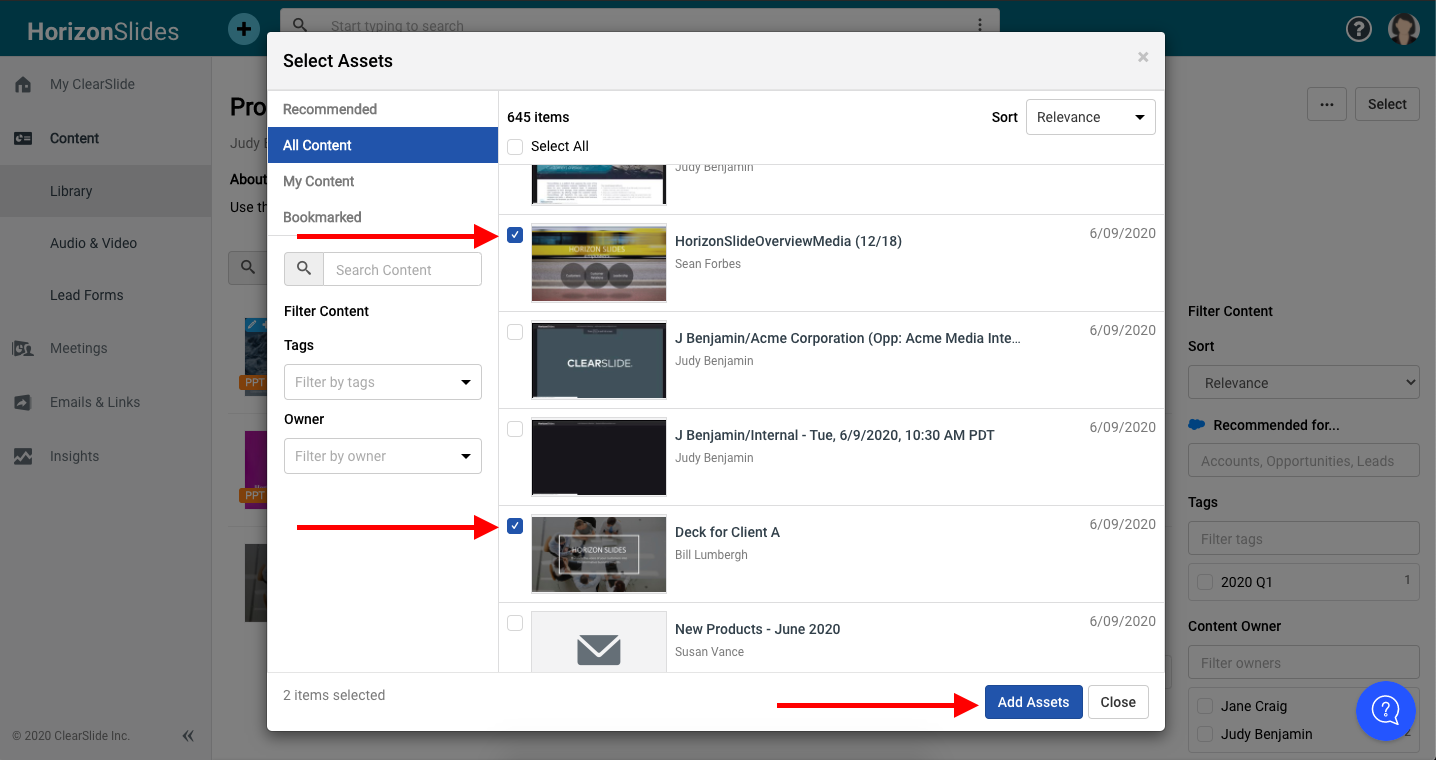
- In the pop-up Select Assets window, select the assets you want to add and click "Add Assets".
Remove Assets from a Collection:
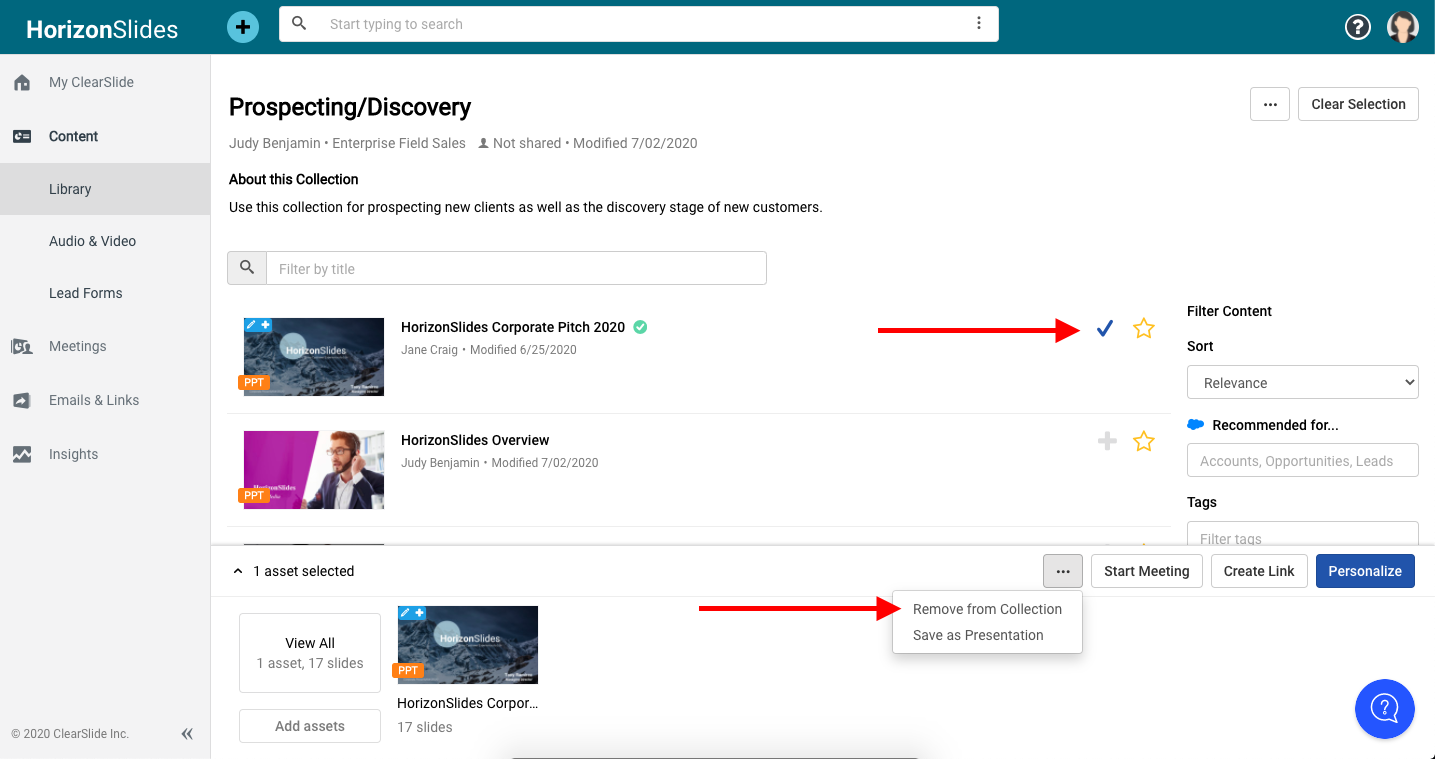
- From your collection's page, click the "+" of the assets you want to remove. The "+" will become "✔" to indicate the assets have been selected. Selected assets will appear in a tray on the bottom of your window.
- From the tray, click the more options "..." button, then click "Remove from Collection".
Create a Presentation from a Collection:
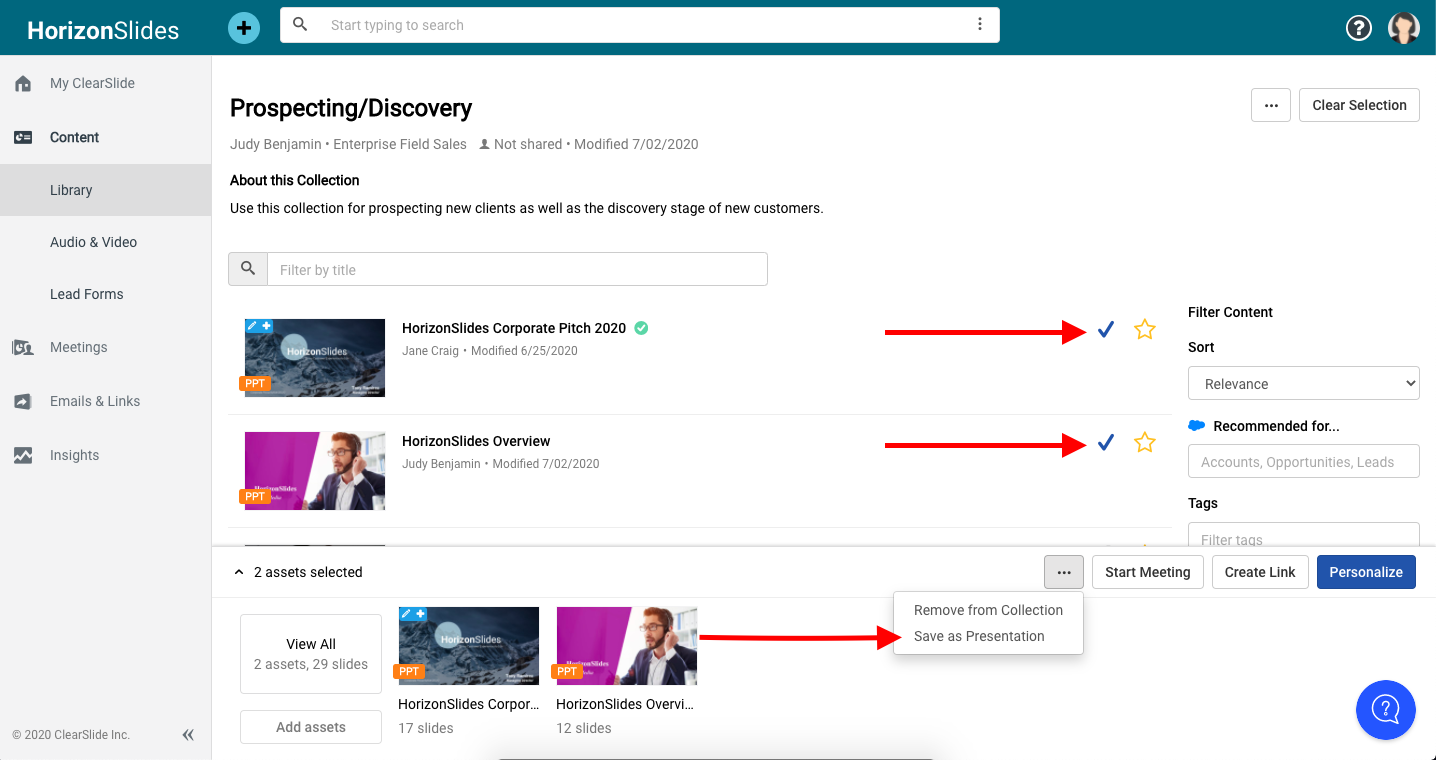
- From the collection's page, click the "+" of the assets you want to remove. The "+" will become "✔" to indicate the assets have been selected. Selected assets will appear in a tray on the bottom of your window.
- From the tray, click the more options "..." button, then click "Save as Presentation"
Note: By default, a collection is only viewable to the user who created it - though you are able grant access to other users.
Publish Your Collection:
If you are a ClearSlide admin, you can Publish a Collection to the entire team.
When on the Collection Detail page, in the upper right corner, click the more options "..." button. Click "Publish Collection" to make it visible to the entire team in the Content Library. 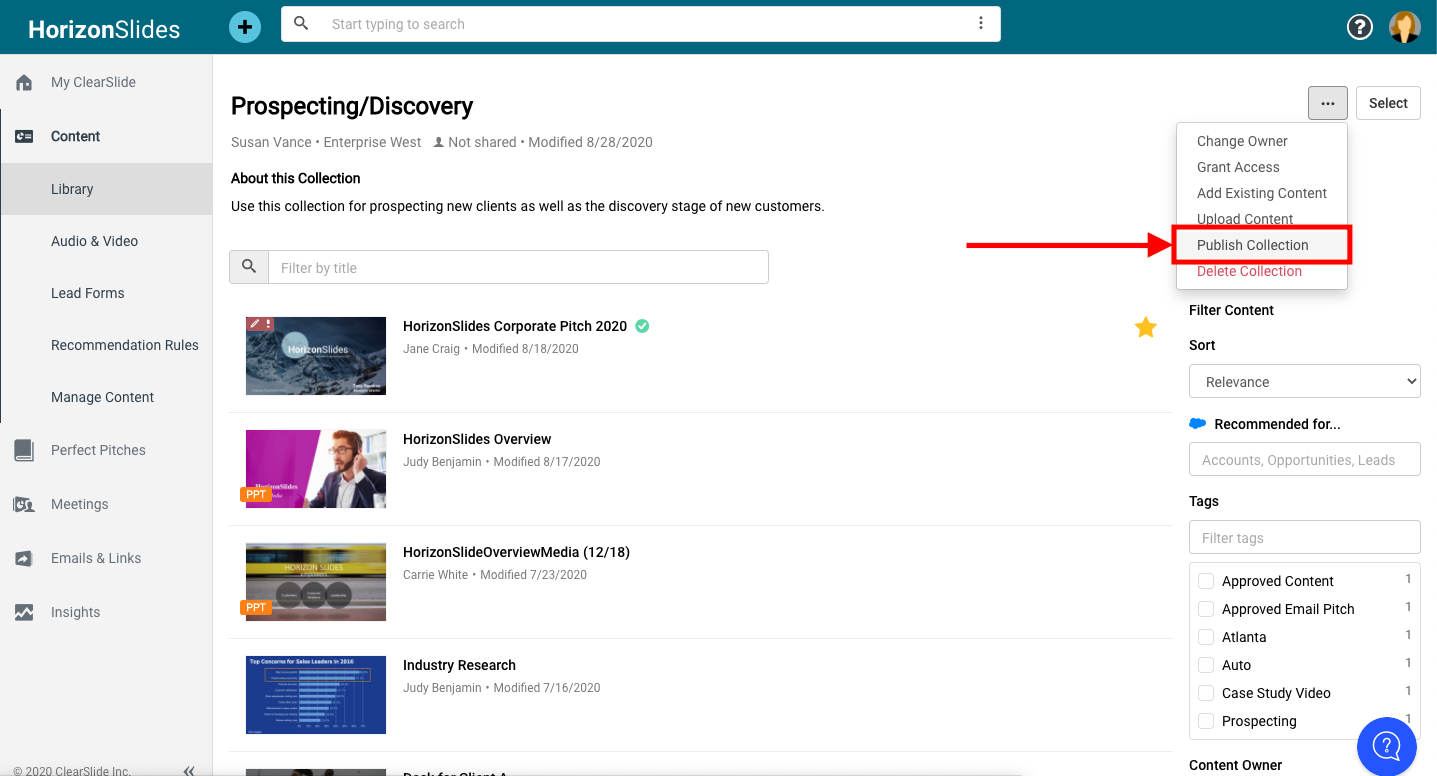
Comments
0 comments