Recorded customer calls can contain useful information including product feedback and examples of great sales pitches. The video playback and clipper features let you quickly jump to key moments of recorded calls and share them with colleagues and customers as short video clips either via email, link or the Perfect Pitch Library.
Getting started
Locate the recorded call that contains the information you wish to share.
- Your own recorded calls are listed in your my ClearSlide view.
- To find a team member’s recorded call, search for them by name in the Team Insights dashboard. Click on their name to open their activity profile where their engagements, including recorded calls are listed.
When you find the recording click on it to open its Meeting Recap.
Using Playback
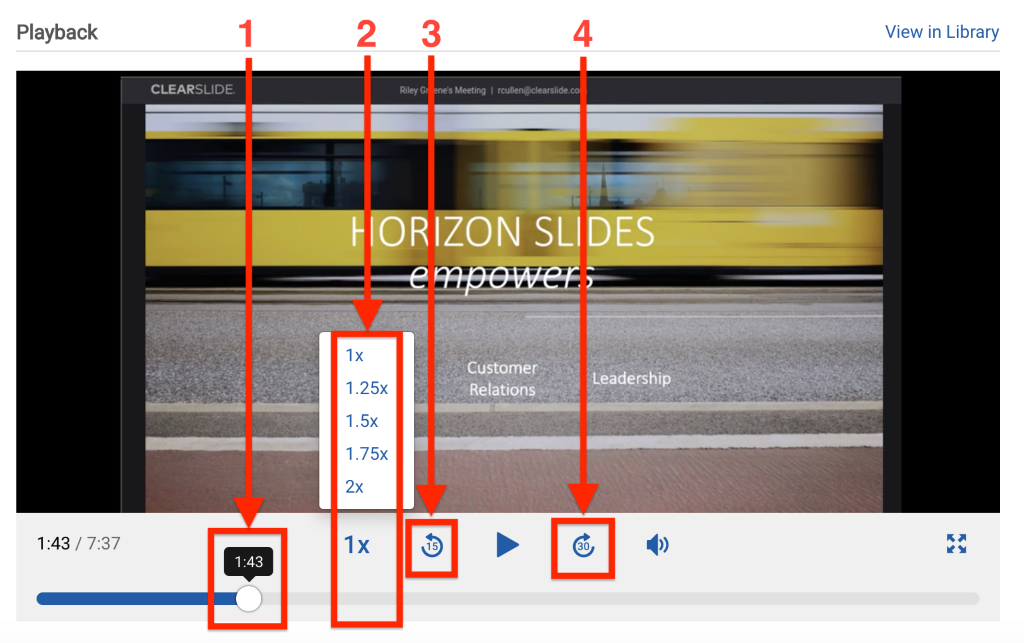
The Playback feature lets you skip or speed through entire portions of recordings to efficiently find the segments you’re interested using the following tools:
- Jump to a specific time of a recording by moving the dial.
- Increase playback speed by 1.25x, 1.5x, 1.75x or 2x.
- Skip back 15 seconds.
- Skip forward 30 seconds.
Using the clipping feature to share segments of recordings
The video clipper lets you extract a section of a video to share with colleagues or customers. To access it click the ‘Share’ button at the top right corner of the Meeting Recap.

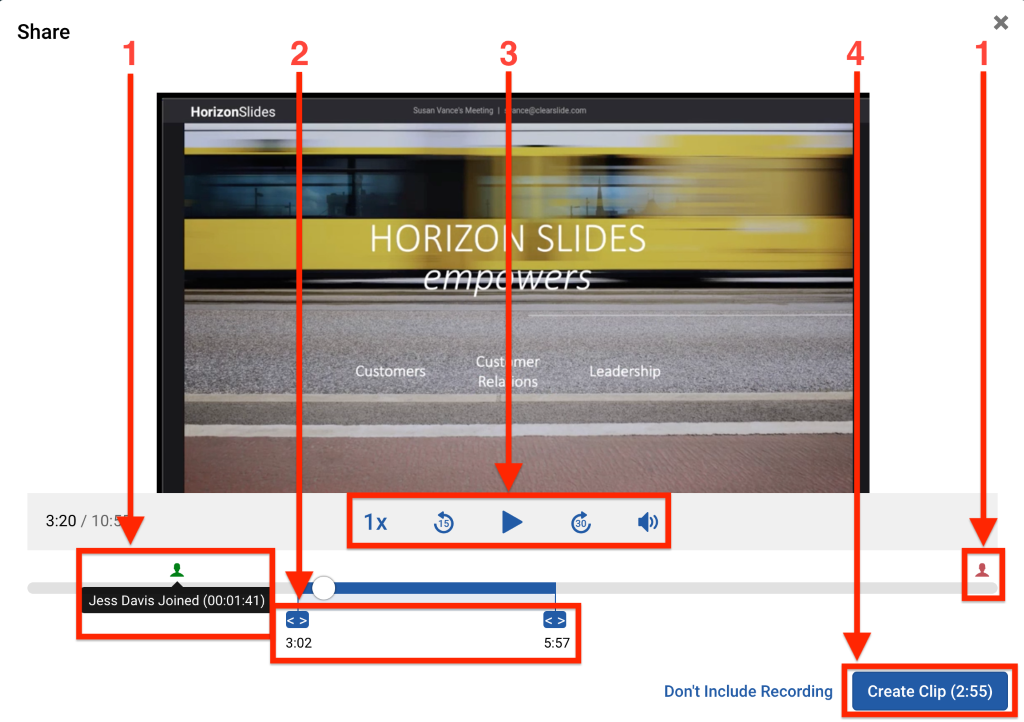
In the clipping modal:
- See when attendees joined and left the meetings.
- Slide the clipping dials to where you’d like your clip to begin and end.
- Play your selection to ensure you’ve captured the desired information to be shared. It’s worth noting that the speed control features are also accessible in this view.
- When you’re happy with the segment you’ve selected to be clipped click ‘Create Clip’ (this button shows the length of your selection in brackets).
Sharing clips as links
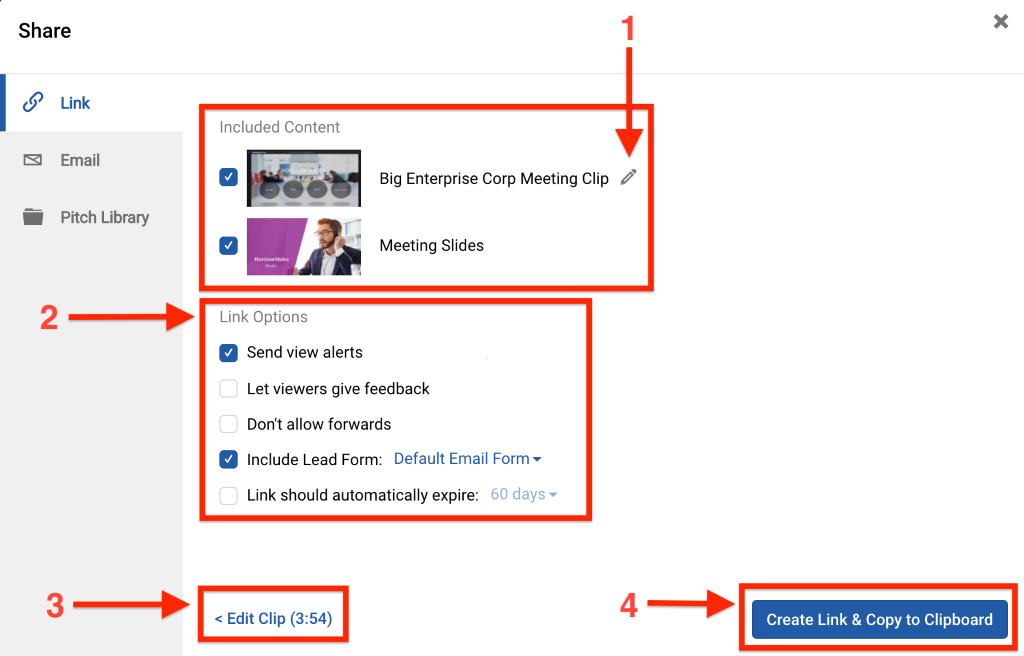
Clicking ‘Create Clip’ opens by default the ‘Link’ dialog that lets you share the video clip as a link.
- Edit the name of your Clip. Note that you have the option to include the meeting slides as well as your clip. If you don’t want to include them, uncheck the box to the left.
- Configure your link options:
- Send view alerts: Turn on to be alerted when your recipients view your clip.
- Let viewers give feedback: Allow viewers to leave comments on what you shared.
- Don’t allow forwards: Select to prevent recipients from sharing the clip.
- Include Lead Form: Select to add a lead form. The drop-down menu lets you choose from a list of saved lead form templates.
- Link should automatically expire: Set a time limit for how long the link will work
- Select ‘Edit Clip’ to return to the clipping tool to change your clip selection. For instance, if you decide your clip is too long.
- Select ‘Create Link & Copy to Clipboard’ to generate a link for your video clip that you can paste in your communication channel of choice to share with the intended recipient(s).
Sharing clips via email
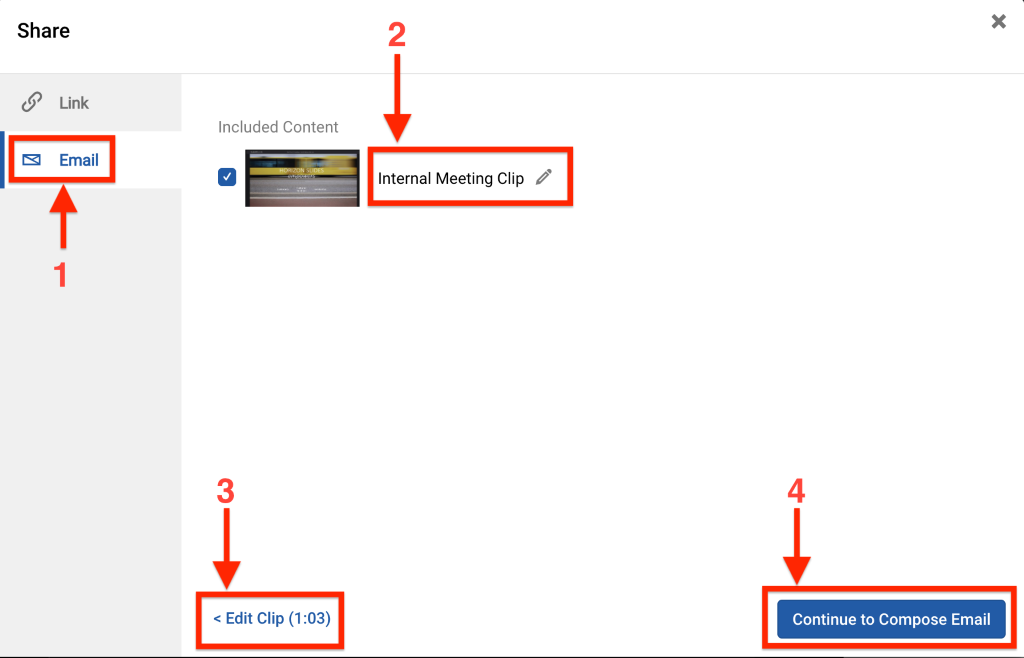
To share your clip via email:
- Click ‘Email’.
- Edit the name of your clip.
- Select ‘Edit Clip’ to return to the clipping tool to change your clip selection.
- Clicking ‘Continue to Compose Email’ takes you to the ‘Compose Email’ page where you can enter recipients, upload recipient lists, write text, access email templates, style your email, and send it. Learn more about composing emails in ClearSlide.
Adding clips to the Perfect Pitch Library
Create video clips of amazing sales pitches and share them with your team through the Perfect Pitch Library.
To share clips to the Perfect Pitch Library:
- Click ‘Pitch Library’.
- Edit the name of your clip.
- Add relevant tags to make the clip discoverable in the Perfect Pitch Library.
- Edit the use and edit access permissions for the clip. Options are to provide access to everyone, only owner (yourself), or specific groups or users.
- Select ‘Edit Clip’ to return to the clipping tool to change your clip selection.
- Click ‘Add to Library’.

View engagement analytics
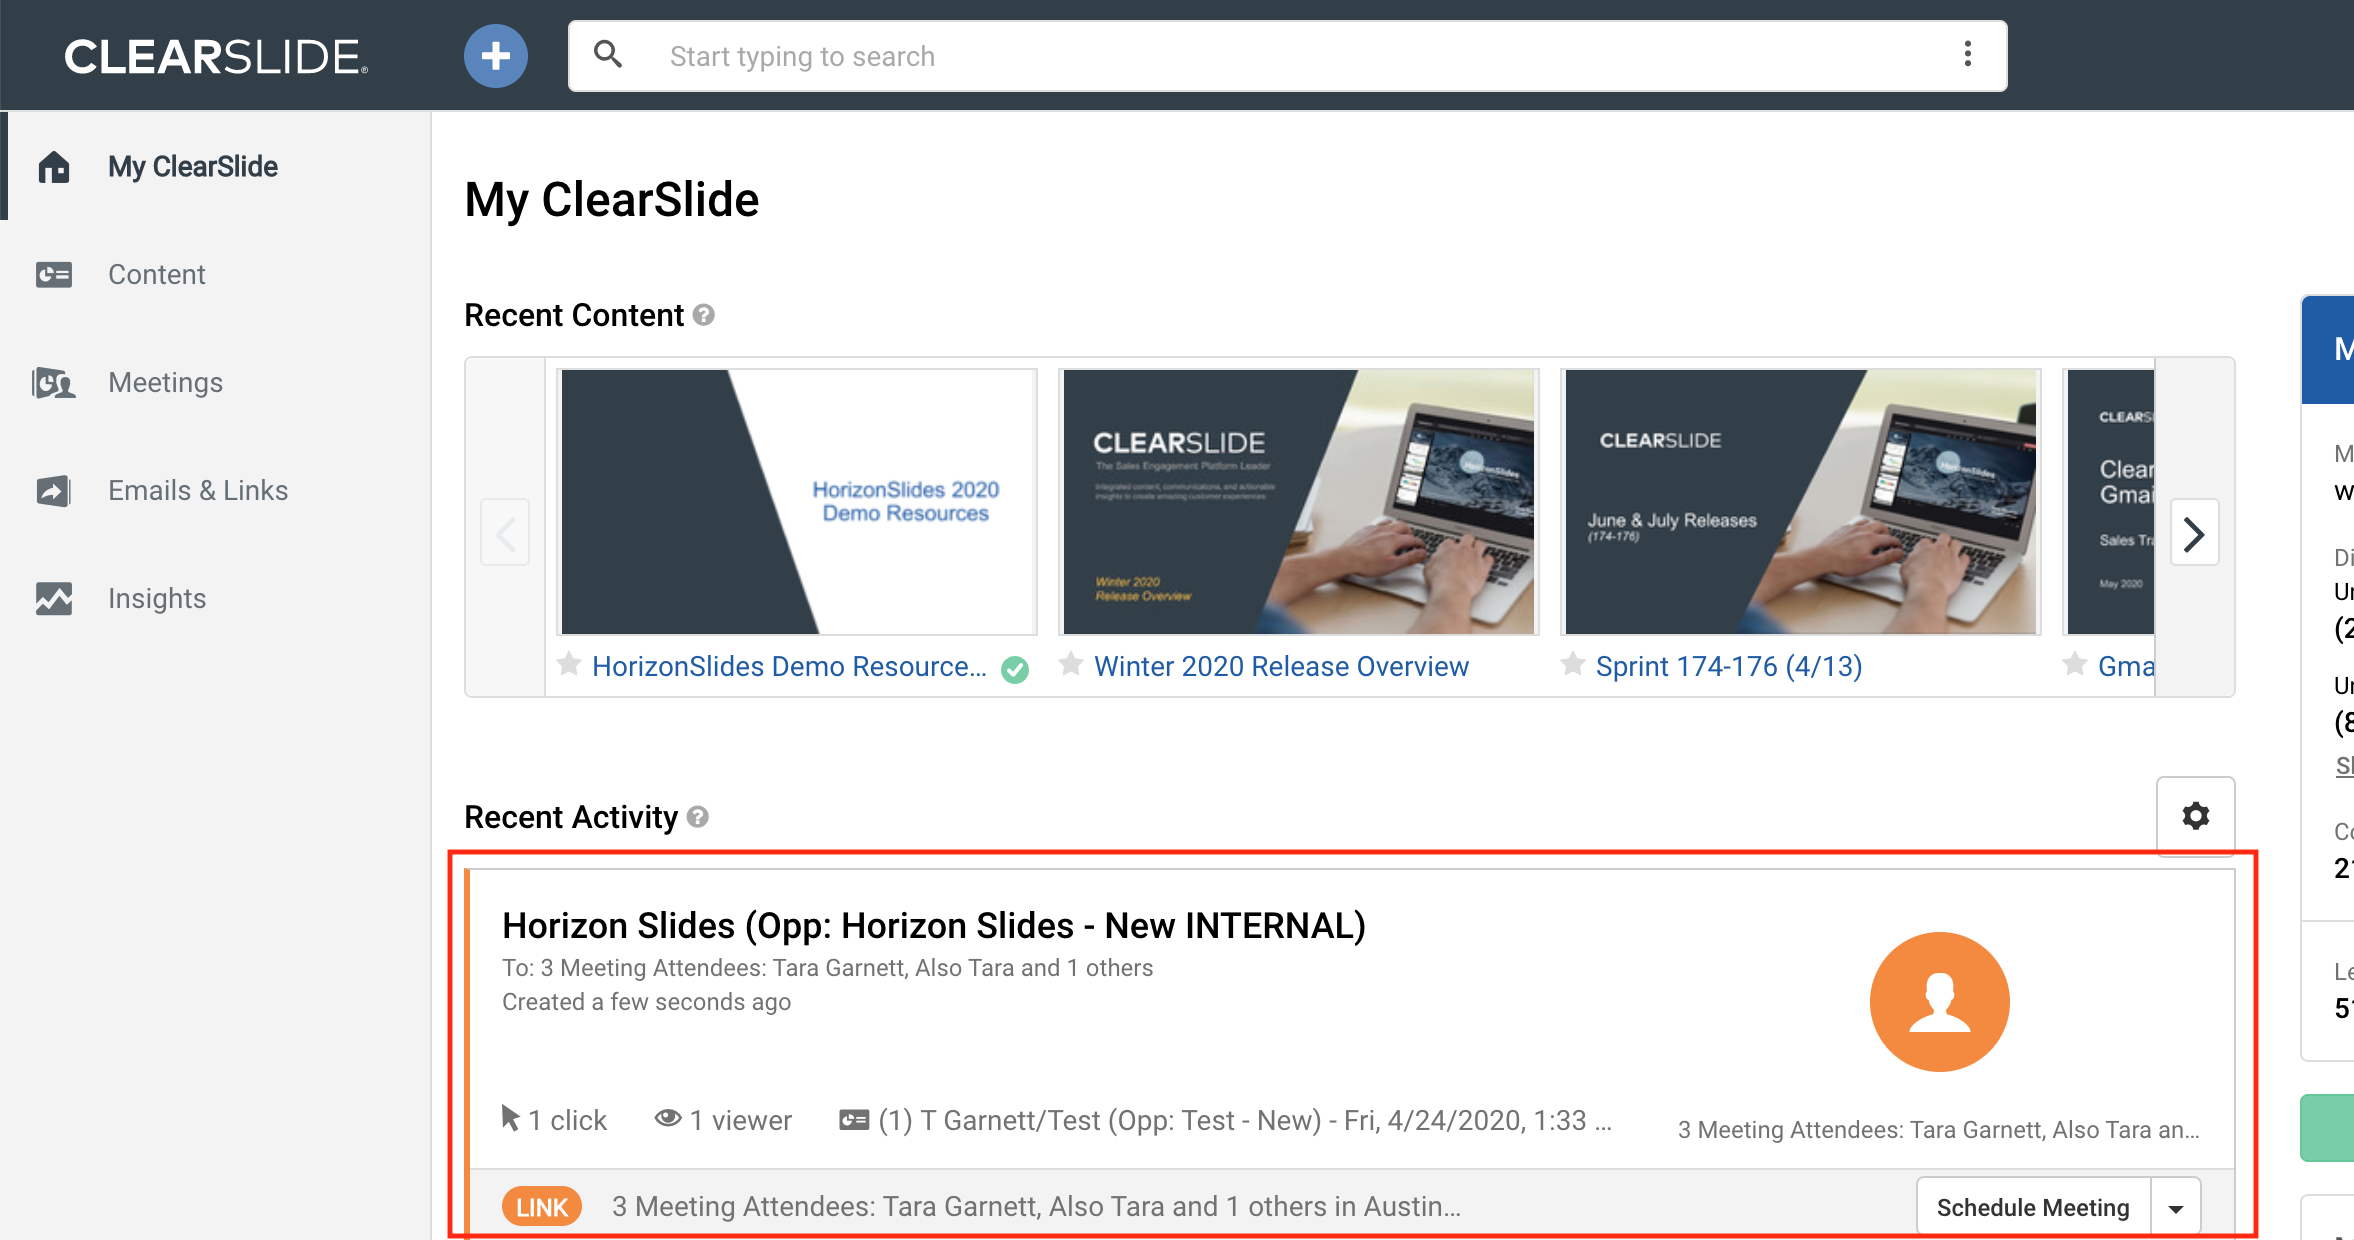
As with any content shared using ClearSlide, understand in real time how your recipients are interacting with clips you shared via link or email. Find the link you created in your Activity Feed on your My ClearSlide page or on the Sent Emails and Links page to see each viewer and how long they viewed your clip for.
Comments
0 comments