Courses let you create bite-sized training programs, using your content and quizzes.
*Note: Before creating your course, make sure you have your course assets available in Zunos. Course assets would be any learning material, PDF, videos etc which you would like to include in the course and also any Quizzes that you will be using as part of the assessment.
After you've created your course you can always come back and add or remove course assets at a later stage.
Create your own Course:
- Click Drive, then click Add Content
- Click Course

3. Give your course a name and click create
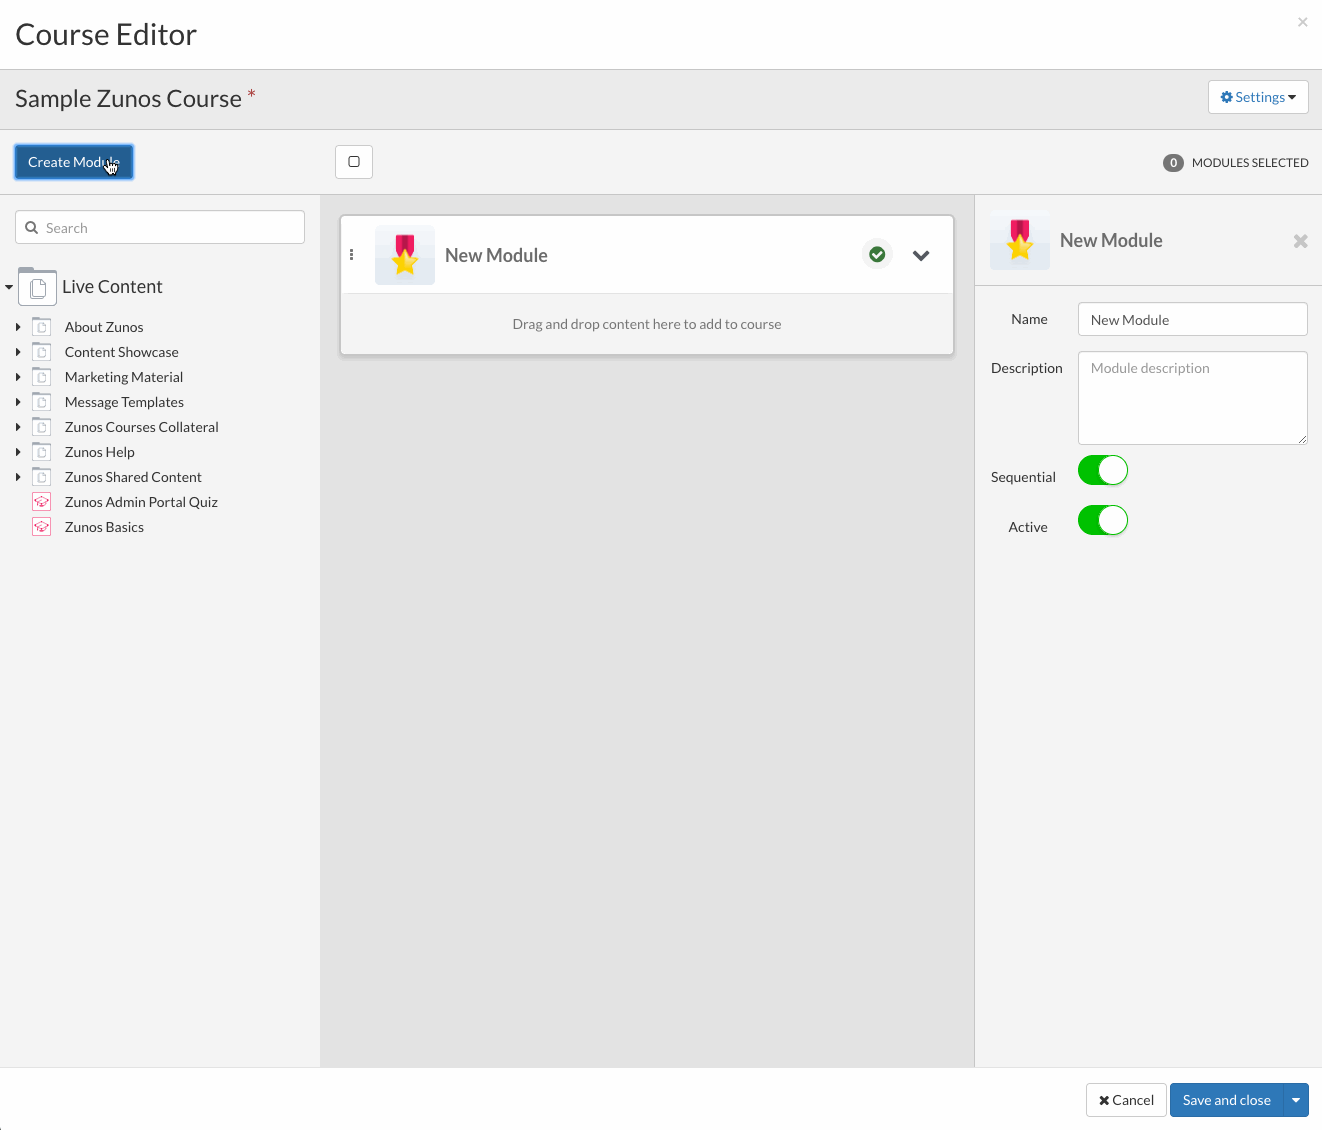
4.The Course Editor will open
5. Click Create Module
6. A new module will be created
7. To edit the module, click on it and a settings panel will appear. here you can edit your course name, description, active/inactive and if the course elements will follow a sequential order by the end-users.
*Note: Sequential here denotes the order the module will follow based on the order that has been set.
8. You can change the module icon by clicking the icon and clicking the pencil icon
9. Upload your new logo or use an existing image

Adding Content to your Module
1. To add learning material to your new course module, you will have access to your content from the Drive Content panel on the left side of the screen.
2. Drag and drop your content elements from Drive across to the new module
3. The content items can easily be rearranged after they have been moved across. This can be done by clicking the 3 dots on the left-hand side of the module created and moving the content to the desired location.

Course settings and allocating users to your course
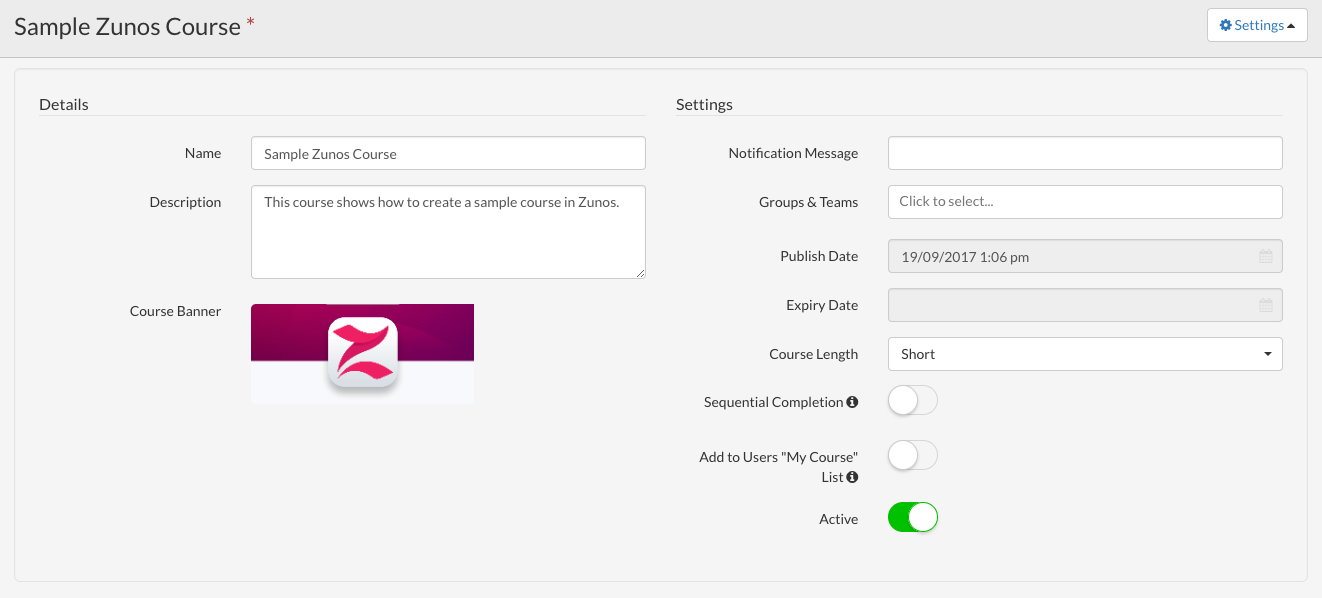
1. To allocate your users to your course, click the Settings on the top right-hand corner
2. You can amend the Course name and description here
3. You can also create a custom banner image, click Add Banner and upload your new logo or use an existing image
4. Set your course notification message. This will be used as the default notification message when alerting users to the new course via the Notify option in Drive.
5. Allocate your Groups and Teams. If your course is available for all users, you may leave this field empty.
6. Set the course Publish and Expiry dates if required
7. Set your course length Short, Medium, Long. This is an arbitrary time estimate indicator shown to your users to indicate how much time needs to be allocated to complete the course.
8. Sequential Completion toggle: Course modules will be locked until the previous module has been completed
Note: With Sequential Completion toggle, please take note that if you'd like to ensure users view the content first, don't attach content to the quiz questions. If the content is linked to quiz questions, users will see the "take quiz" banner that is presented if a content is linked to a quiz which will allow users to skip ahead.
9. The Add to Users "My Courses" Listoption means that learners will see this course in their 'My Courses' list. If this setting is off, learners have the option to add this course to their list.
10. Finally, set your course to Active or Inactive

Viewing Course Progress
- Click the Show Users Progress button located on the course module

2. A listing of your users undertaking the course displays the progress of your users against each other

Comments
0 comments