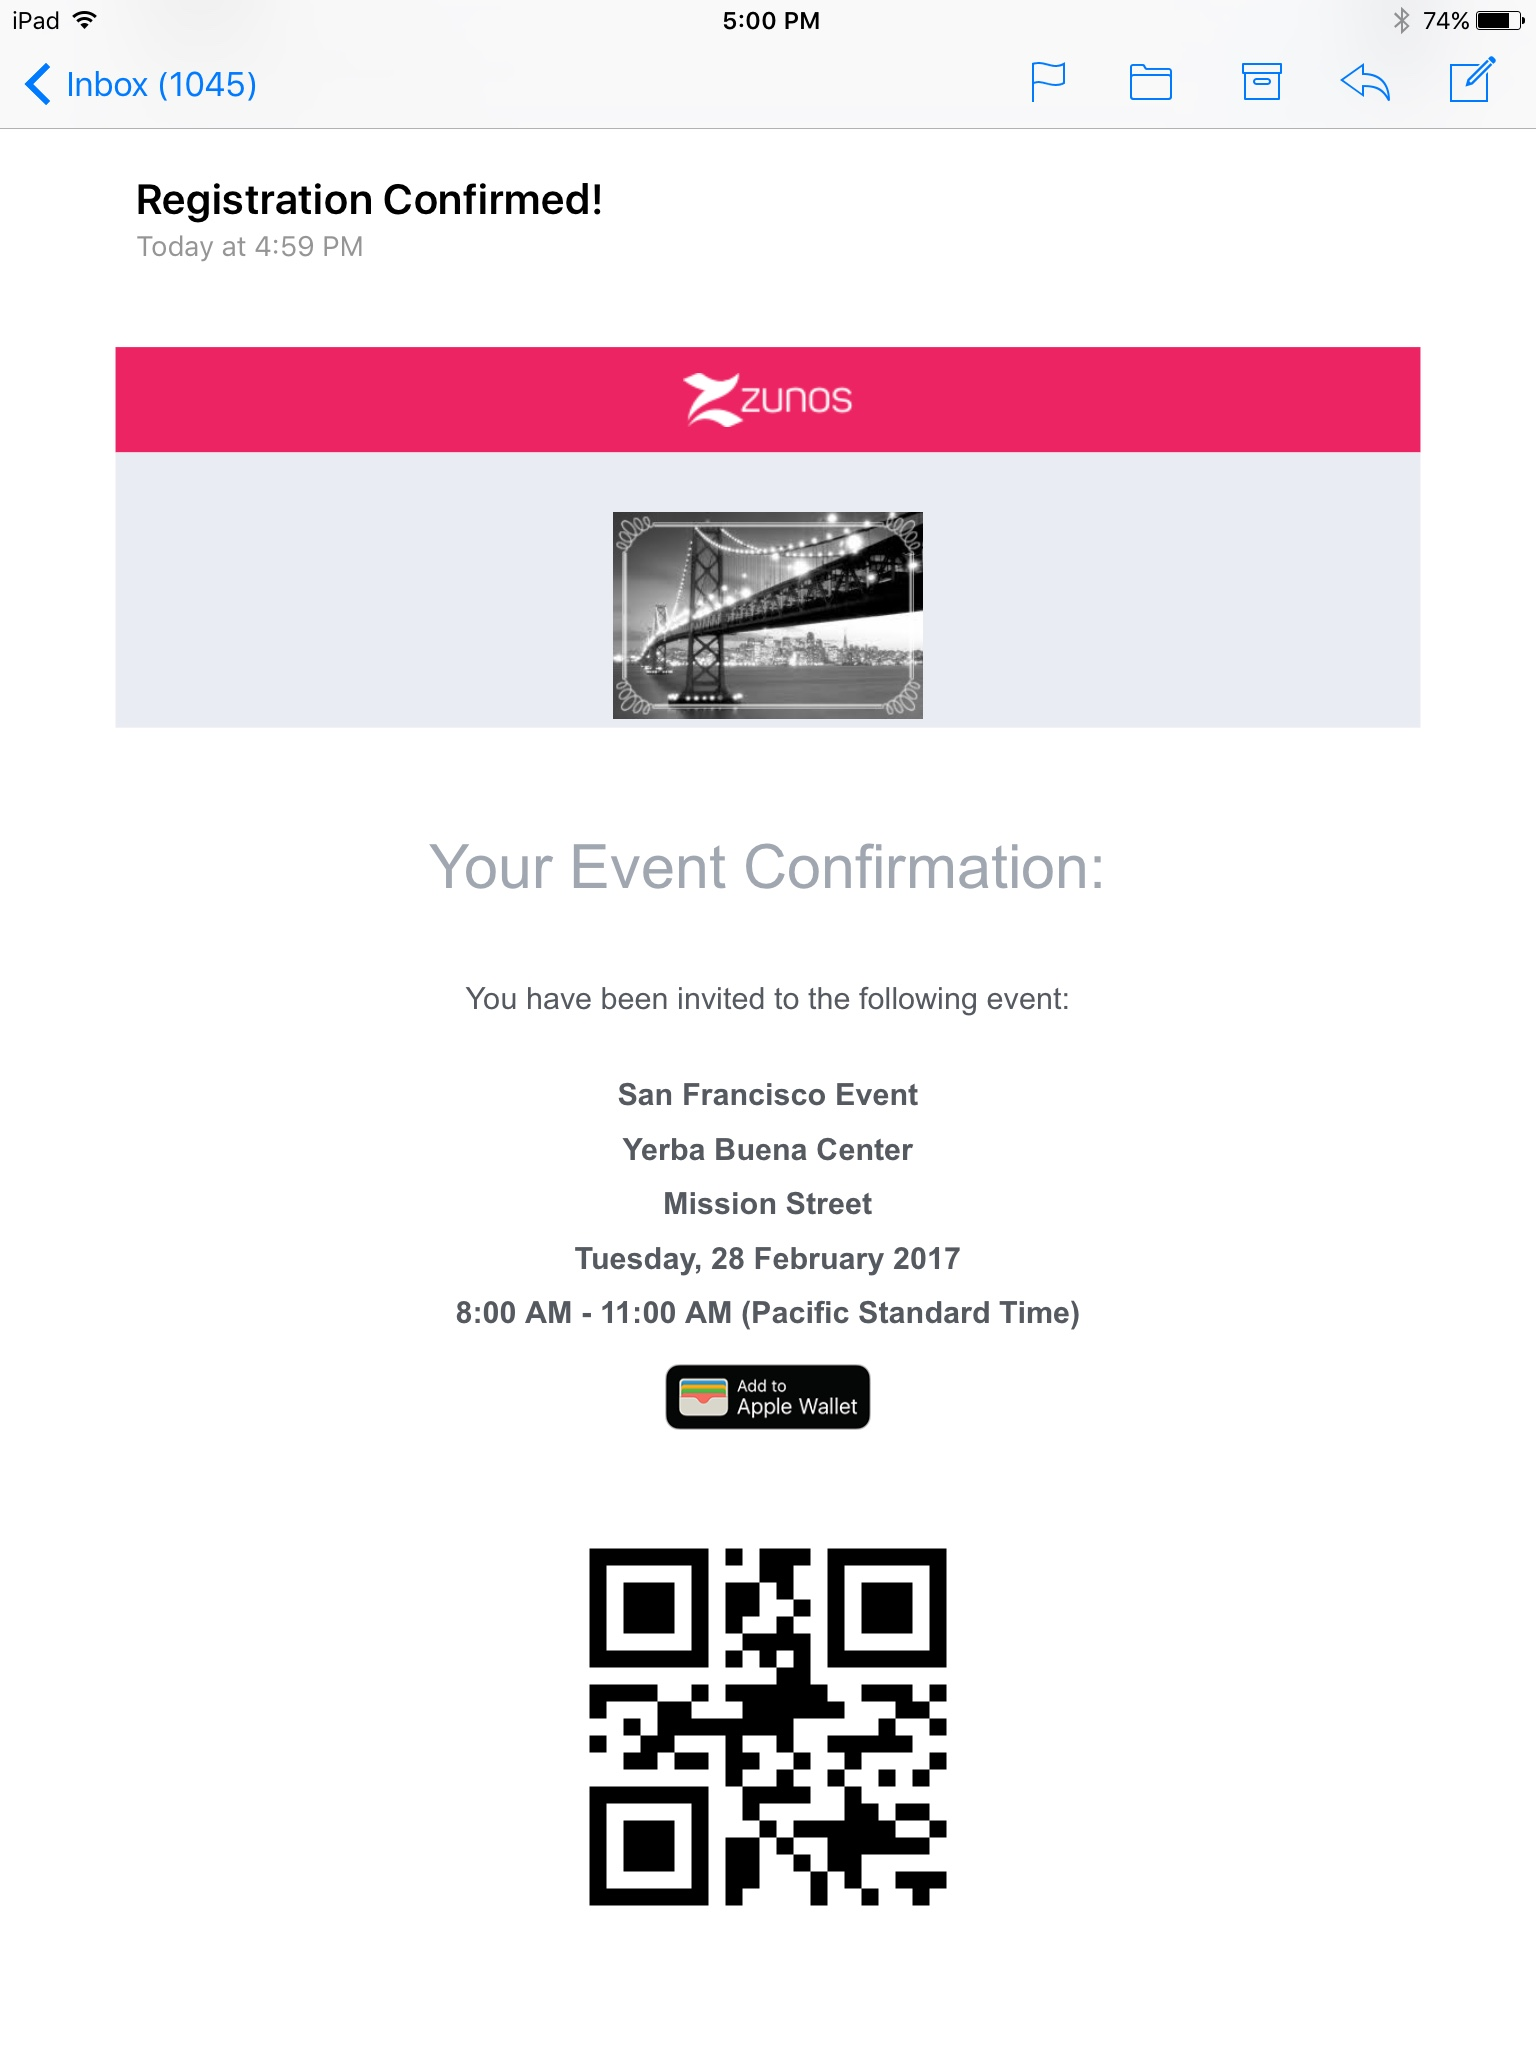
Equipping an Event Confirmation Template with a QR Code allows for quick and easy, in-person attendance recording.
Add a QR Code to an Event Confirmation Template
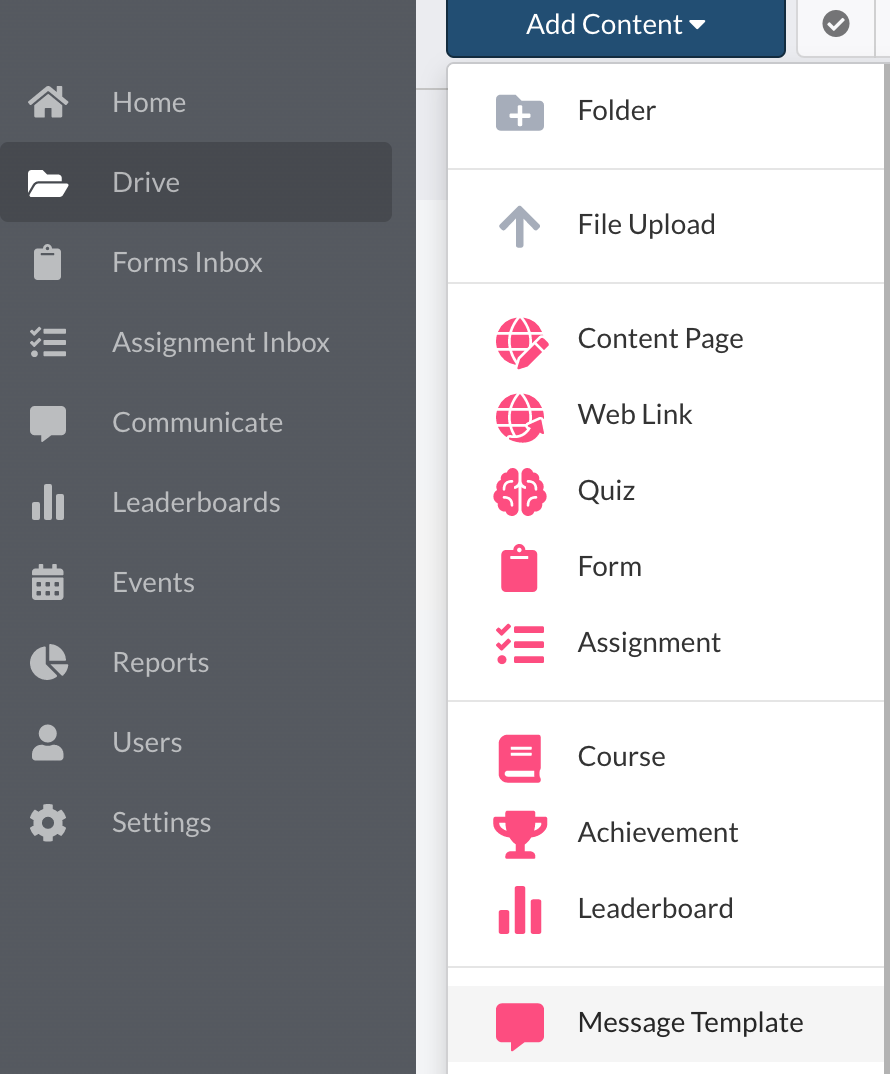
- Navigate to "Drive" from the main menu on the left side panel.
- Select "Add Content" at the top of the page.
- Select the "Message Template" from the drop down menu:

- Generate the desired Message Template
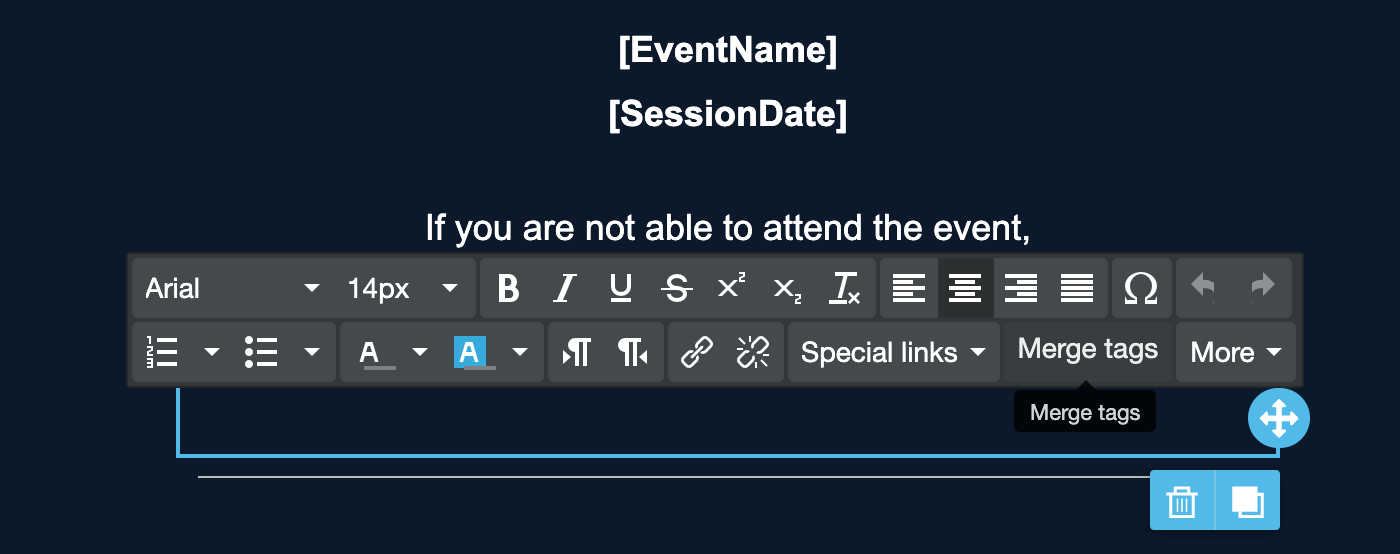
- Upon creation, administrators will be able to customize different sections of the template. Simply select the section and a toolbar will appear similar to the following:

- Select the "Merge Tags" Option and select the "QR Code" Option. This will add a QR Code to the user's event confirmation. Users will receive a confirmation similar to the following:

What happens next
At the event:
- When the user attends an event, they will display their QR code to be scanned by the event coordinator by using the Zunos app.
- Once the QR code has been scanned the Registrant Details are displayed.
Comments
0 comments