Administrators have the ability to add/delete new users into the platform, as well as, grant administrator status to users already existing within Zunos.
Onboard A New User
- Navigate to the User section on the application tab bar on the left of the screen.
- Navigate to the User's Tab in the section.
- Click the "New User" button on the top left of the screen.
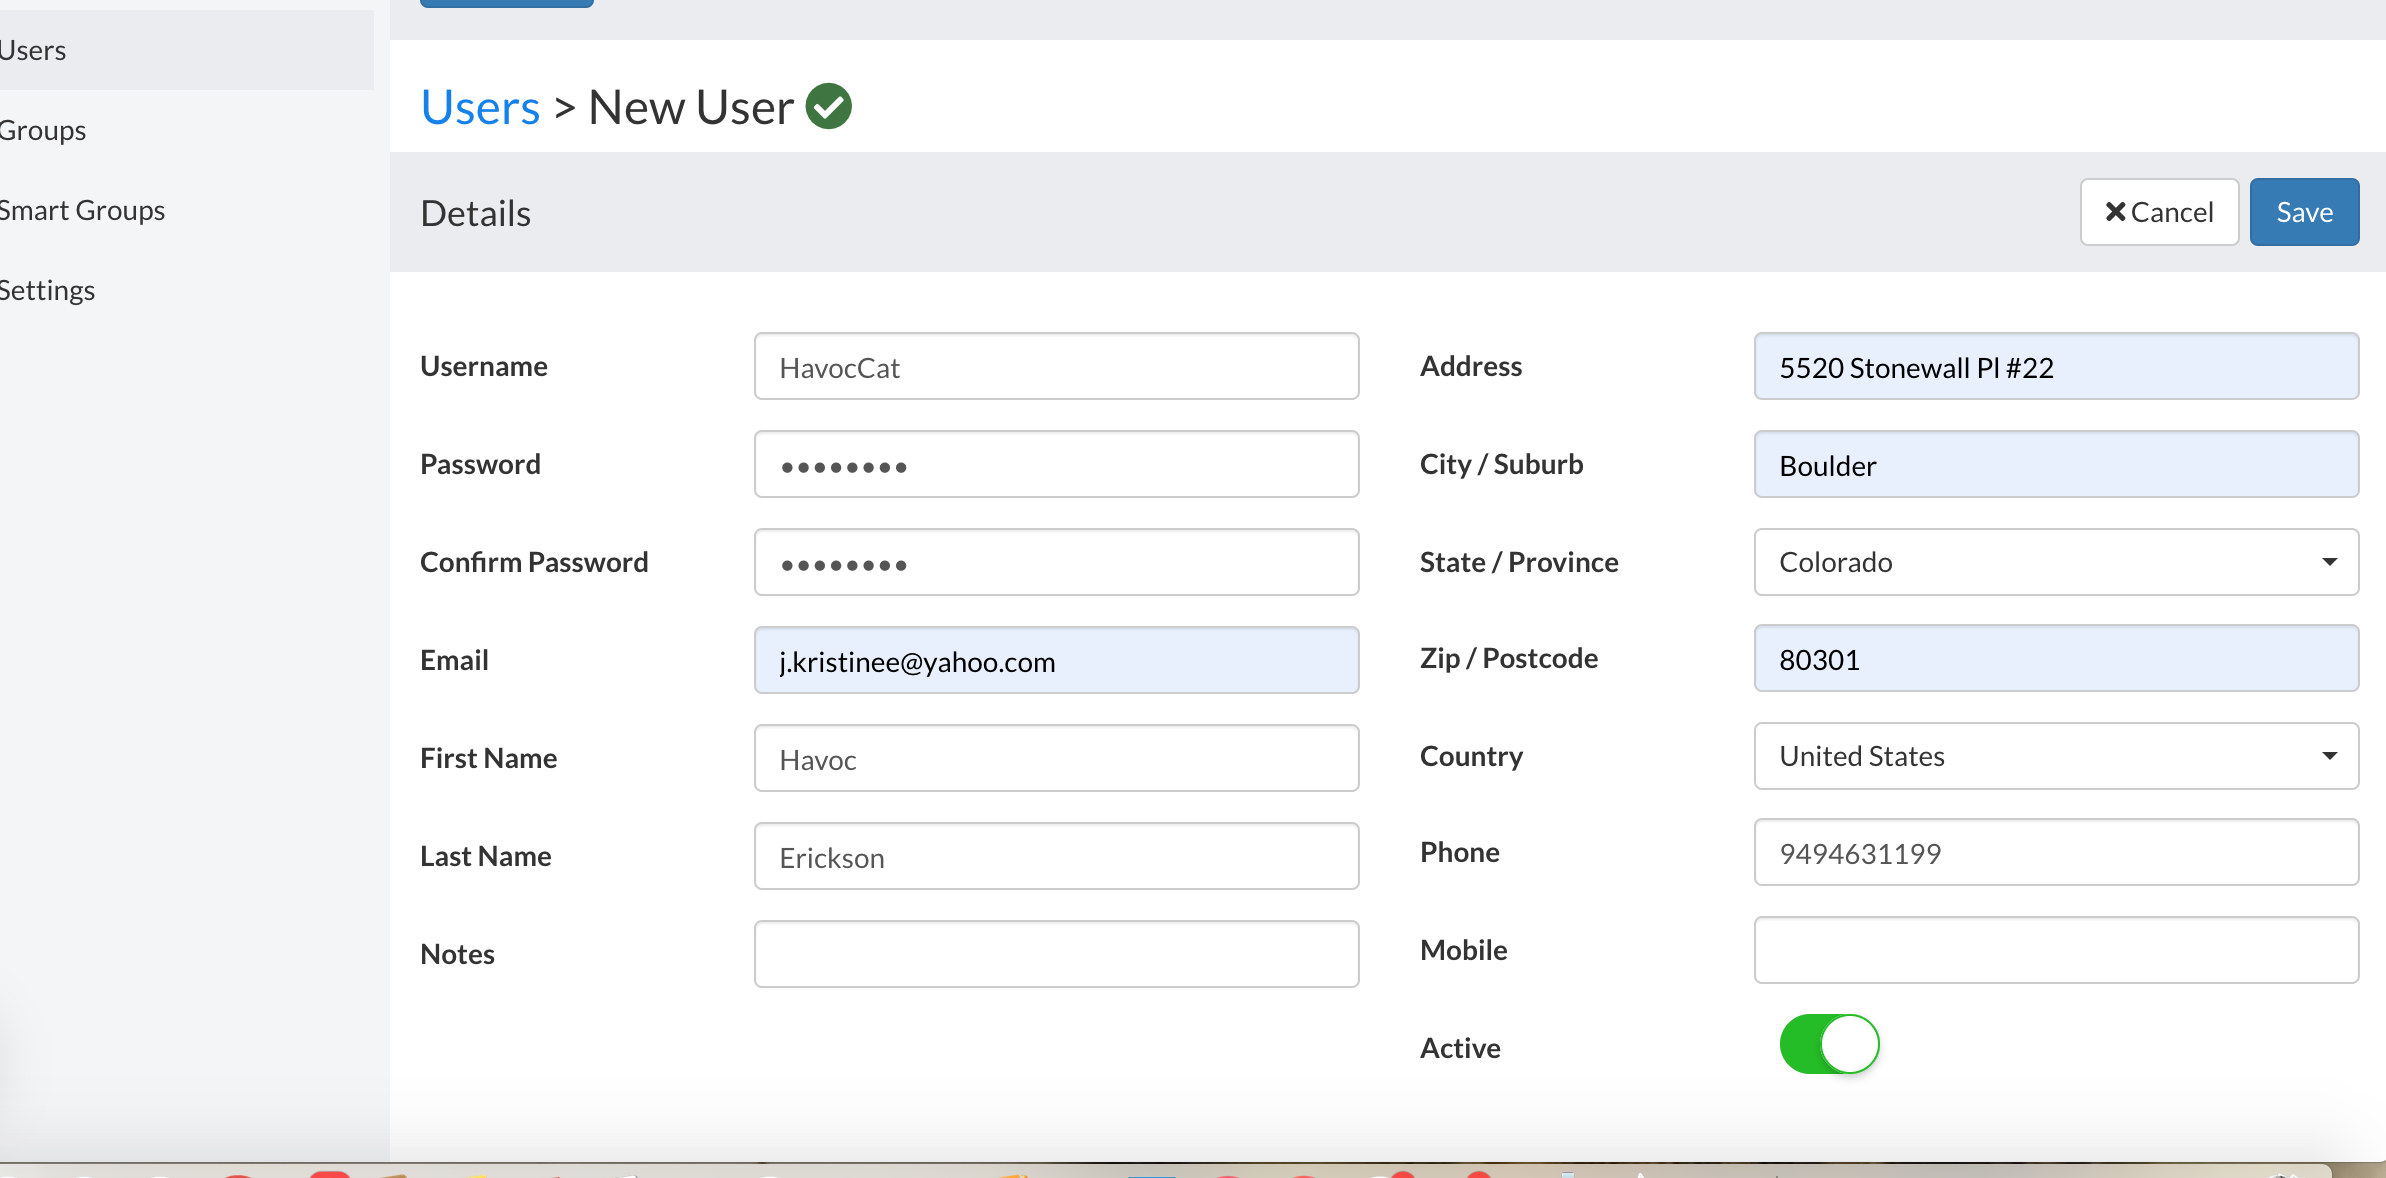
- The following screen will appear:

- Fill in the appropriate information and ensure the "Active" toggle is enabled.
*Note: If the toggle is on, the user has access to the platform. If the toggle is off, the user does not have access to the platform, but the user is NOT deleted. - Select the "Save" option in the top right corner. This will allow the manifestation of the next steps.
Adding A User to a Group
- After the user's information has been saved, the administrator will gain access, directly below the user's information, to the following option:

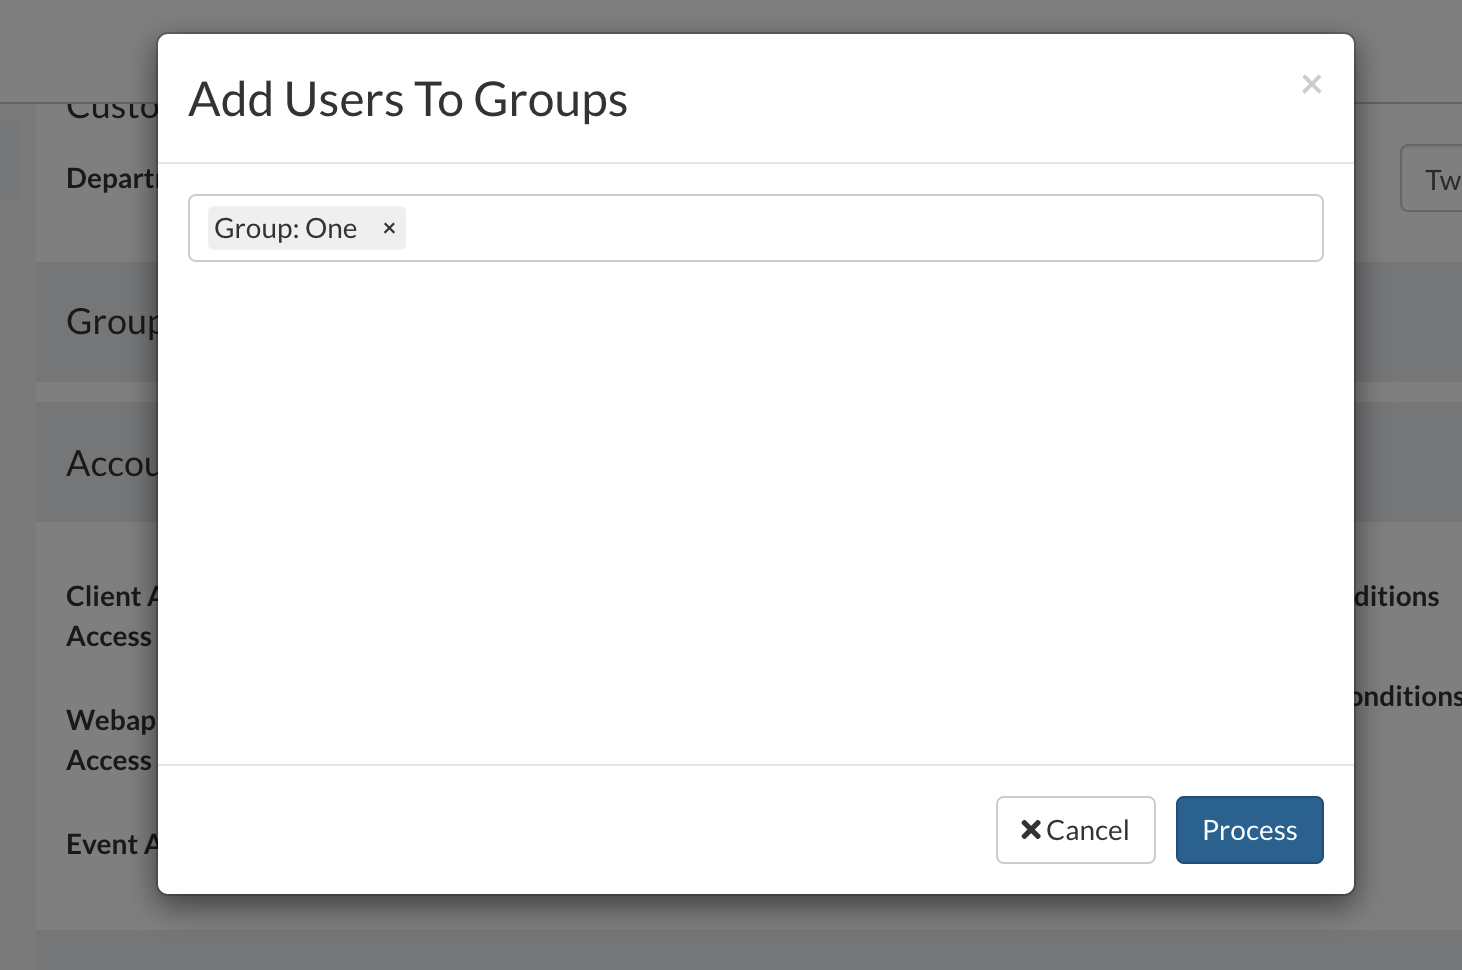
- Click "Add to Groups" for the following popup window:

- Browse the available groups and select the desired options.
- Click "Process" to add the user to the group.
Account Settings: Give User Privileges
- Once the user has been assigned to the appropriate groups, administrators may customize that user's specific permissions through the following toggles.

- Simply enable or deactivate the desired toggles for the unique user's needs.
Grant Administrator Access (Basic)
Administrators have a variety of additional configurations for Basic Admins. Under the "User's Details" navigate to the Account Settings sections. With this, organization admins can assign just the right access for Basic Admins, so they can do their jobs while limiting access to other business critical areas.
- Under the "User's Details" navigate to the Account Settings sections.

2. Under the option "Admin Level"select "Basic" :
3. This prompts the "Menu Access" option directly below. Select the desired areas for which the user may access. The items selected with be visible/configurable to the user selected.
Delete/Deactivate A User
- If an administrator wishes to delete or deactivate a certain user, they must navigate to the User Section and into the User Tab (the same screen used to add "New User".
- Select the User intended for deletion/deactivation.
- On the right side of the screen, across from the user's name, their are a few options similar to the following:

- Selecting the first option, represented by a circle and slash will deactivate the user. This will allow administrators to reactivate at a later time (simply click the same button to reactivate).
- Selecting the second option, represented by a trash can, will delete the user.
Options
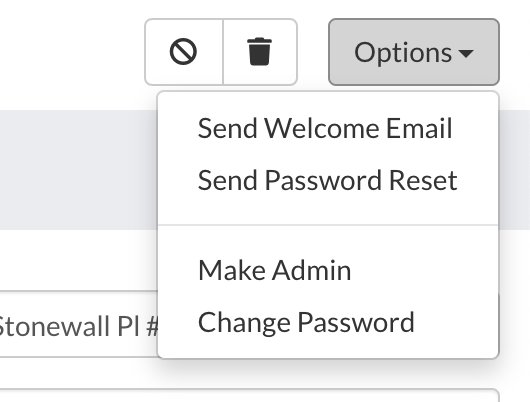
- Directly to the right of the deletion/deactivation buttons is an "Options" menu. Select the button and following menu appears:

Option
Function
Send Welcome Email Selecting this option will allow an administrator to choose from a predetermined set of welcome email templates and send it to the email address attached to the selected user. Send Password Reset Selecting this option sends an email with instructions on password reset steps to the email address attached to the selected user. Make Admin Selecting this will grant the selected user administrator access and privileges. Change Password This action allows administrators to manually reset the selected user's password.
Comments
0 comments