Custom Filters' Overview
The new Custom Filter option allows Administrators to precisely tailor what content appears for users, sorted and filtered in logical ways.


Setting Up Custom Filters
*Note: Ensure Advanced Dynamic Widget Filtering is enabled. See customer service representative.
Once enabled, the Custom Filter option interspersed with the rest:

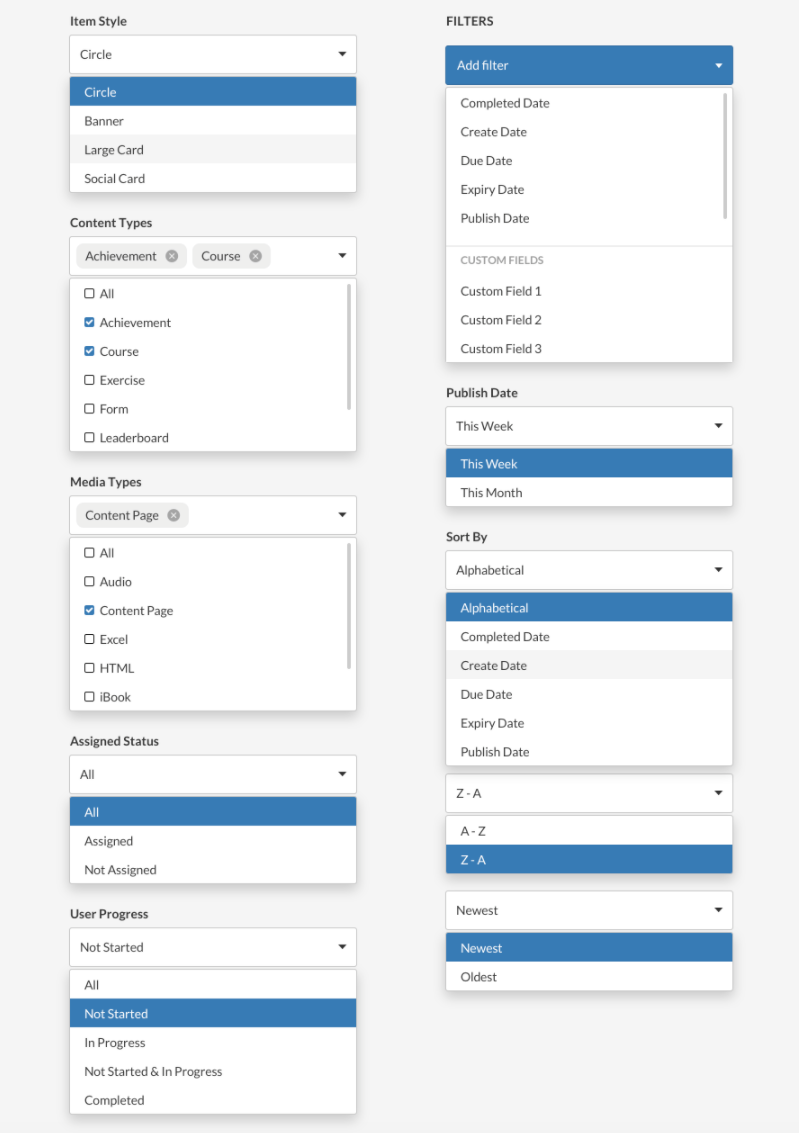
The menu will expand to show a variety of new options to better control what content to display to users.
A few key points to know when customizing the settings:
-
Many choices are non-exclusive. Ex. In content types, an administrator could choose Achievements AND Courses; without this filter, they can only choose a single type.
-
Set a date range to limit what users can see at any one time. Since this is a dynamic widget, all dates are relative - so “this week” and “this month”.
-
Use Custom Fields (across multiple entity types) to filter by company-specific criteria. Ex. Create a field called “Priority” and then tag any item as “Sales Top Priority” and then only show the content with those values in the custom field.
-
Filters are restrictive e.g. leaving Content Type blank will show All.
-
A Content Page is considered a media type.
Custom Filters: Types and Status
First Administrators will choose if they want to limit what content to see in any way.
|
Custom Area |
Choices and Details |
|
Content Type |
Choose 1 or more content types to display in the widget. Includes:
|
|
User Progress |
Restrict by where the specific user is in their own progress. This will differ from user to user. That includes:
|
|
Assigned Status |
Refine based on whether Administrators assigned (requested) they do specific content or not.
*Note: Using a status will exclude any requests (including assignments) that are Closed - past the due date, or Inactive. |
Filter and Sort
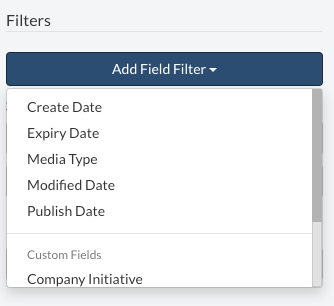
Then, select a user to see the content in any particular order or range. Select Add Field Filter to pick a relative date range or to filter by one or more custom fields.
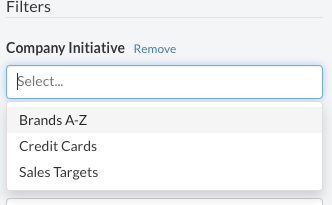
Once a filter is added, select Remove to clear that filter.

|
Filter / Sort |
Choices and Details |
|
Date Filtering |
Types of date filters include:
|
|
Media Type |
Once you’ve chosen to include Media content, you can filter by one or more specific types:
|
|
Custom Fields |
Restrict the content presented through the Custom Fields
|
|
Sort By |
If Administrators added a number of objects, they can determine the order in which their users will see those objects. First choose whether by name or by date.
|

Comments
0 comments