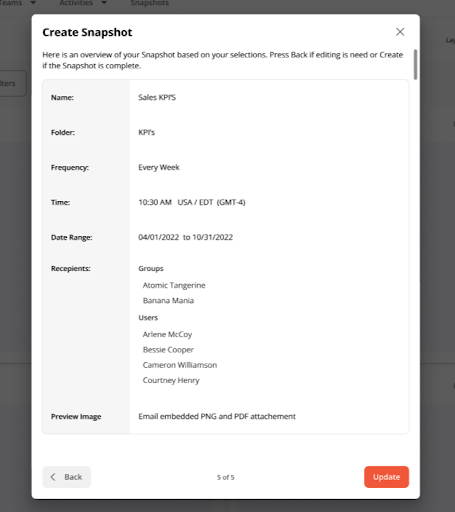
Snapshots will now be created and scheduled within the same modal. This setup will eliminate confusion on where to schedule a snapshot after creation.
How to create and schedule a snapshot:
- From your Scorecards page, find the appropriate card you wish to create a snapshot from, and then click on the ellipsis icon.

- Select Create Snapshot from the drop-down menu.

- Create a new snapshot by selecting New snapshot and entering a name into the Name text field.

- Select the folder you want to save your snapshot into by selecting the appropriate folder from the drop-down menu.

- Click the Next button to proceed with scheduling your newly created snapshot.

- From the Create Snapshot page, choose an email frequency, time, and date range for your snapshot.

- Click on the Next button to proceed with choosing your snapshot audience.
- You are now able to send your snapshot to groups as well as individuals! Select the groups and individuals you would like to send the snapshot to by checking the boxes next to those particular groups or individuals.

- Click on the Next button.
- Select which preview images you would like to include, leave both boxes unchecked if you do not want to include preview images.

- Click on the Next button.
- You will now preview the details of your snapshot. Click on the Create button to proceed with creating your new snapshot!

How to update an existing snapshot:
- From your Scorecards page, and then click on the ellipsis icon on one of your cards.

- Select Create Snapshot from the drop-down menu.

- Update an existing snapshot by selecting Update existing snapshot.

- Select the appropriate folder from the drop-down menu.

- Select the snapshot you wish to edit by finding and selecting the snapshot from the drop-down menu.

- Click on the Next button.
- From the Create Snapshot page, you can update the email frequency, time, and date range for your snapshot.

- Click on the Next button to proceed with updating your snapshot audience.
- You are now able to send your snapshot to groups as well as individuals! Select the groups and individuals you would like to send the snapshot to by checking the boxes next to those particular groups or individuals.

- Click on the Next button.
- Select which preview images you would like to include, leave both boxes unchecked if you do not want to include preview images.

- Click on the Next button.
- You will now preview the details of your snapshot. Click on the Update button to proceed with creating your new snapshot!

Comments
0 comments